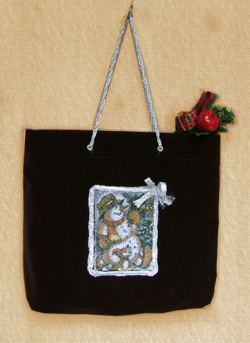
To make this bag you will need a piece of fabric, approximately 13" x 28", 26" of silver metallic ribbon, 26" of grosgrain ribbon 1 1/2" wide to reinforce the edges, silver metallic cord for the handles and 4 grommets.
Step One: Fold your fabric in half, right side to right side. On the wrong side of the fabric mark a rectangle 12 1/2" x 13 1/2". Cut it 1/2" outside the marked lines. You'll get 2 rectangles 13" x 14". The 13" sides are the upper and lower edges of the future bag, the 14" sides are its left and right sides.
Step Two: Hoop one rectangle with tear-away stabilizer and stitch out a design, leaving at least 5" from the upper edge.
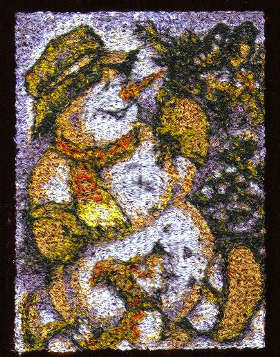
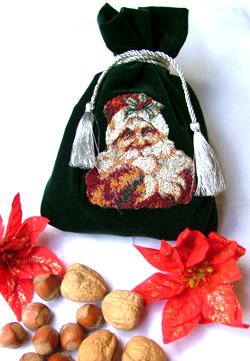
We have chosen the Merry Snowman design, but we offer a variety of designs that can be used for the purpose, such as the Christmas Card Set I, Christmas Card Set II, Christmas Card Set III, Christmas Card Set IV, Birds with Ashberries and others.
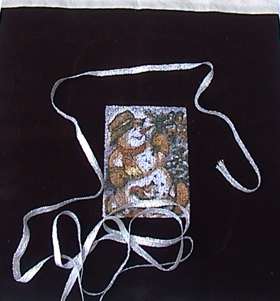
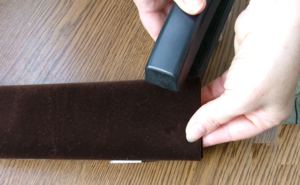
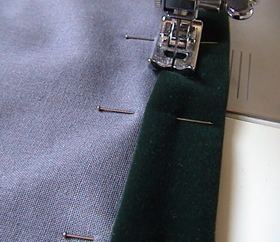
Step Three: Prepare a silver metallic ribbon, of which you will need 26", and pin it around the embroidery. Look at the photos below...
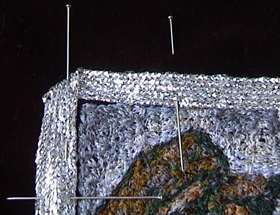
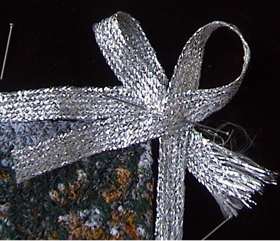
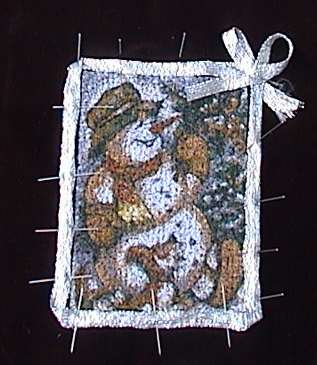
...and top-stitch the ribbon to the fabric.
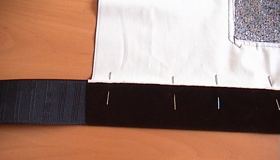
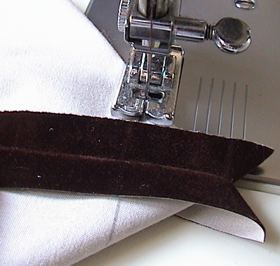
Step Four: Prepare a 1 1/2" wide grosgrain ribbon (you'll need 2 pieces each 13" long). Place the first piece of ribbon along the upper edge on the wrong side of one working piece. Fold back the fabric with the ribbon to the wrong side; pin all three layers together. Machine-stitch. Repeat the procedure with the second rectangle.
Step Five: Place both rectangles face to face and align the upper, reinforced edges. Pin the side and lower edges together and machine-stitch them along your marks. Trim the ends of the grosgrain ribbon, if necessary.
Step Six: Stitch the box corners at the bottom of the bag. For this separate the front and back sides at the corners. Center the seams on each side of the corner on top of each other. Measure 1 1/2" along the seam from the corner and draw a line perpendicular to the seam across the corner and machine-stitch it. Do not trim the seam.
Step Seven: Turn the bag inside-out. Cut a rectangle measuring 1 1/2" x 13" out of thin cardboad and place it at the bottom of the bag to reinforce it. Fold the corners to the bottom and tuck them under the cardboad. If you wish you can wrap this piece of cardbord with fabric and staple fabric and cardbord together along the edges.
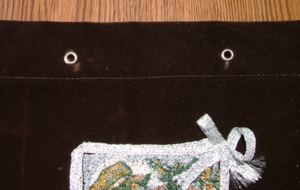
Step Eight: Mark the placement of the grommets for the handles and attach them, following the manufacturer's directions.
Step Nine: Cut the silver metallic cord into two pieces 1/2 yard long. Insert the edges into the grommets and tie knots at the ends. The bag is ready! Now just fill it with presents.
Step One: On the wrong side of the fabric mark a rectangle 9 1/5" x 20 1/2" and cut it out, leaving 1/2" outside your marks.
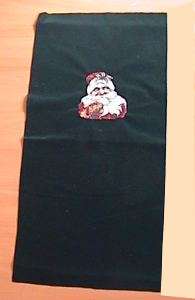
Step Two: Hoop the fabric with tear-away stabilizer and stitch out a design so it is approximately 5" from one of the shorter edges of the rectangle. We have chosen Santa Claus. Some other designs you can use include Snow Maiden I, Snow Maiden II, Bear Santa, Kitten in Santa Hat, Christmas Tree and others. If you wish, you can embroider the name (or initials) of the giftee with our charming Christmas Alphabet.
Step Three: Fold your working piece in half, wrong side out, and align the upper edges of the bag. Pin the side edges together and machine-stitch them along your marks.
Step Four: Double fold the upper edge of the bag for approximately 1/2" to the wrong side, pin it and machine-stitch.
Step Five: Turn the bag inside-out. Put your present inside and tie the mouth of the bag with be-tasseled metallic cord.


