This guide explains how to make a fabric frame for an embroidery. As you will see, it is fast and easy.
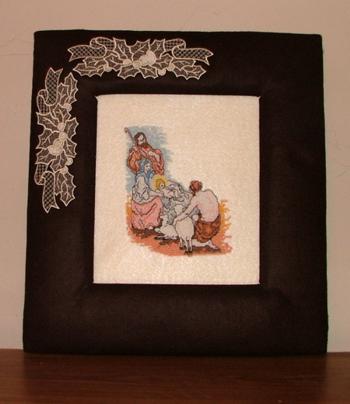
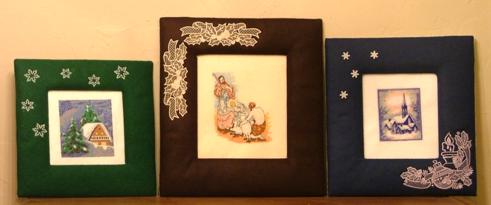
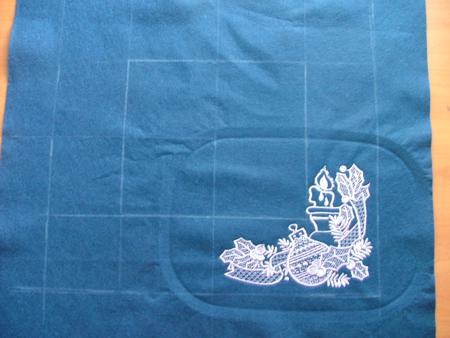
For the frame, you can use both patterned fabric or plain fabric and embroider it in turn, like we did. We used the designs Cottage under Snow, Adoration of the Shepherds and Christmas Night; for decorating the frame, we used Snowflakes from the Winter Set and lace designs Christmas Border Set III and Christmas Ornament Corner.
Step One: Stabilize a piece of felt and embroider a picture of your choice. You can use any other fabric, but felt is easiest to work with. Tthe piece of fabric should be big enough to accomodate the embroidery and have broad fields of around 7 inches on each side. The calculation is this: 1 1/2" is space left around the embroidery, the frame itself is going to be 3" and 2 1/2" are going to be folded back and fastened.
Step Two: After the embroidery is finished, iron and then use a removabe marker to draw the two squares (or rectangles) drawn in dotted lines on the diagram.
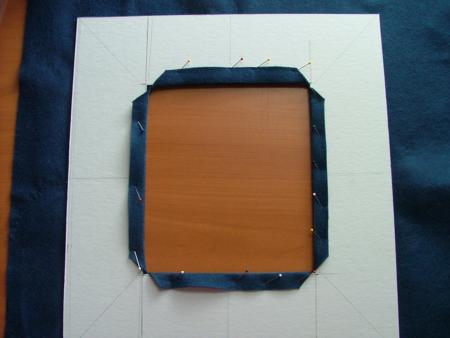
Step Three: Out of cardbord, cut a mounting board measuring the same size as the red square.
Step Four: Place the embroidery on an even surface (table) face down and place the mounting board on top so it corresponds to the red square. You might have to redraw the square on the back of the fabric.
Step Five: Fold the excess parts of the fabric to the back of the mounting board and secure them with scotch tape. Check the face of your work to make certain it was pulled evenly and the embroidery is not off-center.
Step Six: Out of cardboard, cut another board of the same size as the mounting board. Mark the center and draw the outline of the opening, which should be the same size as the blue square on the diagram. Cut out the opening -- this is the foundation of the frame itself.
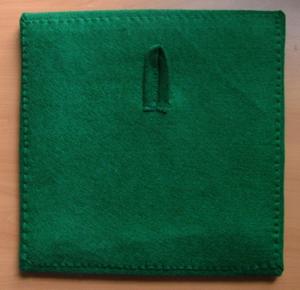
Step Seven: Take a fat quarter of felt (or any other fabric, depending on your preference). With a removable marker draw the outline of the frame (use the cardboard foundation as a template). If you would like to decorate the frame with one-color embroidery, do it at this stage.
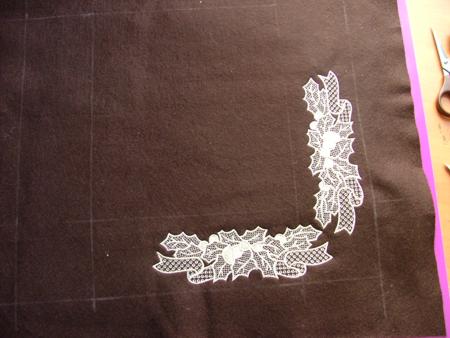
After the embroidery is finished, cut out the opening as shown on the diagram by the dotted line, forming 4 flaps. Each flap should be about 1" wide.
Step Eight: Out of low-loft batting, cut a mat of the same size as the cardboard frame (again, you can use it as a template).
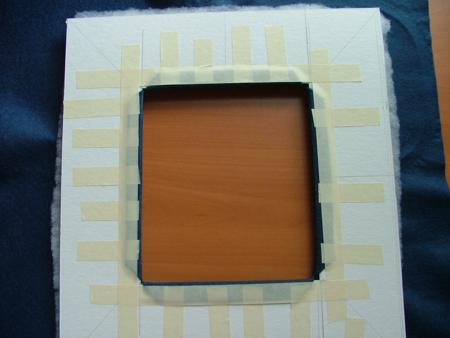
Step Nine: Place the fabric mat on an even surface, face down. Place the batting on top and place the cardboard foundation on top of that, aligning the openings of all three pieces. Fold the inner flaps of fabric back onto the cardboard and secure them with scotch.
Step Ten: Place the piece with the embroidery and mounting on board on top of the frame, aligning the edges (check that the embroidery is centered in the opening). Fold the excess fabric of the frame over the both pieces and secure with scotch.
Step Eleven: If you would like the back to look neat, cut a piece of fabric the same size as the frame (if you're not working with felt, also adds some seam allowance). Place the piece of fabric over the back of the frame and hand-stitch it in place.