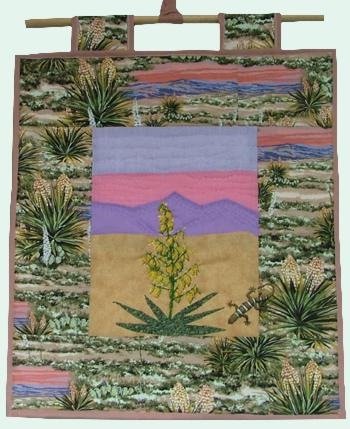
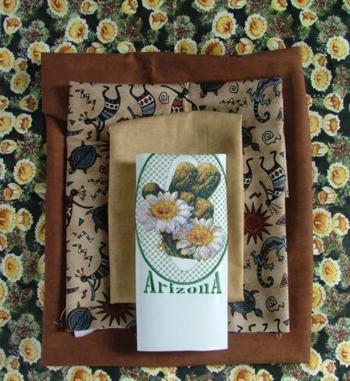
For this mini quilt we used six different 100% cotton fabrics:
1. a fat quarter of fabric featuring yucca brushes;
2. about 12" x 10" of sand-colored and sand-textured fabric;
About 3" x 10" of each of the following:
3. solid pale blue fabric,
4. solid bright pink fabric,
5. solid bright violet fabric
And:
5. about 3" x 6" of green fabric.
Of course, the choice of fabric is up to you.
You will also need one pack of matching quilter's binding, fusible batting measuring about 20" x 21", a piece of cotton fabric measuring about 20" x 21" for backing, and a rod.

Step One: Starch the fabric you are working with and iron them; this makes it easier to work with them. Cut out the needed parts as instructed below. All measurements do not include seam allowance. Please do not forget to add around 1/2" seam allowance on every side.
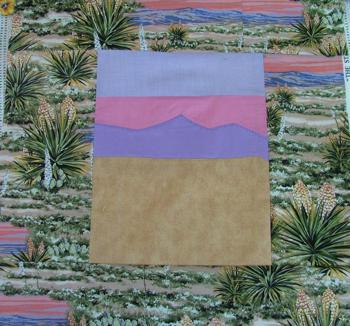
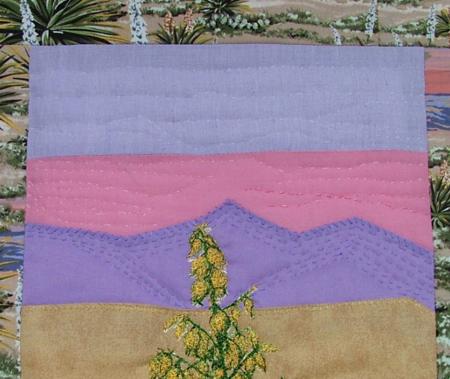
Out of the sand-colored fabric, cut a rectangle measuring 8 1/2" x 10 1/2"
Out of the violet fabric cut a strip measuring about 2 1/2" x 8 1/2" for the mountains
Out of pink fabric cut a strip measuring about 2 1/2" x 8 1/2" for the sunset sky
Out of the pale blue fabric cut a strip measuring about 3" x 8 1/2" for the sky.
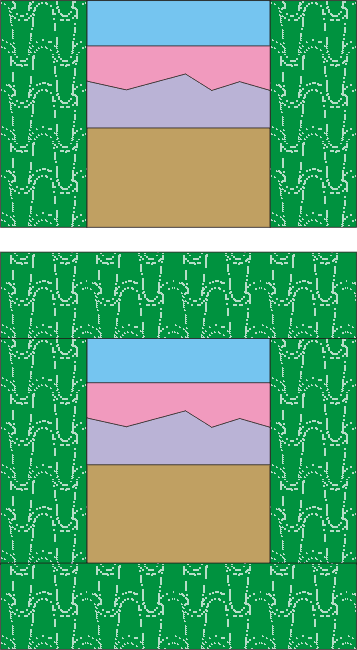
Out of patterned fabric, cut 2 strips measuring 4" x 10 1/2" and 2 strips measuring 4" x 19".
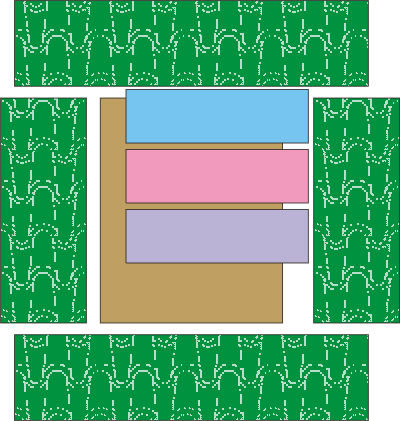
Step Two: Assembling the central part. Place the pale blue strip over the sand-colored rectangle, aligning the upper edges. Pin or glue in place.
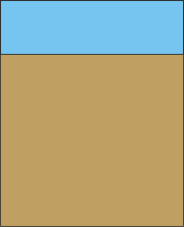
Step Three: Fold back the top edge of the pink strip about 1/4" and press. Place it so that it slightly overlaps the pale blue strip. Pin or glue it in place. The border between the two strips shouldn't be perfectly straight.
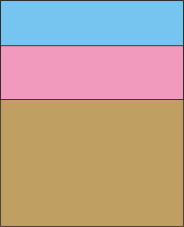
Step Four: Cut the violet strip to make it appear like a chain of mountains. Fold back each of the raw edges 1/4" and press. Pin or glue so that it overlaps the pink strip.
Step Five: Stitch all of the strips in place using a zig-zag.
Step Six: Assemble all the pieces according to diagram. Do not forget to press the seams flat after each step.
Step: When you finish the top, cut out a piece of fusible batting, measuring approximately 20" x 21".
Place the batting on the ironing board, cover it with the quilt top and press. The iron should not be very hot, because if it is, you might end up gluing the batting to the ironing board. To prevent this, you can cover the board with non-stick paper.
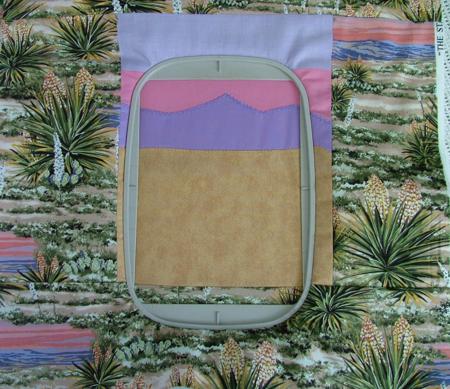
Step Three: Hoop the top with batting -- you do not need additional stabilizer. Embroider the designs. When you embroider the yucca, skip the first two colors - it's the frame, and the last color - it's the name of the state.
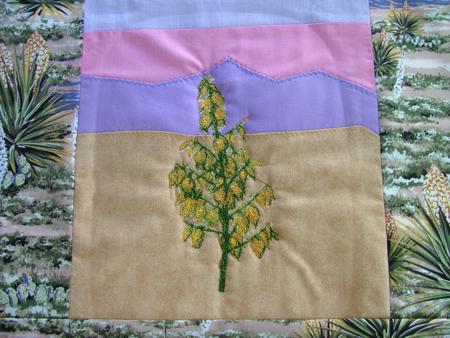
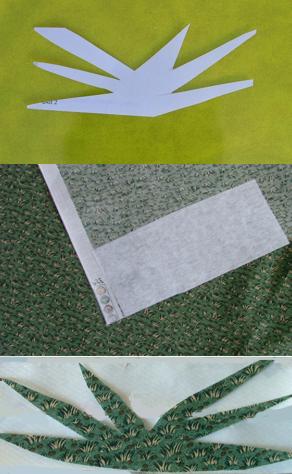
Step Four: Press a piece of iron-on cut away stabilizer on a 3" x 6" piece of dark green fabric and cut out the bush leaves.

Step Six: Cut out the backing, measuring 21" x 24". Place the quilt on the ironing board face down, cover with the backing and press. The fusible batting will adhere to the backing.
Step Six: Using a matching thread quilt the sandy part, making wavy lines imitating sand dunes. Using white thread quilt the mountain line, following the mountains shapes. Using white thread quilt the pink and pale blue parts, imitating the shape of clouds. The rest of the work can be quilted along the seams.
Step Seven: Place your mini quilt on an even surface (table) and even up all the edges. Finish the edges with the quilt binding tape.
Step Eight: Make two loops 3" wide and 5" long. Fold them and attach them to the upper edge of the mini quilt. Insert the rod and tie a cord in the middle. You can also decorate the quilt with a 3D element - we used a small plastic lizard.