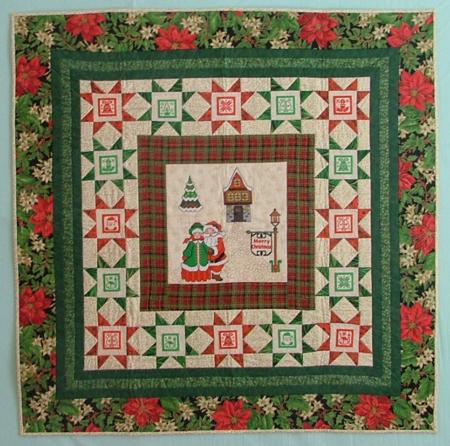
The finished size of the quilt is 42" x 42".
Eight 100% cotton fabrics with different patterns were used for the top. 100% cotton batting, and rayon embroidery and cotton quilting threads were also used.
You'll need a fat quarter for the central part, a fat quarter for the first border,
1/4 yard of red fabric, 1/4 yard of light green fabric, and 1/2 yard of light fabric for the star border,
1/4 yard of dark green fabric for the third and fifth border.
1/4 yard of medium green fabric for the fourth border.
For the outer border, if you make mitered corners border, you'll need 1/2 yard of 54" wide fabric or 1 1/2 yard of 42" wide fabric.
You'll also need fabric for the binding (about 1/2 yard) and for the backing.
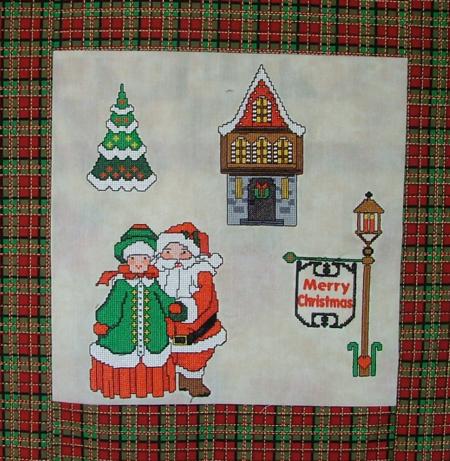
The central square with embroidery measures 12" x 12" when finished (cut it 12 1/2" x 12 1/2").
The first border is 3" wide (cut it 3 1/2" wide). You'll need two strips 3 1/2" x 12 1/2" and two strips 3 1/2" x 18 1/2".
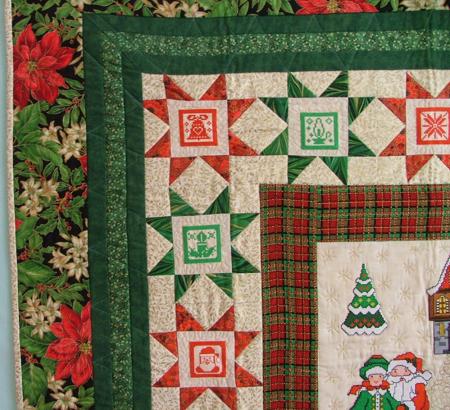
The second border is formed out of sixteen 6" x 6" Star blocks. See our instructions for making these blocks below.
The third, fourth and fifth borders are each 1" wide, but you should cut them to 1 1/2", so you have seam allowance. For the third border you'll need four strips of dark green fabric measuring 1 1/2" x 36". For the fourth border you'll need four strips of medium green fabric measuring 1 1/2" x 38". For the fifth border you'll need four strips of dark green fabric measuring 1 1/2" x 40".
The outer border is 3 1/2" wide. For a border with mitered corners you'll need four strips 3 3/4" x 48" (cut down the length of the fabric).
You will need two different fabrics to make this block. It consists of five squares and four flying geese units.
Out of light (background) fabric cut a strip measuring 2" x 22"; cut it into four rectangles 2" x 3 1/2" and four 2" x 2" squares. Out of the same kind of fabric, cut a 3 1/2" x 3 1/2" square.
Out of the red (or green) fabric for the star points cut a strip 2" x 16" and subcut it into eight 2" x 2" squares.
To make a flying geese unit, take a 2" x 3 1/2" rectangle and two red 2" x 2" squares. Place one of the squares on one end of the rectangle, draw a diagonal and sew over it. Trim the excess fabric, leaving 1/4" seam allowance. Press the seam, unfold the red triangle and press again. Repeat with a red square on the other side of the rectangle.
For one block, make four flying geese units.
Assemble the block in accordance with the diagram below.
For this quilt you'll need eight red star blocks and eight green star blocks; so, you'll need 24 red flying geese units and 24 green flying geese units.
Stitch the first border to the central square as shown on the digram.
Stitch three star blocks into a row in the following sequence: green star, red star, green star. Stitch this row to the upper edge of the working piece. Repeat for the bottom.
Stitch five star blocks in a row in this sequence: red, green, red, green, red. Make another similar row. Attach the rows to the left and right sides of the quilt.
The outer borders have mitered corners, and we recommend to stitch them together before attaching them to the quilt, as this makes things easier. To do this, take one strip from each border. Mark the center of each with a pin. Match the centers and stitch the border strips together. You should get four units like the one shown below.

Mark the center of each side of your quilt with a pin. Match the center of your border with the center of one of the sides. Stitch the border to the quilt, starting and stopping 1/4" from the quilt edges.
Repeat with the remaining three borders. You should get something like this:
Make the mitered corners using your favorite method. The method that we describe here is the one that we find easiest.
Spread the quilt top on a flat surface, face up. At the corners, one border will overlap the other.
Take the protruding part of the top border and fold it at a 45 degree angle. Press carefully. The individual strips that form each border should meet at a right angle and appear continuous. Secure in place with pins. Slip stitch the top part to the bottom part by hand, as indicated on the diagram by the red line. If you prefer to work on your sewing machine, just top stitch the upper piece in place along that line. Trim the excess fabric to 1/2". Press.
Repeat with all the corners.
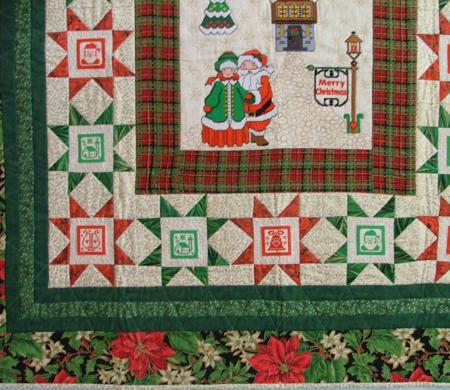
Stabilize each star with your favorite tear-away stabilizer and embroider the centers of the stars with designs from Christmas Miniature Sets I and II. Tear away the excess stabilizer.
To embroider the central part, you can either use your favorite stabilizer, or stabilize the fabric with your batting, which is what we did. You'll need 100% cotton batting. Cut out a piece slightly larger than the quilt top and place it underneath your working piece. Do not attach the backing yet! Spread the top evenly and pin two layers together in a few places and embroider the designs from Mr and Mrs Santa Set one by one.
Now place the backing on a flat surface (table) face down. Spread your working piece over it.
Note: If you embroidered the central part with regular stabilizer, do not forget to place batting between the backing and the top.
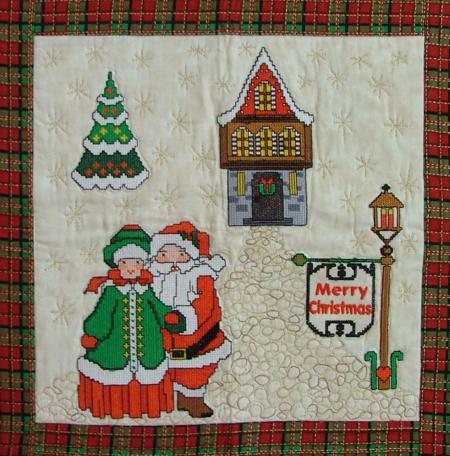
Pin all three layers together with 1" pins and start quilting. We quilted pavement and snowflakes on the central, embroidered part, and stitched in the ditch on the borders.
For the backing we used the same fabric as for the outer border. It was 54" wide and that was very convenient for this quilt.
After the quilting is finished, press the work with heavy steam and square the work -- all corners should be 90 degrees and the opposite sides should be of the same length.
Finish the raw edges with the binding.