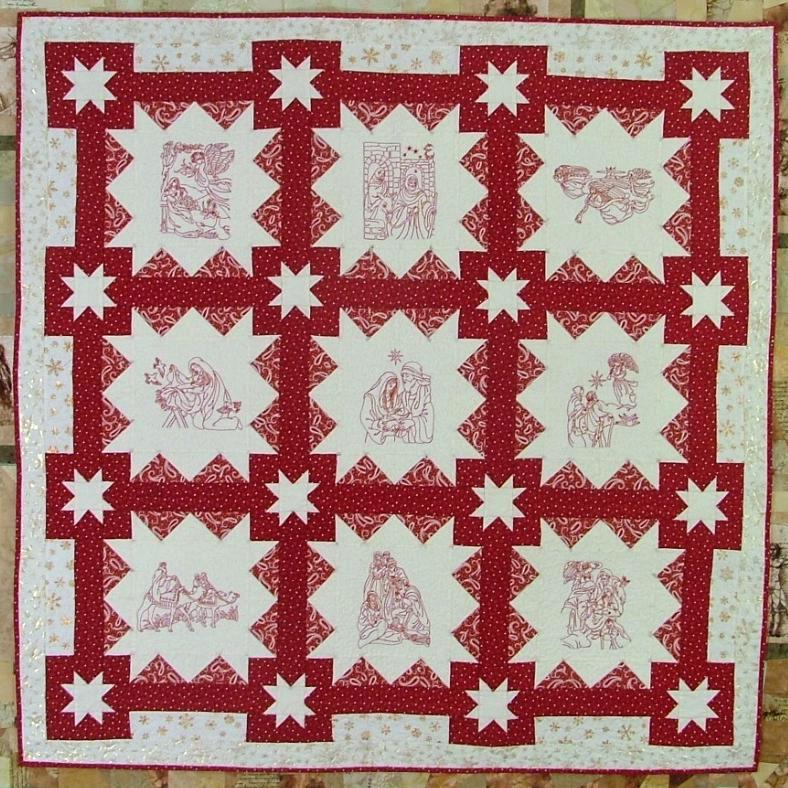
For this wall quilt we used the designs from Nativity Redwork Set , Nativity Redwork Set II, Nativity Redwork Set III and Nativity Redwork Set IV. We made the quilt 3 by 3 blocks, but you can make it 4 by 4. These are instructions for how to make the quilt.
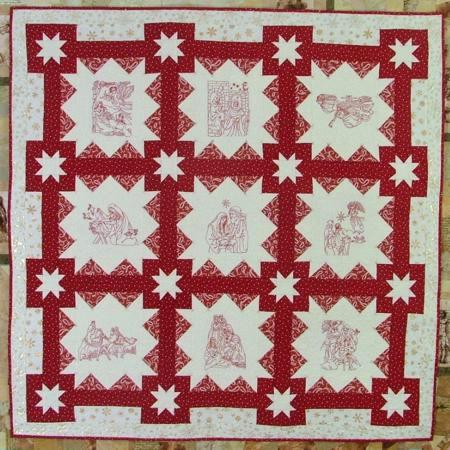
The finished size of the quilt is 51" x 51".
We used five different 100% cotton fabrics - plain white (for the embroidery), white with gold stars, white with snowflake patterns, and two red fabrics with different patterns. You need about 1 yard of the plain white fabric and about 1/2 yard each of all the other fabrics.
We also used 100% cotton batting, and rayon embroidery and cotton quilting threads.
You'll also need fabric for the binding (about 1/2 yard) and for the backing (52" x 52" or so).
Cutting:
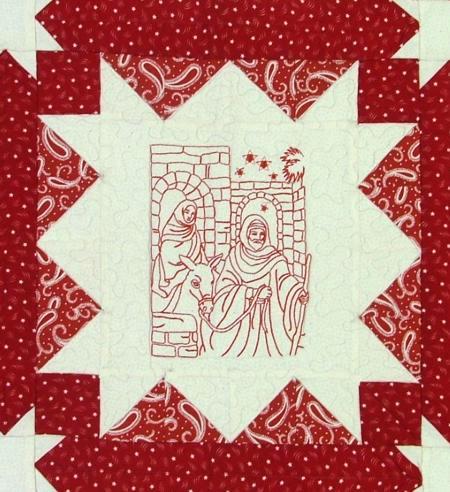
You will need three different fabrics to make this block.
Out of the white fabric, cut:
1. One square measuring 8 1/2" x 8 1/2", which will be the central part of the block;
2. 8 squares measuring 2 7/8" x 2 7/8".
Out of the first red fabric cut:
1. 8 squares measuring 2 7/8" x 2 7/8".
Out of the second red fabric cut:
1. Four squares measuring 2 1/2" x 2 1/2"
Assembly:
Step One: Place the white and red 2 7/8" squares together face to face. You'll get eight pairs. With a lead mechanical pencil, draw a diagonal across the white square. Stitch 1/4" from the pencil line on both sides.
Step Two: Cut along the line. Open the new square. Press the seam towards the red. Trim the ears. Repeat for all the pairs. You should get 16 two-color squares, measuring 2 1/2" x 2 1/2".
Assemble the quilt block in accordance with the diagram below:
For this quilt you'll need nine such blocks.
Out of red fabric cut:
24 strips measuring 2 1/2" x 12 1/2"
Out of white fabric cut:
16 squares measuring 2 1/2" x 2 1/2" and
128 squares measuring 1 1/2" x 1 1/2".
You will not use all 128 squares for the sashing, 32 of them are for the border.
Position a 1 1/2" white square on one corner of a red 2 1/2" x 12 1/2" strip. Draw a diagonal and stitch on the line. Trim seam allowance to 1/4", unfold and press. Repeat for all the corners of the strips. Make 24 strips in this way.
Sew the blocks and sashing strips together as shown below. Press seams towards the sashing strips. Repeat to get three such rows.
Sew together three sashing strips and four 2 1/2" white squares as shown below. Press seams toward the sashing strips. Make four units.
Stitch all row together as shown on the diagram.
Out of red fabric cut
44 squares measuring 2 1/2" x 2 1/2"
Out of the first patterned white fabric cut
12 strips measuring 2 1/2" x 8 1/2"
Out of the second patterned white fabric cut
4 strips measuring 2 1/2" x 51"
You will also need the 32 plain white squares measuring 1 1/2" x 1 1/2" that you have left over from the sashing. If you did not cut them out before, do this now.
Position a 1 1/2" white square on one corner of a red 2 1/2" x 2 1/2" square. Draw a diagonal and stitch on the line. Trim seam allowance to 1/4", unfold and press. Repeat for the second corner of the square. Make 16 squares in this way. (See the diagram below.)
Stitch together three white 2 1/2" x 8 1/2" strips, 6 red squares and four red squares with the white corners that you just made. See the diagram below. Repeat to get a total of 4 such borders.

Attach the borders to the top and bottom edges of the quilt top.
Now take the red 2 1/2" x 2 1/2" squares and stitch them to each end of the two remaining borders. See diagram below:
Attach the borders to the left and right side of the quilt.
Finally, add white 2" wide borders to the quilt top.
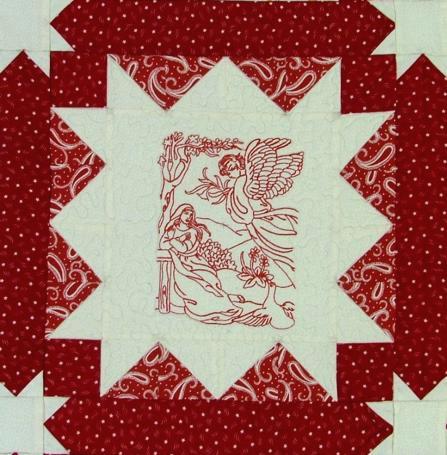
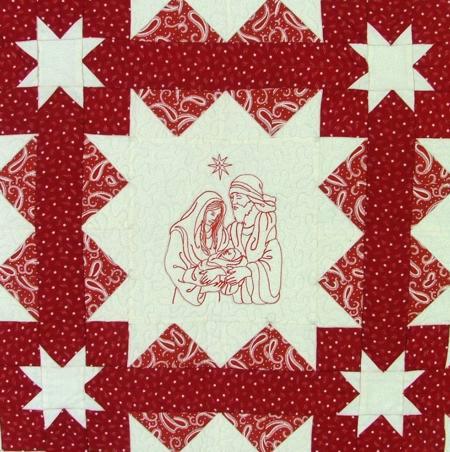
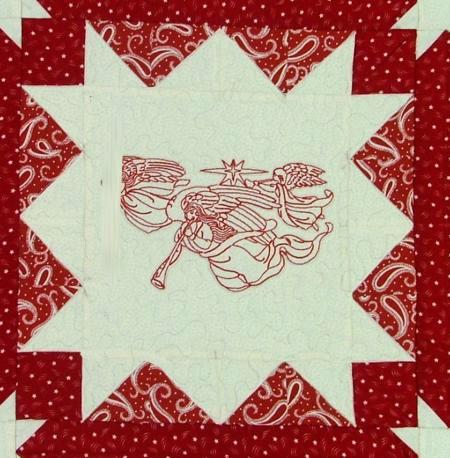
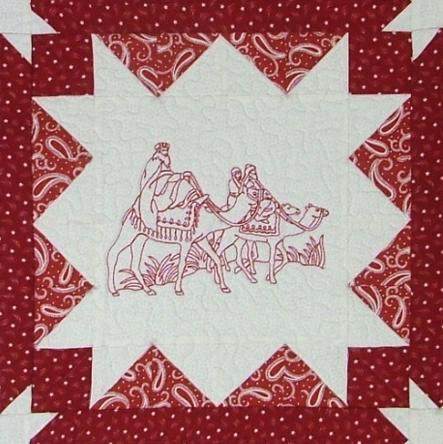
Stabilize each block with your favorite tear-away stabilizer and embroider the centers of the blocks with the designs from the Nativity Redwork Set , Nativity Redwork Set II, Nativity Redwork Set III and Nativity Redwork Set IV. Tear away the excess stabilizer.
Note II: We prefer to embroider on very thin (low loft) felted Dream Poly batting instead of stabilizer. Then, we cut away the batting as close to the embroidery as possible.
Now place the backing on a flat surface (table) face down. Cover with batting. Spread your working piece over it.
Pin all three layers together with 1" pins and start quilting. We quilted along the lines of the embroidery, made stippling around the embroidery and then stitched in the ditch on the blocks and sashing. We quilted the borders with straight lines which continue the lines of the stars.
For the backing we used red fabric.
After the quilting is finished, press the work with heavy steam and square the work -- all corners should be 90 degrees and opposite sides should be of the same length.
Finish the raw edges with the binding.
Here are some more close-ups of the quilt:


