You will need a 30" x 35" piece of white fabric for embroidery, about 33" x 38" of batting, about 33" x 38" of fabric for backing, scraps of fabrics in blue hues - from pale ice blue to navy blue, scraps of blue and silver-toned ribbons, rick-rack and or any other trimming, about 140" of quilt binding.
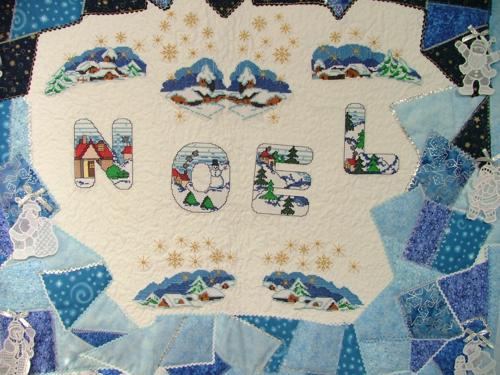
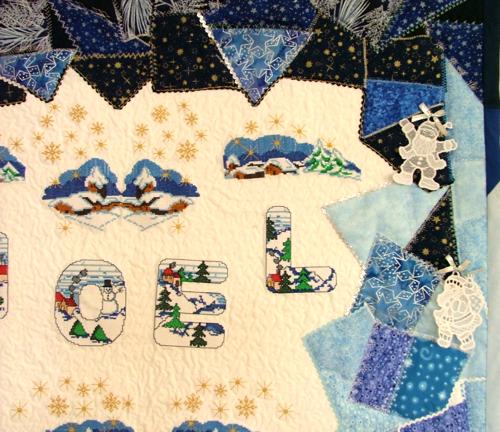
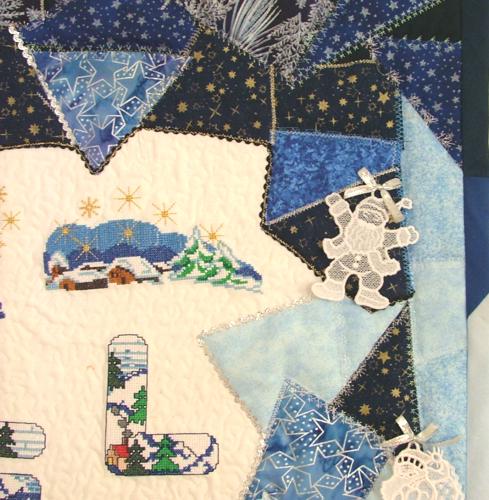
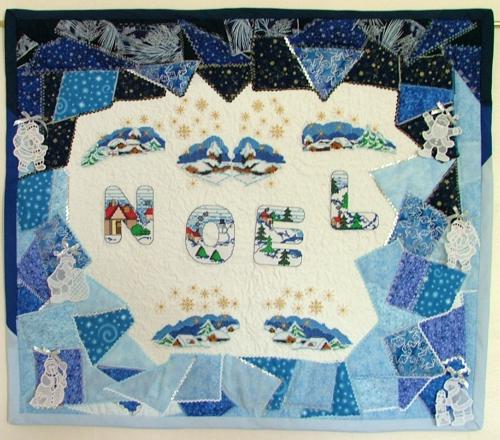
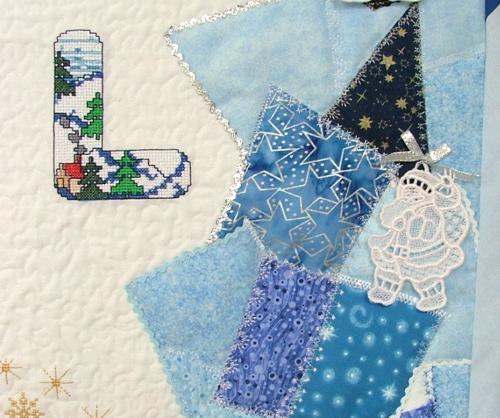
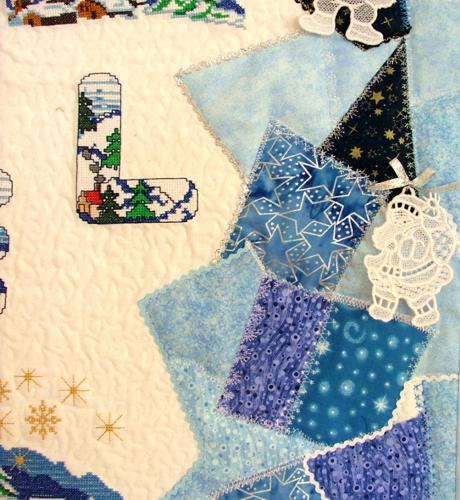
Step One: On the piece of white fabric, mark the centers of each embroidery design. You do not need to achieve symmetry - scatter the designs freely, it will add charm to the finished project. The designs should be concentrated in the middle of the fabric, leaving broad margins. These will be used as a foundation for "crazy" patchwork borders.
Embroider the designs one by one. We used white cotton fabric and iron-on tear-away stabilizer.
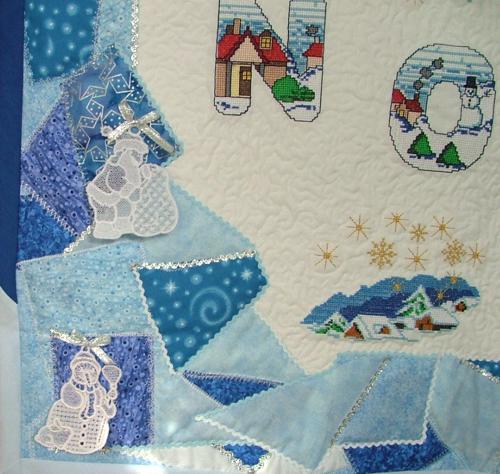
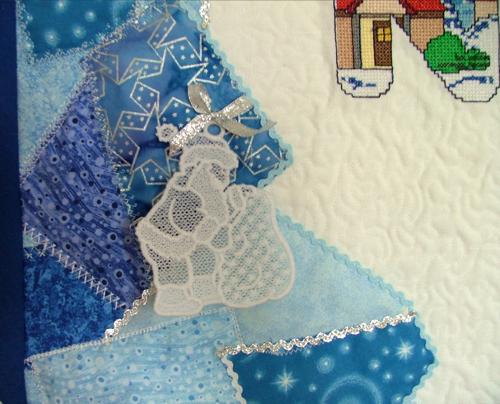
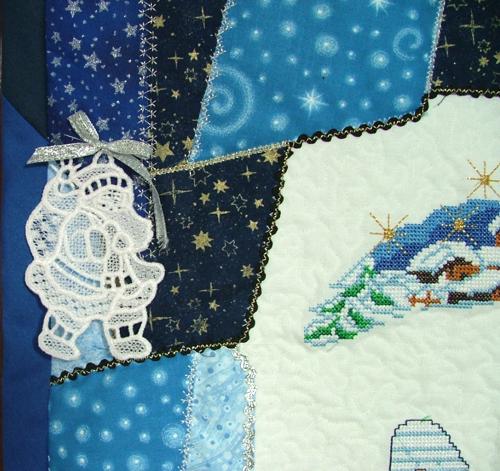
Step Two: After the embroidery is finished, tear the stabilizer away, iron the working piece and place it on an even surface (table). Take all your scraps of blue fabrics, iron them and cut into pieces of different shapes and sizes. Position the patches around the embroidery randomly, to make a "crazy" border. The lighter-colored pieces of fabric should be at the bottom, and the darker pieces should be in the upper part of the quilt.
Step Three: When you are satisfied with the arrangement, baste or glue each piece into place, using a temporary fabric adhesive. You can also use fusible net, but follow the manufacturer's instructions carefully. All pieces must be secured in place well enough to survive the quilting process. Press the working piece and trim the patchwork to the same size as the foundation (white embroidered) fabric.
Step Four: On the even surface, spread the backing, cover it with the batting, spread, and then cover both with the embroidered top. Pin all three layers together. Start quilting from the center. We quilted the white center with a stippling pattern.
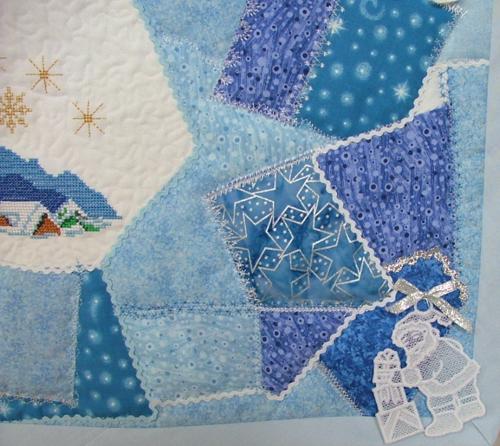
Step Five: Quilt the "crazy" part using decorative stitches from your machine. Quilt along all the edges of the fabric scraps. Stitch pieces of rick-rack or ribbons on some of the edges.
Step Six: Finish the raw edges of the quilt with the quilt binding.We used ready-made bias binding in three different colors - ice blue, oxford blue and navy blue - and sewed them together to get the effect we needed.
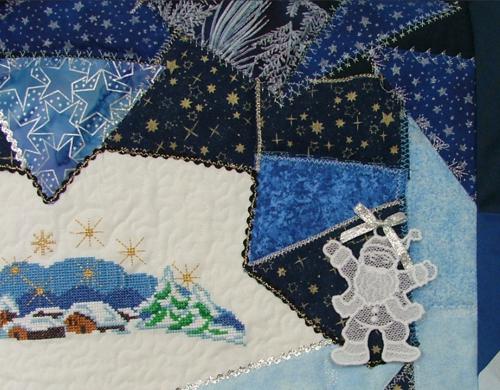
Step Seven: Embroider the FSL Santa Ornaments. Follow instructions on how to embroider FSL designs in the General Guidelines and Step-by-Step Guide to Creating Free-Standing Lace Ornaments.
Step Six: Attach the ornaments to the quilt.