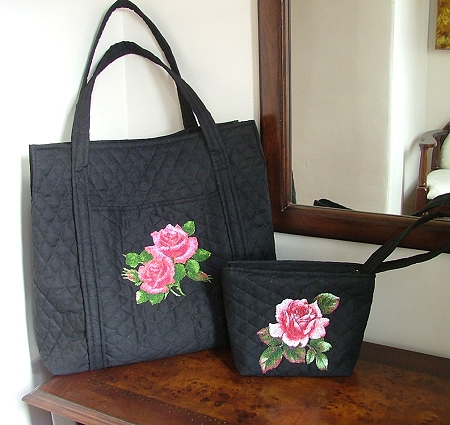
For both items you will need 1 yard of pre-quilted solid-colored fabric, 1 yard of cotton fabric for lining and a 9" zipper for the cosmetic bag.
Step One: Out of pre-quilted fabric, cut two squares measuring 21" x 21", one rectangle measuring 11" x 14", and two strips measuring 4" x 56". If the width of your fabric does not permit you to cut out strips 56" long, cut several strips and sew them into two 4" x 56" strips.
Out of the fabric for lining, cut a rectangle measuring 21" x 17" and a rectangle measuring 11" x 13".
Step Two: Take a pre-quilted rectangle measuring 11" x 14", hoop it with a tear-away stabilizer and make the embroidery about 3" from the short upper side. This will be the outer pocket of the tote.

Step Three: Cover the embroidered rectangle with the pocket lining (an 11" x 13" rectangle), right sides inside. Stitch together along the upper short side. Press the seam towards the lining. Turn the working piece to the right side, fold and make the other short sides meet. Press. Topstitch 1/4" seam along the upper edge. Mark the center of the upper and lower edges.
Step Four: Take one of the 4"x 56" strips and fold it lengthwise. Press. Fold the edges 1" inside. Press. Topstitch 1/4" seam along both edges. Repeat with the second strip. These are the handles of the tote.
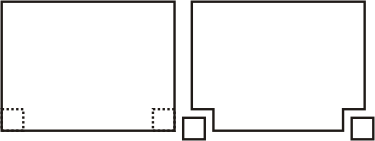
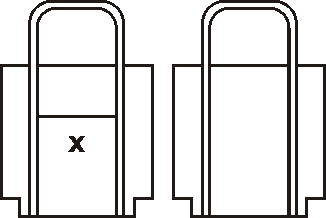
Step Five: Mark 2 1/2" squares in the corners on the bottom side of each 21" x 21" squares and cut them out. You'll have the front and the back panels of the tote.
Step Six: Take the front panel and mark the center on the upper and lower edges. Place the pocket over the panel and match the centers. Pin in place.
Step Seven: Take one of the handles and place it over the long edges of the pocket. Pin in place. Topstitch through all layers, attaching together the panel, the pocket and the handles. Stop stitching at the point 15 1/2" from the lower edge.
For the back panel, attach the handle strip at a width of about 9". Stop stitching at the point 15 1/2" from the lower edge.
Step Eight: Place both halves of the bag right side to right side. Stitch the pieces together along the bottom edge, leave 1/2" of seam allowance. Press the seam open and topstitch 1/4" on each side of the seam.
Step Nine: Stitch the side seams with 1/2" seam allowance.
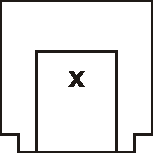
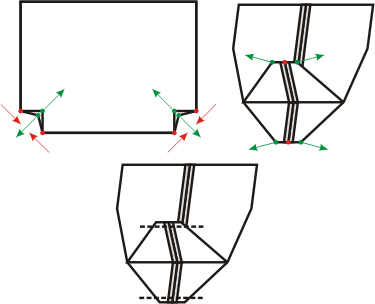
Step Ten: Now pinch each corner so that the end of the side seam matches with the end of the bottom seam (see the diagram below; the ends of the side seams and the ends of the bottom seams are marked in red). Pin. Stitch through all the layers across the bottoms of the corners (see the last picture in the diagram below). This will square the bottom of the bag. Now you can turn the bag right side out.
Step Eleven: Turn the upper edge of the tote 2 1/2" inside. Topstitch 1/4" from the edge of the tote.
Step Twelve: To make the lining, take the lining rectangle, fold it in half widthwise, right side inside. Cut away 2 1/2" x 2 1/2" squares in the corners where the fabric is folded. Then sew the side seams and the corners as described in Step Ten.
Step Thirteen: Fold the upper edge of the lining 1/2" onto the wrong side. Press. Insert the lining into the totebag. Slipstitch the upper edge of the lining to the tote.
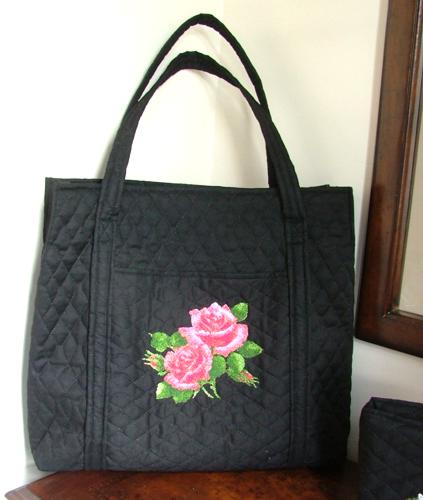
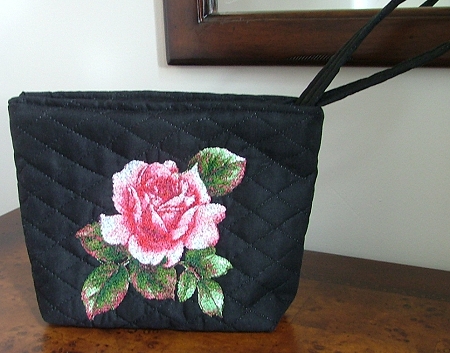
For the small cosmetic bag use the remnants of the fabric. The embroidery is the Pink Heart Rose design.