This eye-catching table runner is really easy to piece and can add that final touch to your Christmas decor. The whole project can be done in just a few hours.
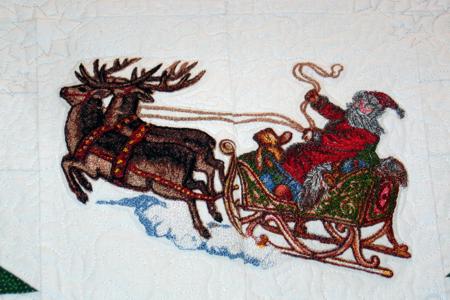
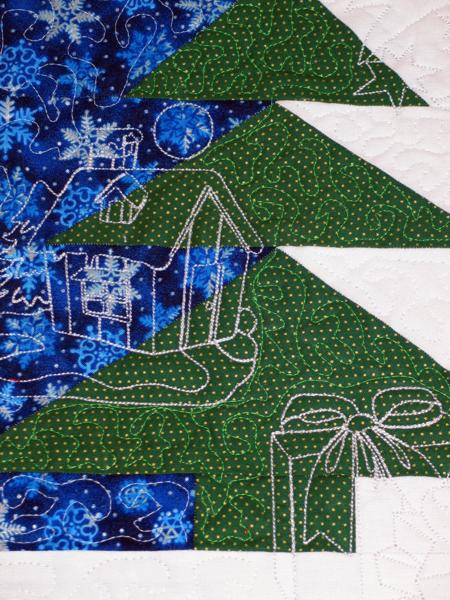
The designs used are Santa's Sleigh, Christmas Redwork Set IV and Christmas Redwork Set III.
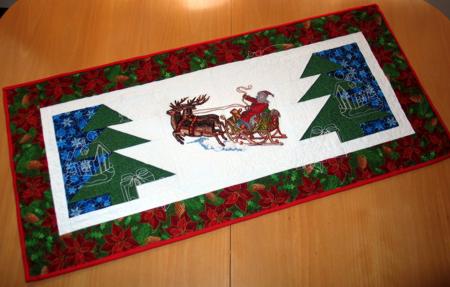
The finished size of the tablerunner is about 17" x 33".
We used:
You will also need a piece of low-loft polyester batting and fabric for backing and binding.
For embroidery, we used embroidery polyester threads and light-weight iron-on cut-away stabilizer.
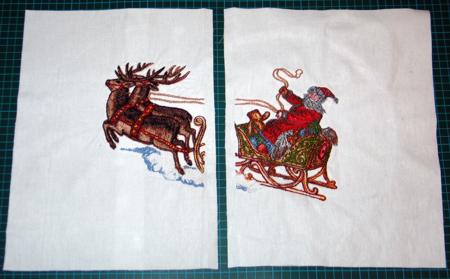
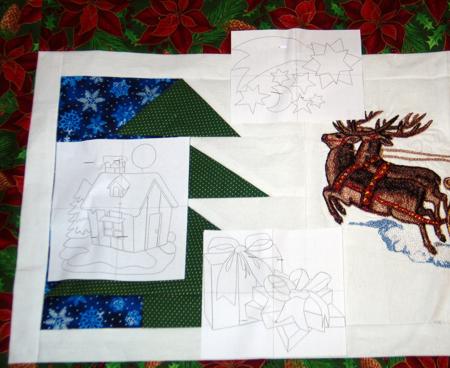
Out of white fabric, cut 2 pieces about 12" x 12".
Stabilize each piece and make the embroidery of Santa's Sleigh for a large hoop (5" x 7").
After the embroidery is finished, press each piece and trim the inner edges to 1/4".
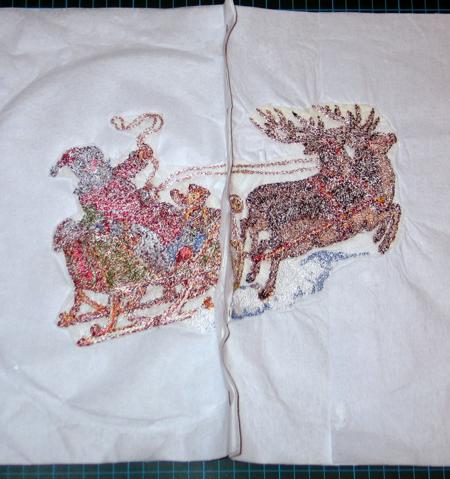
Machine stitch both parts together with seam allowance 1/4". Press the seam open.
Trim the whole piece to 11 1/2" (width) x 10" (height).
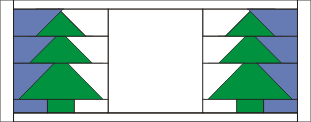
There are two symmetrical blocks that will frame the embroidery from the left and right. They are assembled in the same way, except as mirror images of each other.

For each block, out of the green fabric, cut
The block consists of 4 strips.
To make the first strip take the 3" x 5 1/2" strips of all three colors - green, white, blue.
For the left block, position the white strip along the right edge of the green strip, as shown, face down. With a lead pencil draw a diagonal. Stitch over the diagonal, cut away with 1/4" seam allowance. Unfold and press.
For the right block, position the white strip along the left edge of the green strip. Do everything else the same way.
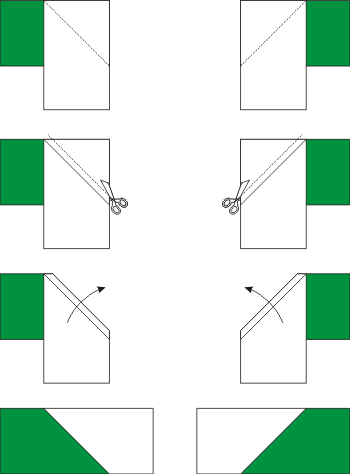
For the left block, position the blue strip on the left end of the green strip, as shown, face down. With a lead pencil draw a diagonal. Stitch over the diagonal, cut away with 1/4" seam allowance. Unfold and press.
For the right block, the procedure is the same, but position the blue strip over the RIGHT end of the green strip.
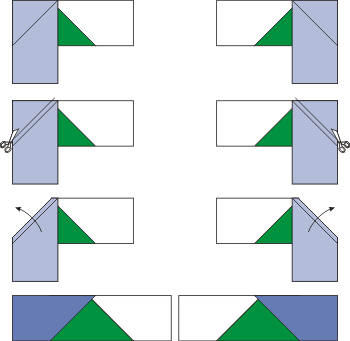
To make the second strip, take the 3" x 4 3/4" strips of white and blue and the 3" x 7" green strip. It is sewn in the same way as the first strip, except the strips are a different size.

To make the third strip, take green strip measuring 4" x 9 1/4", white strip measuring 4" x 4 1/2", blue strip measuring 4" x 4 1/2". The strip is sewn in the same way as the first two above.

To make the fourth strip, take the green 1 1/2" x 3 1/2" strip, white 1 1/2" x 4" strip and blue 1 1/2" x 4" strip and sew them together as shown. For the left block, the blue strip goes on the left. For the right strip, the blue strip goes on the right.
To assemble the block sew all strips together:
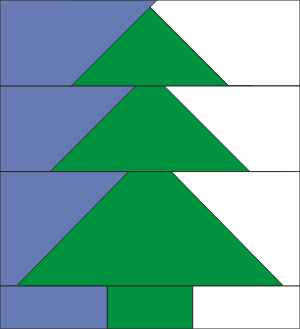
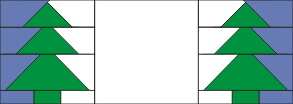
Sew the left block to the left edge of the central (embroidered) panel, sew the right block to the right edge of the central panel.
Out of white fabric, cut 2 strips measuring 1 1/2" x 31 1/2".
Sew the white borders to the upper and lower edges of the working piece.
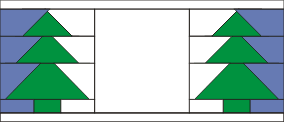
Out of white fabric, cut 2 strips measuring 1 1/2" x 12". Sew the white borders to the left and right edges of the working piece.
Out of patterned fabric, cut 2 strips measuring 3" x 33 1/2". Sew the patterned borders to the upper and lower edges of the working piece.
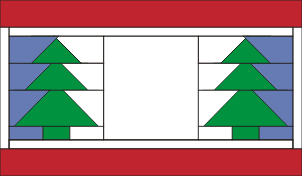
Out of patterned fabric, cut 2 strips measuring 3" x 17". Sew the patterned borders to the left and right edges of the working piece.
Now place the backing on a flat surface (table) face down. Cover with batting. Spread your working piece over it.
Baste to fasten all three layers together. Baste 3-4 lines lengthwise and 5-6 lines widthwise.
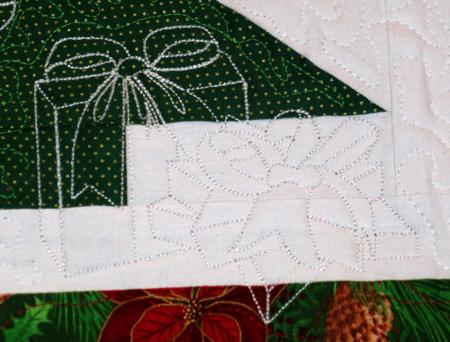
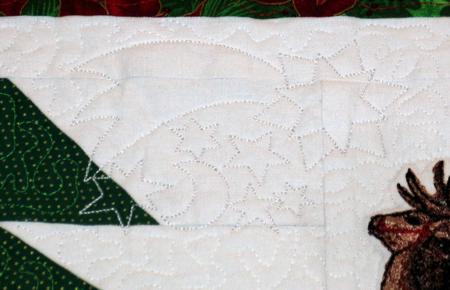
With the design templates, mark the places where you want to embroider-quilt the redwork designs form the Christmas Redwork Set IV and Christmas Redwork Set III.
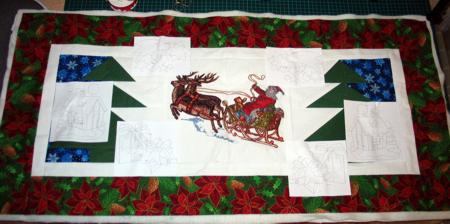
Hoop all three layers together and embroider-quilt the designs one by one.
The remaining spaces were filled in with free-hand meandering.


