Our machine embroidered freestanding Battenberg lace does not imitate hand-made Battenberg lace.
We include specific recommendations for stitching out every particular design on the page of that design. This page has some general instructions.
Stabilizers: We strongly recommend to use water-soluble mesh, such as Vilene. Vilene D0102 is a non woven dissolvable stabilizer which is imported into the US, is sold in large rolls and is sometimes repackaged under different brand names.
Some of these brand names are Fabri-Solvy by Sulky, Avalon Plus by Madeira, Wash-Away, and Aqua Magic.
Film-like water soluble stabilizers, such as Solvy by Sulky, Avalon by Madeira, Badge Master, are not suitable for Free-Standing Lace embroidery.
The drawbacks of Vilene are that it leaves lint, so clean the bobbin case with a soft brush after every project. Also, dissolve it only in luke-warm water; in hot water, the chemicals in the mesh can cause the color of the thread to fade.
Threads: You can embroider this type of lace with any embroidery threads: polyester, rayon and cotton. The choice of thread depends on your project.
The thinner the thread, the finer the final product will be.
Embroidery polyester thread will make very fine weblike lace. You might like its looks and feel for garments.
Embroidery rayon thread is too soft, it does not keep its shape well and very often its color fades under the influence of chemicals from the watersoluble mesh. However it might work in some projects.
We highly recommend that at least one of the threads, either in the bobbin or in the needle, should be cotton, which gives bulk to the lace and makes it look hand-made.
If you are using 50- or 60-weight cotton, you can use it both in the bobbin and in the needle. If you use 40-weight cotton thread for the needle, you can use regular polyester bobbin thread.
Most often we use Signature machine quilting cotton thread, but similar threads from other companies should work just as well. Cotton thread for machine quilting is very strong and gives less lint than sewing cotton thread.
To get 2-sided embroidery you should use the same thread for the needle and the bobbin.
Needles: We use size 80/12 embroidery needles and 80/12 metallic needles. Our experience shows that cotton thread used with metallic needles gives less lint. The needles should be sharp, so it's advisable to change them after every project.
Hooping: We usually use 2 layers of water-soluble Vilene with our FSL designs. It's very important to hoop the stabilizer VERY tightly, like a drum skin. If your hoop does not hold the stabilizer well (this often happens because the stabilizer is very thin), we recommend to wrap muslin strips around the long sides of your hoop's upper frame.
Thread Tension is very important. When you embroider on fabric, it's recommended that the needle thread appears on the back of the embroidery. Then the embroidery looks neat and nice.
With the lace, it's important that the bobbin and needle threads meet halfway, in the center of the stabilizer layer.
If you leave the tension as per fabric embroidery, your stitch-out may end up like on the photo below: all stitches and picots look fuzzy.
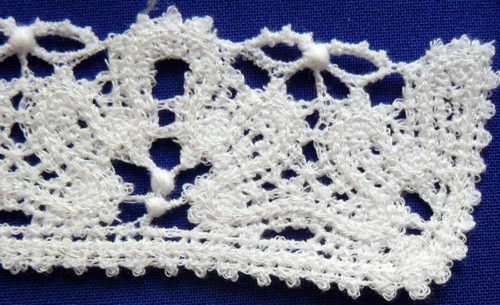
You need to reduce the tension of the bobbin thread, or increase the tension of the needle thread to make a stitch-out neat. Consult your machine's manual and/or dealer on how to do this. The tension is very individual for each machine.
Most Importantly: ALWAYS make a test stitch-out of the design and wash away the stabilizer. This helps you to select the threads, needles, stabilizers and settings of your machine correctly. DO NOT embroider several designs in one hoop.
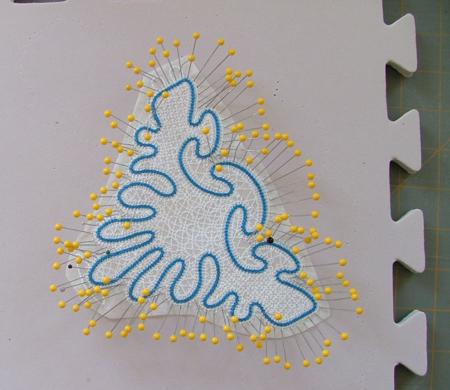
Washing out the Stabilizer: Rinsing away the stabilizer is an important step, because the lace can be stretched or distorted if this is done incorrectly. We recommend to use a foam board and stainless pins.
Cut away the excess stabilizer close to the stitches. Take your time and carefully pin every single loop on the lace's outer edge to the board.
Now place the board into a bowl with luke-warm water. Leave the board in the water for at least half an hour. Change the water a couple of times.
Take the board from the water and leave to air dry. DO not unpin the lace until it's completely dry.
Step One: Download the design from the website to your computer.
| ART | DST | EXP | HUS | JEF | JEF+ | PES | VIP | VP3 | XXX |
Step Two: Unzip the file. Upload the embroidery file to your machine (depending on your machine brand, you might use a card, a floppy, USB jumpdrive or direct connection between the machine and the computer).
Step Three: Hoop 2 layers of water-soluble mesh. Make a test stitch-out of the file using different combinations of the threads.
Rinse the stabilizer in lukewarm water and leave to air dry. Press with steam.
Do not discard your stitch-outs. Keep them for future reference. Staple them to a sheet of paper and write down which thread you used in the needle and in the bobbin. Later it will be easier for you to decide which thread to use for different projects.
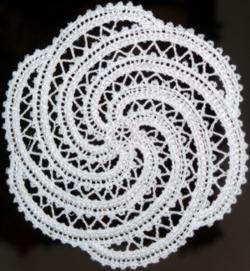
This particular design can be used as a coaster or small doily.
You can also make a lace insert. For this, place the doily on a piece of fabric and pin in place. With a 1mm straight stitch along the outer outline of the lace, attach the lace to the fabric. Step 1mm from the first stitch line and make another 1 mm straight stitch along the previous one. You will have 2 parallel straight stitch lines along the outer outline of the lace. Work from the right side of the doily.
Turn the work on the wrong side. With a pair of sharp scissors cut away the fabric under the lace close to the stitch.
Joining the Battenberg Lace Parts:
Some projects will need you to connect lace parts. To sew Battenberg lace together, you have to work by hand. Use the same thread with which you made the embroidery. Align the lace parts so that the tiny loops on one part coincide with the loops on the other part. Connect the lace parts by these loops.


