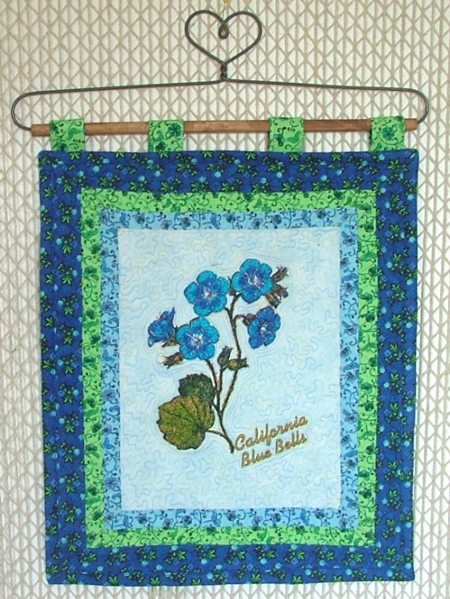
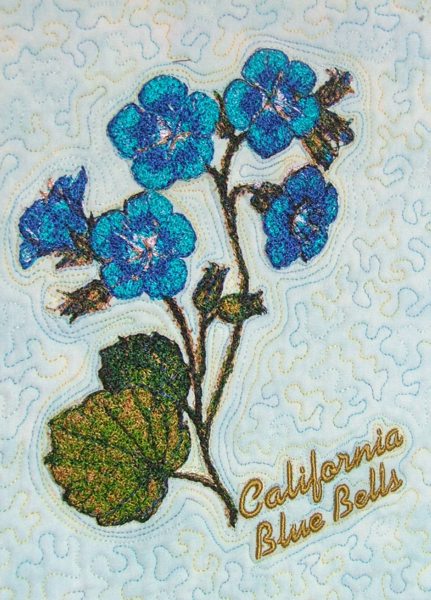
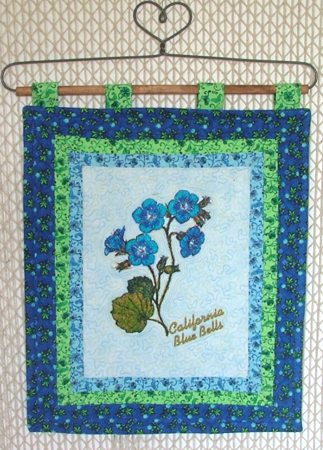
| A small charming quilt such as this one is fast to put together, and makes a beautiful home decoration or a gift. We made several of these quilts. In this tutorial, we describe one that features the California Blue Bells design in the photo-stitch technique. The finished size of the quilt is about 12" x 14".
|
|
| The most important thing in such a small quilt is to select your fabrics so that they match and enhance the colors of the embroidered flower. You do not need much fabric. We used a pale blue batik for the embroidered center, as well as light blue, vivid green and dark blue fabrics with small flower patterns for the borders and binding. You will also need a piece of fabric for the backing. We used polyester craft felt both as batting and embroidery stabilizer. You will need a piece of about 13" x 15".
|
|
Cutting:
|
| Out of pale blue fabric cut the central part measuring 7 1/2" x 9 1/2". Out of light blue fabric cut
- 2 strips measuring 1" x 7 1/2" and
- 2 strips measuring 1" x 10 1/2";
Out of bright green fabric cut
- 2 strips measuring 1" x 8 1/2" and
- 2 strips measuring 1" x 11 1/2";
Out of dark blue fabric cut
- 2 strips measuring 2" x 9 1/2",
- 2 strips measuring 2" x 15 1/2", and
- 2 strips 2" wide and the length of the width of the fabric (38" - 42" for the binding).
|
|
Making the top:
|
Sew the light blue 1" x 7 1/2" strips to the upper and lower edges of the central rectangle.
Sew the light blue 1" x 10 1/2" strips to the left and the right edges of the same rectangle. |

|
Sew the green 1" x 8 1/2" strips to the upper and lower edges of the working piece.
Sew the green 1" x 10 1/2" strips to the left and right edges of the working piece. |
|
Sew the dark blue 2" x 9 1/2" strips to the upper and lower edges of the working piece.
Sew the dark blue 2" x 15 1/2" strips to the left and right edges of the working piece. |
|
|
Embroidery:
|
| Place your quilt top on a piece of polyester craft felt. The felt piece should be 1" larger on all sides than the quilt top. Hoop the central part and embroider the first design from the California Blue Bells Set. Note: Instead of felt you can use your favorite medium-weight iron-on cut-away stabilizer.
|
|
|
Quilting and Finishing:
|
| Now place the backing/lining on a flat surface (table) face down. If you used felt as a stabilizer, you won't need batting. Otherwise, spread a layer of batting over the backing. Spread the embroidered quilt top on top. Pin all three layers together with 1" pins. We quilted around the embroidery and all over the piece in a free-motion style. Remove the pins.
Press the work with heavy steam and square the work -- all corners should be 90 degrees and opposite sides should be of the same length.
|
| Finish the raw edges with binding. We used the bright blue fabric that forms the outer border of the quilt. |
| To hang the quilt on a wall, you will need to sew either a sleeve or small loop hangers on the back of the quilt. We chose loops. For this, out of the green fabric, we cut 4 strips measuring 2" x 4". Fold the long sides of the strips 1/4" back and press. Fold 1/4" again and press. Topstitch along the edges.
|
|
| Fold the strips, wrong side inwards and make the short edges meet. Pin them together. Zig-zag both edges, so that you sew them together and at the same time finish the raw edges. |
|
| Sew the loops to the back of the quilt. |
|
|
Enjoy!
|
|
Happy Stitching!
|
|
Back to California Blue Bells
|
|
Back to Projects Page
|


