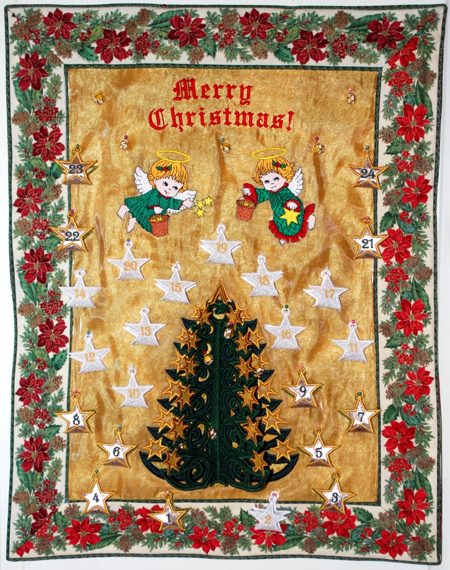
For this year's Advent Calendar we used the designs from the Flying Angel Set, Freestanding Applique Advent Star Pouches and FSL Christmas Tree with Applique Stars.
You can buy the designs separately, or you can buy them as an Advent Calendar Set.
For embroidery besides embroidery threads (either polyesyer or rayon), you will need several stabilizers: light-weight cut-away stabilizer and water-soluble mesh. Temporary fabric spray adhesive, such as KK 2000 by Sulky, or a similar product, will be very helpful.
For the calendar we used:
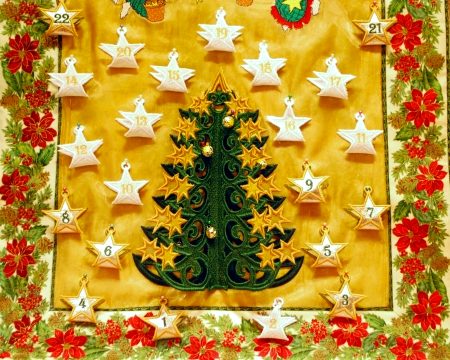
Embroider all Advent Star Pouches as described in the instructions. We used scraps of different light-colored fabrics for the pouches. When the pouches are ready, put them aside for the time being.
The rest of the embroidery is done on a piece of organza measuring 16" x 22". Organza gives a 3d effect to the whole project. However, if you do not feel like working with organza, you can make the embroidery right on the golden cotton fabric that we are going to use for the lining under the organza. In this case, we recommend to sew the borders first, and then make the embroidery.
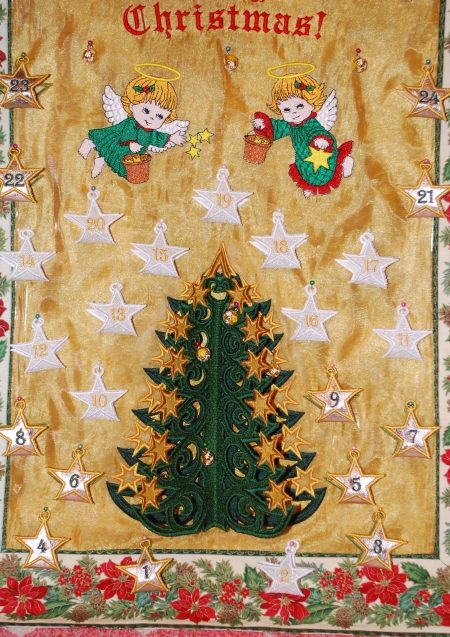
Using paper templates, mark the position of the words "Merry Christmas", the angels and the tree.
Stabilize the fabric with light-weight cut-away stabilizer using temporary adhesive and embroider first the words, then the angels.

Now we are going to embroider the tree. If you DO NOT use organza, make 2 stitch-outs of the tree as described in the instructions.
If you are working on organza, make only one freestanding stitch-out according the instructions.
We'll make the second stitch-out as applique on the organza.
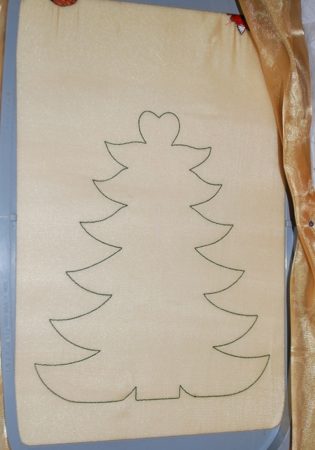
Mark the position of the tree in the lower part of the organza piece. Hoop the organza with 2 layers of water-soluble mesh. Upload the file into your machine. Start the machine. It will embroider the outline of the tree and stop.
With a pair of sharp scissors, cut away the fabric inside the tree.
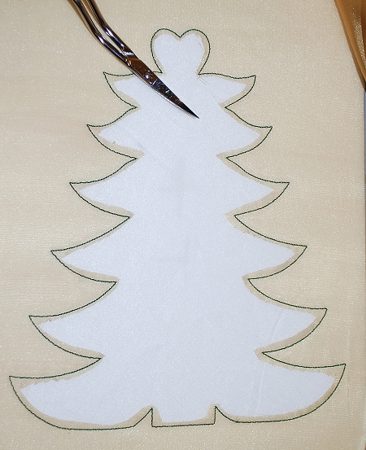
Finish the embroidery of the tree. Then make the embroidery of the stars. You do not need any additional applique fabric for the stars.
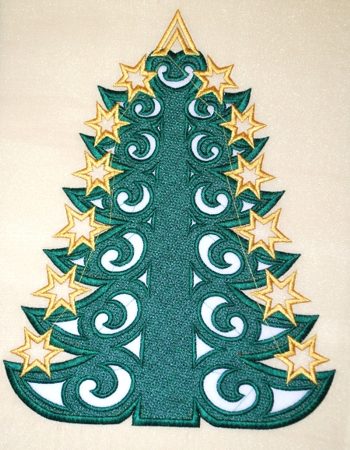
Cut away the excess mesh stabilizer and rinse away the remainder. Spread the work carefully and leave to air dry. Lightly press, if needed.
Place the organza piece over the lining - golden cotton fabric. Align all edges and pin them together. Topstitch along the edges, 1/4" from the edge.
Sew the borders to the working piece. Our borders are 3" wide and have poinsettia print. We made mitered corners. You can make the corners either mitered or boxed. The upper and lower sides are 16", the left and right are 22". Measure the size of your top and cut out the borders accordingly.
Quilting and Finishing:
Now place the backing/lining on a flat surface (table) face down. Cover with batting. Spread your working piece over it.
Pin all layers together with 1" pins. We quilted only around the angels and the words in a free-motion style.
Then we placed the top on the table and laid out the star pouches all over the top. In the spots where the pouches' rings go, we hand-sewed small beads. To do this, we first made 2 stitches through all layers to fasten them together, then attached the beads.
After the pouches are removed during Advent, the small beads will continue to lend a decorative touch to the quilt.
Then we machine quilted the borders in a free-motion style. Remove the pins while quilting.
Press the borders with heavy steam, square the top and finish the raw edges with the binding.
If you are working with organza: Position the freestanding stitch-out of the tree on top of the applique stitch-out and topstitch along the middle of the trunk.
If you are not using organza: Sew the first tree stitch-out onto the quilt top. Position the second stitch-out on top of the first one and topstitch along the middle of the trunk.
Fold the upper stitch-out to make the tree 3-dimensional. Decorate the tree with jingle-bells. Button the pouches onto their buttons/beads. Place small sweets into the pouches.


