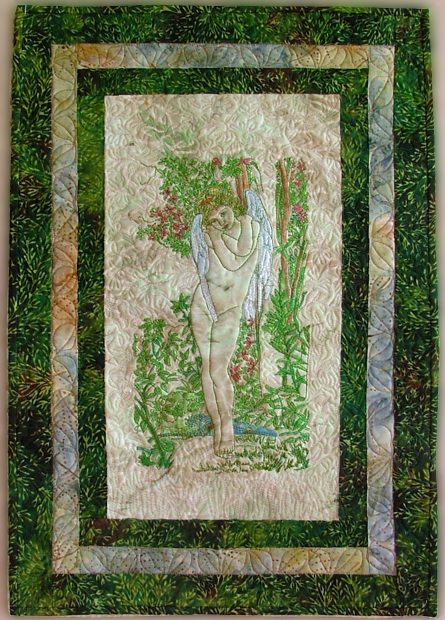
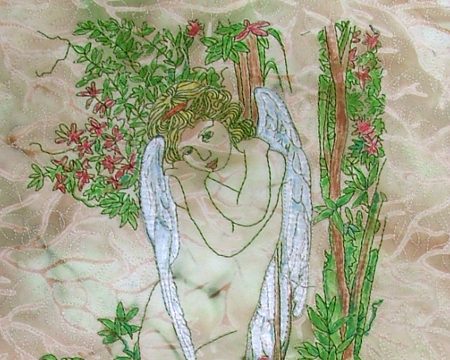
For this small, simple but very attractive quilt, we used the embroidery design Cupid by William Bouguereau for the mega hoop. We also used a fat quarter of pale cream batik, about 1/4 yard of forest green batik, and fabric markers. The finished size of the quilt is about 15" x 23".
You will also need polyester craft felt, used both as stabilizer and batting, and fabric for the backing.
Cutting:
Out of cream batik, cut
Out of forest green batik, cut
Out of polyester craft felt cut a piece measuring about 16" x 24".
Seam allowance is 1/4". Please don't forget to press the seam right after you make it.
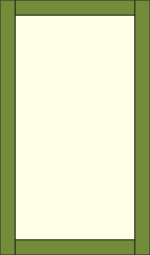
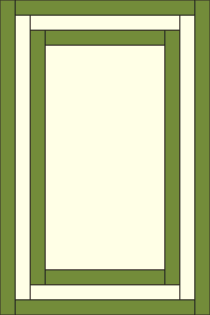
Sew the green 1 1/2" x 8 1/2" strips to the upper and lower edges of the cream rectangle.

Sew the green 1 1/2" x 17 1/2" strips to the left and right edges of the rectangle.
Sew the cream 1 1/2" x 10 1/2" strips to the upper and lower edges of the rectangle.
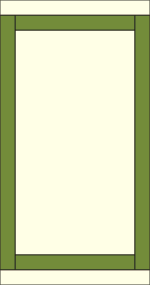
Sew the cream 1 1/2" x 19 1/2" strips to the left and right edges of the rectangle.
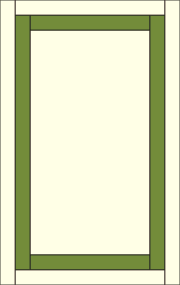
Sew the green 2" x 12 1/2" strips to the upper and lower edges of the central part.
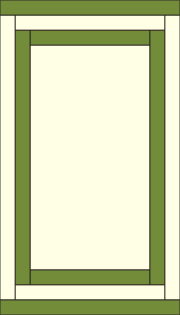
Sew the green 2" x 23 1/2" strips to the left and right edges.
Embroidery:
Place the pieced top on the felt piece. Smooth the fabric with hands. The fabric will cling to the felt.
Mark the position of the embroidery in the center of the pieced top. Hoop both layers. Embroider the Cupid by William Bouguereau. We made the embroidery with forest green thread.
Quilting and Finishing:
Spread the backing on your table, face down. Cover with the working piece. The felt will work now as batting. Pin all three layers together with 1" pins.
We quilted around the embroidery and all over the quilt in a free-motion style with floral patterns. Remove the pins while working.
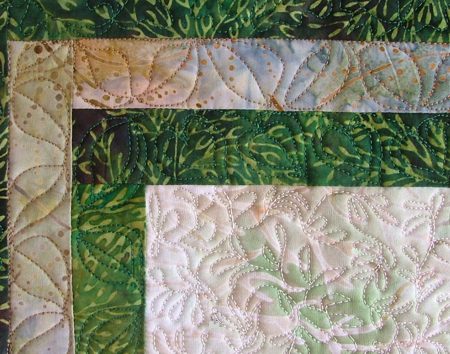
Press the work with heavy steam and square the work -- all corners should be 90 degrees and opposite sides should be of the same length.
Finish the raw edges with the binding.
Now for the most exciting part. Using fabric colors (you can use markers, pencils, ink, etc.) to color your quilt. We colored the wings white, the hair gold, the small flowers red, the branches brown and the foliage green. Follow the manufacturer's instructions. We needed to let the markers dry and then press the picture with steam.
Now the quilt is ready.


