Mobile Menu IconMenu
Advanced Embroidery Designs -- Online Center for Machine Embroidery Designs
Earth Day Sale! 40% off Floral, Landscapes, Redwork Flowers and Seasons!

First Call for Fall Wall Quilt with Redwork Embroidery

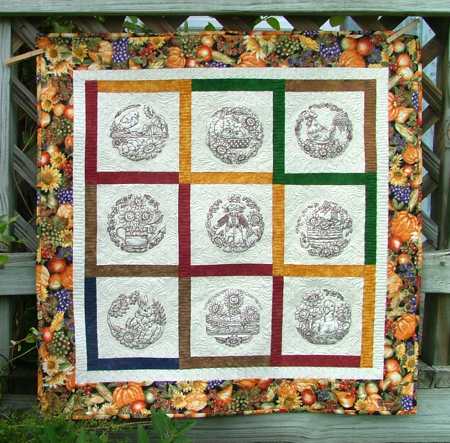
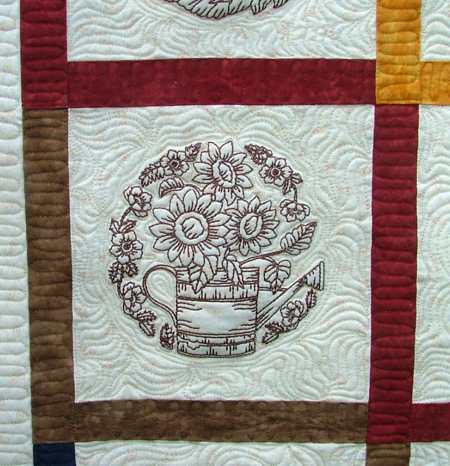
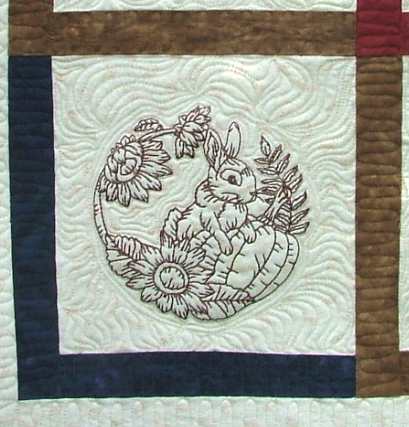
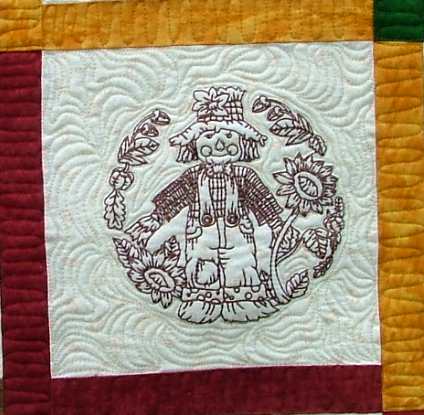
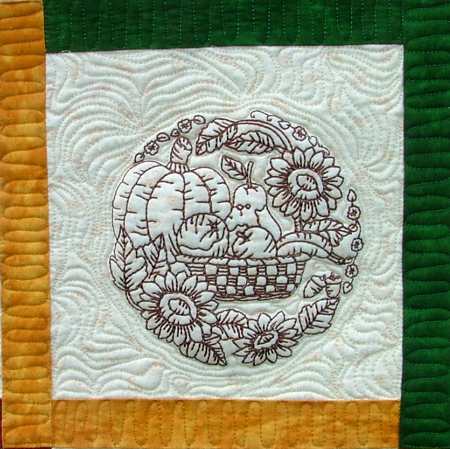
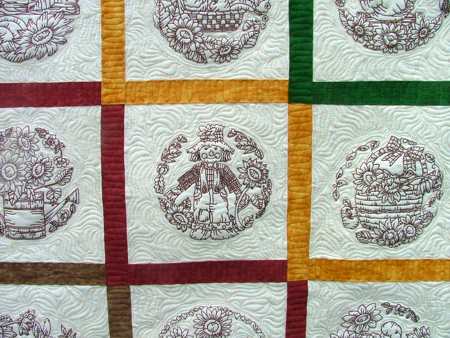
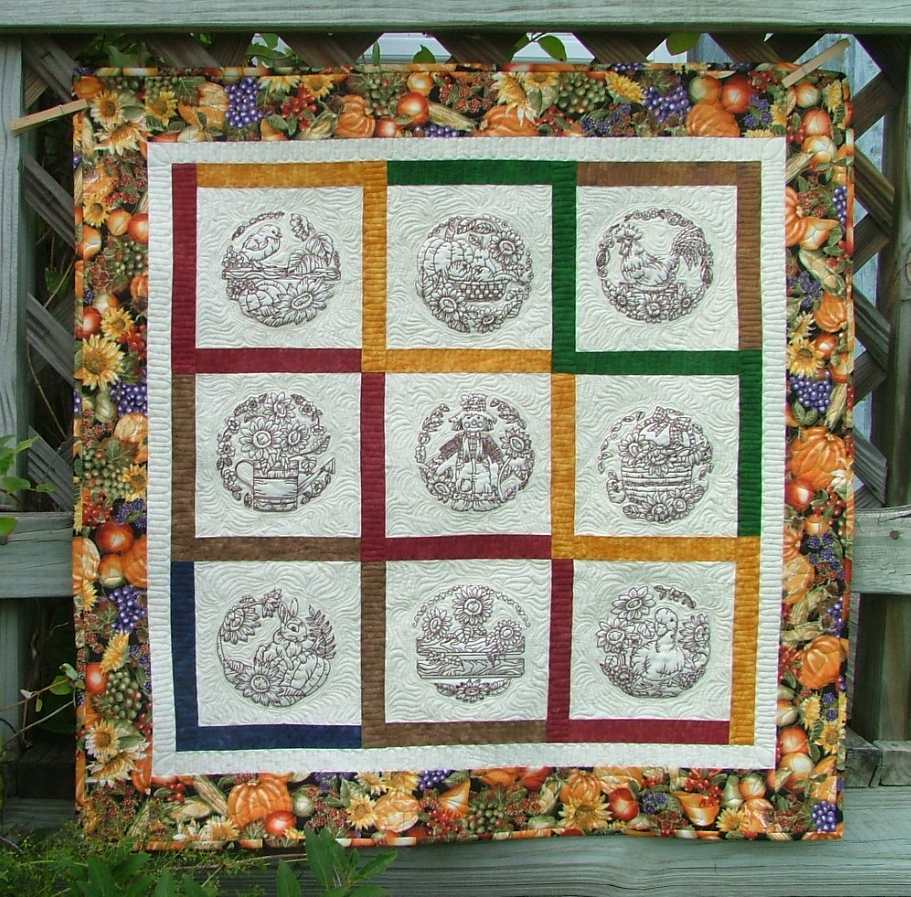
This charming Autumn-themed wall quilt features the designs from the Redwork Sunflower Set for a large, 5" x 7" (130 x 180 mm), hoop.

The finished size of the quilt is about 34" square.

First Call for Fall Wall Quilt with Redwork Embroidery image 1

Click to enlarge

For embroidery you will need thread (either polyester or rayon), and light-weight cut-away stabilizer.

For the quilt top, you will need:

  • 1 yard of light-cream cotton fabric (for the blocks),
  • 1/2 yard of autumn-themed patterned fabric (for the border and binding),
  • small amount of fabric in 6 colors (try to match the colors of the border). We used dark blue, greenish brown, burgundy, burnt yellow, dark green and brick brown.
You will also need fabric for the backing and batting.

Cutting

Out of light-cream fabric, cut

  • 9 squares measuring 7 1/2" x 7 1/2",
  • 2 strips measuring 1 1/2" x 25 1/2" and
  • 2 strips measuring 1 1/2" x 27 1/2".
Out of fabric for the border, cut
  • 2 strips measuring 4" x 27 1/2" and
  • 2 strips measuring 4" x 35 1/2".
Cut the remaining fabric into 4 strips measuring 2 1/2" and the length of the width of the fabric for the binding.

Mark the 6 fabrics of different colors with numbers 1 through 6.

Out of fabric #1 (dark blue in our case), cut
  • 1 strip measuring 1 1/2" x 7 1/2" and
  • 1 strip measuring 1 1/2" x 8 1/2".
Out of fabric #2 (greenish brown), cut
  • 2 strips measuring 1 1/2" x 7 1/2" and
  • 2 strips measuring 1 1/2" x 8 1/2".
Out of fabric #3 (burgundy), cut
  • 3 strips measuring 1 1/2" x 7 1/2" and
  • 3 strips measuring 1 1/2" x 8 1/2"
Out of fabric #4 (burnt yellow), cut
  • 2 strips measuring 1 1/2" x 7 1/2",
  • 3 strips measuring 1 1/2" x 8 1/2" and
  • 1 strip measuring 1 1/2" x 9 1/2"
Out of fabric #5 (dark green), cut
  • 2 strips measuring 1 1/2" x 7 1/2" and
  • 2 strips measuring 1 1/2" x 8 1/2".
Out of fabric #6 (brick brown), cut
  • 1 strip measuring 1 1/2" x 7 1/2" and
  • 1 strip measuring 1 1/2" x 8 1/2".
The quilt is very easy to make. However it can be easy to mix up the colors. Pay careful attention to the diagrams when assembling the quilt.

Assembly of the Top:

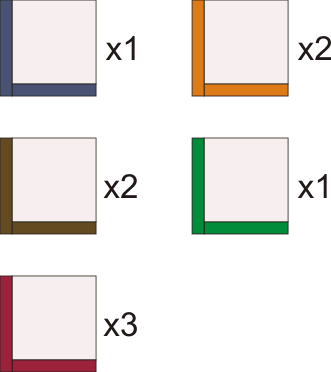
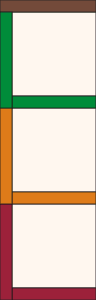
To make the quilt, first you need to assemble the individual blocks. Each block uses a cream 7 1/2" x 7 1/2" square, a color strip measuring 1 1/2" x 7 1/2" and a color strip measuring 1 1/2 x 8 1/2".

Sew the 7 1/2" strip to the bottom of the square. Then sew the 8 1/2" strip to the left of the new piece. Press the seams towards the color strips. See the diagram below.

Make blocks with all of the colors EXCEPT color #6 (brick brown). You should get:

  • 1 block with color #1
  • 2 blocks with color #2
  • 3 blocks with color #3
  • 2 blocks with color #4
  • 1 block with color #5

First Call for Fall diagram

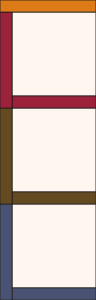
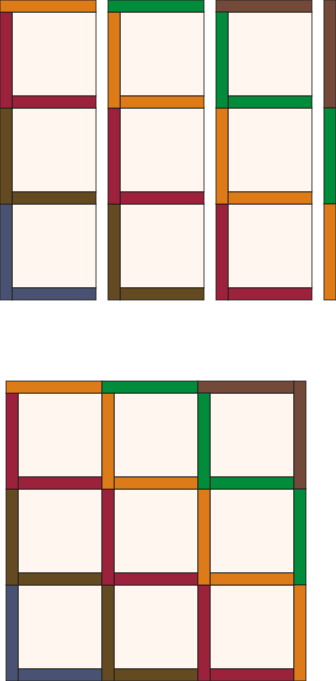
The next step is to assemble the blocks into vertical columns.

For the first column, take the block in color #1, one block in color #2, one block in color #3 and the 1 1/2" x 8 1/2" strip of color #4. Sew them together as in the diagram below, pressing the seams to the colored strips:

First Call for Fall diagram

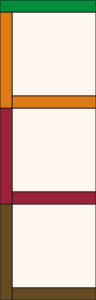
For the second column, take the remaining block in color #2, one block in color #3, one block in color #4 and the 1 1/2" x 8 1/2" strip of color #5. Sew them together as in the diagram below, pressing the seams to the colored strips:

First Call for Fall diagram

For the third column, take the last block in color #3, the last block in color #4, the block in color #5 and the 1 1/2" x 9 1/2" strip of color #6. Sew them together as in the diagram below, pressing the seams to the colored strips:

First Call for Fall diagram

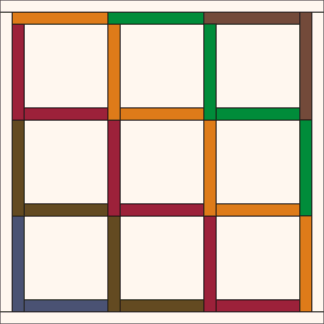
Now take the 1 1/2" x 8 1/2" strip of color #4, the 1 1/2" x 8 1/2" strip of color #5 and the 1 1/2" x 9 1/2" strip of color #6. Sew them together to form a long strip:

First Call for Fall diagram

Take the three columns and the three color strips and sew them together to form the quilt top:

First Call for Fall diagram

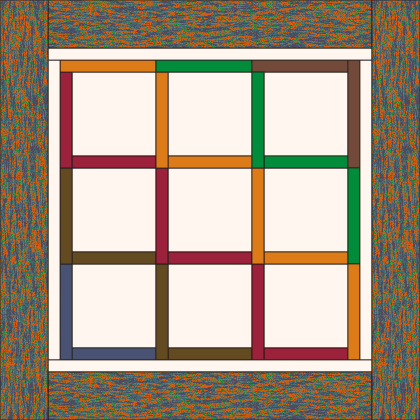
Sew the cream borders measuring 1 1/2" x 25 1/2" to the left and right sides of the top.

Sew the cream borders measuring 1 1/2" x 27 1/2" to the upper and lower sides of the top.

First Call for Fall diagram

Attach the patterned borders: sew the 2 strips measuring 4" x 27 1/2" to the upper and lower sides of the quilt; and 2 strips measuring 4" x 35 1/2" to the left and right sides of the quilt.

First Call for Fall diagram

Embroidery:

Decide which design goes into each block and embroider the designs one by one. After the embroidery is finished, cut away the excess stabilizer.

Quilting and Finishing:

Spread the backing on your table, face down. Cover the backing with batting. Cover with the working piece. Pin all three layers together with 1" pins.
We quilted around the embroidery and all over the quilt in a free-motion style. Remove the pins while quilting.

Press the work with heavy steam and square the work -- all corners should be 90 degrees and opposite sides should be of the same length. Finish the raw edges with binding.

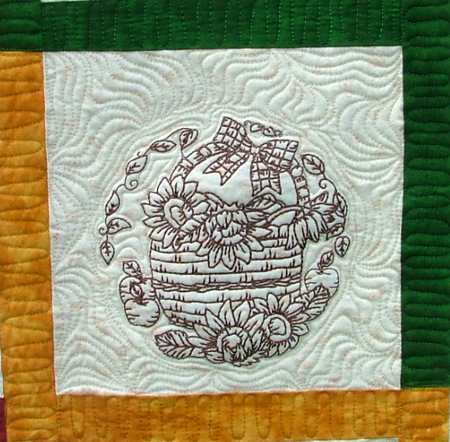
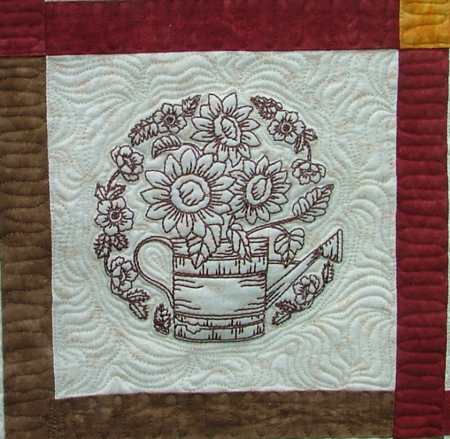
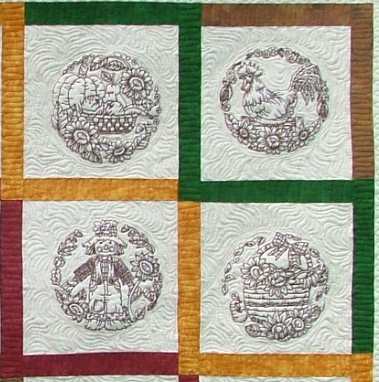
Here are some close-ups of what we got:

First Call for Fall Wall Quilt with Redwork Embroidery image 2

First Call for Fall Wall Quilt with Redwork Embroidery image 3

First Call for Fall Wall Quilt with Redwork Embroidery image 4

First Call for Fall Wall Quilt with Redwork Embroidery image 5

First Call for Fall Wall Quilt with Redwork Embroidery image 6

First Call for Fall Wall Quilt with Redwork Embroidery image 7

First Call for Fall Wall Quilt with Redwork Embroidery image 8

First Call for Fall Wall Quilt with Redwork Embroidery image 9

Enjoy!

Happy Stitching!

Back to Redwork Sunflower Set.

Back to Projects Page

Mailing List
Enter your e-mail for news, discounts and exclusive special offers.


Find us on Twitter

Special Offers
Bonus design on all orders over $30
Ivy Vine Border Set

Shop Now!

Announcement
Best Project Contest
The results are in!
Featured Project
Check out our latest project Birds and Blooms Quilted Tablerunner
Tutorials
Never heard of photo stitch? - Check out our What is Photo Stitch? page
Most Popular Designs
|| Home || Shop || Free Designs || New Designs ||
|| Projects || Tutorials || Links || About Us || Contact Us ||
|| Store Policy || Licensing || Accessibility ||

Social Media:

Copyright © Advanced Embroidery Designs. All Rights Reserved.