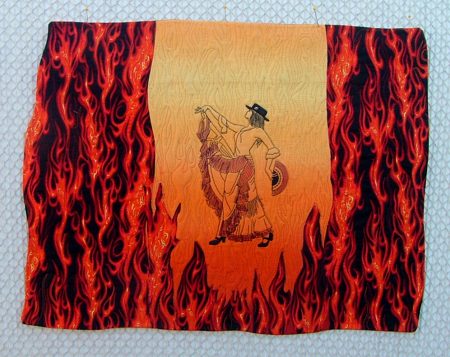
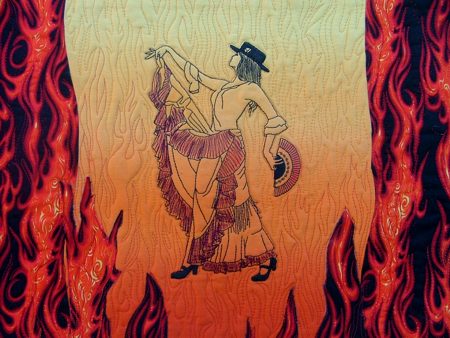
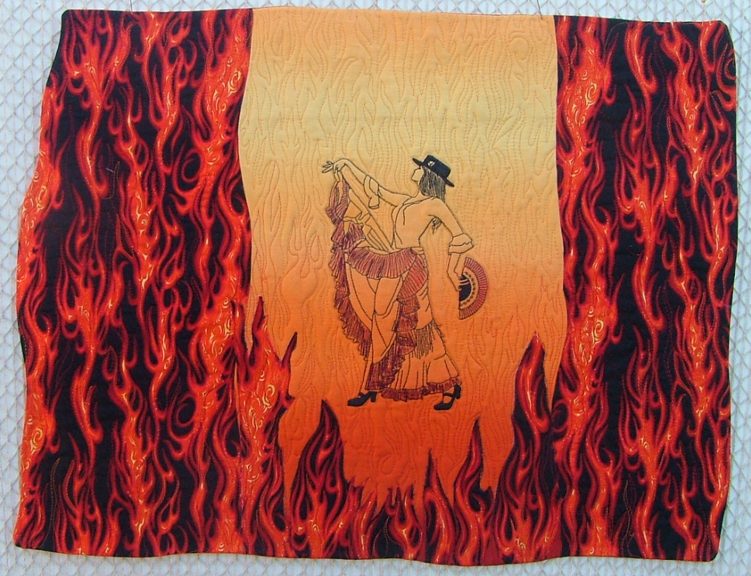
This small art quilt features the Flamenco design for a mega hoop (6" x 10").
The finished size of the quilt is about 17" x 15".
|
Click to enlarge |
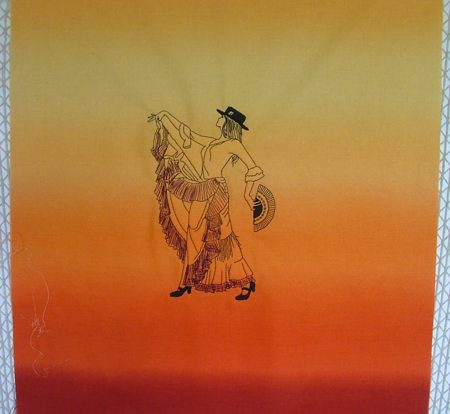
For the embroidered part with embroidery we used the fabric from the 'Gradations' collection by Caryl Bryer Fallert, the exact name of this coloration is
Essential Gradations Ombre Marigold.
If you cannot find this fabric, use a pale yellow fabric and dye the bottom of it orange-red using Derwent Inktense blocks or pencils. We purchased our Inktense blocks at Amazon.com.
For the borders we used fabric with a flame pattern from Jo-Ann's. You will also need batting, fabric for the backing and fabric for the binding.
For the applique we used Lite Steam-A-Seam 2 double-sided self-adhesive fusible net. You can use a similar product or fabric glue. |
|
Embroidery:
|
Stabilize the fabric with polyester craft felt. Mark the position of the embroidery so that the face and hands of the dancer are on the pale yellow part of the fabric, and her skirts and feet on the orange-red part. Hoop and make the embroidery.
Cut away the excess stabilizer close to the stitches.
|
|
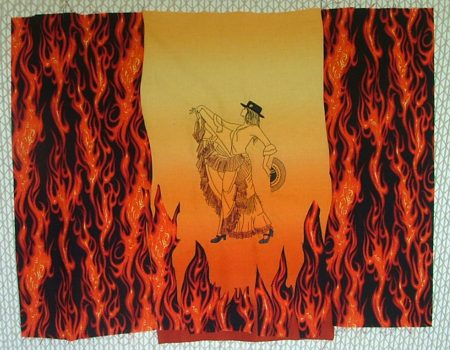
| Sewing the borders: |
Sew the borders to the central part as curved lines. For this, place the central part on the cutting mat, face up. Position the "flame" fabric, face up, on the left side. Overlap both fabrics 2 inches. With a rotary cutter (or a pair of sharp scissors), cut a curve through both fabrics.
Position both fabrics face to face. Neatly pin, aligning the curved edges. Machine stitch with seam allowance 1/8"-1/4". Unfold the "flames" and press.
Repeat for the right side. |

|
| Applique: |
| Out of the border fabric, cut out some of the "flames". Adhere the flames to the bottom part of the quilt. We did not finish the raw edges of the applique. While quilting, quilt several times through the appliqued flames. |
|
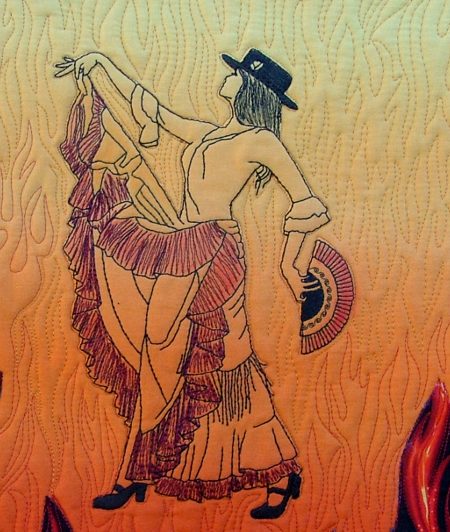
| Quilting: |
| Now place the backing/lining on a flat surface (table) face down. Cover with batting. Spread your working piece over it. Pin all three layers together with 1" pins. We quilted around the embroidery and all over the quilt in a free-motion style. Remove the pins while quilting.Press the work with heavy steam and trim the edges. We did not square the work, as it's an art quilt.
|
|
| Binding: |
For the binding you will need a piece of fabric as large as your trimmed quilt. Press the fabric for the "binding" well. Place it on your working table, face up. Smooth with hands.
Place the quilt, face down, over the binding piece. Pin all layers with safety pins. Pin the edges with flat head pins.
Topstitch 1/4" from the quilt's edge.
Cut away the excess "binding" fabric. |
The "binding" side facing you, cut, with scissors, an opening in the "binding" leaving about 3" of fabric on all sides.
Fold the raw edges 1/4" inside and press. Pin or baste in place. Handstitch in place.
This is what the quilt looks like from the back. |

|
| The quilt is ready. Enjoy! |
|
|
Happy Stitching!
|
|
Back to Flamenco
|
|
Back to Projects Page
|


