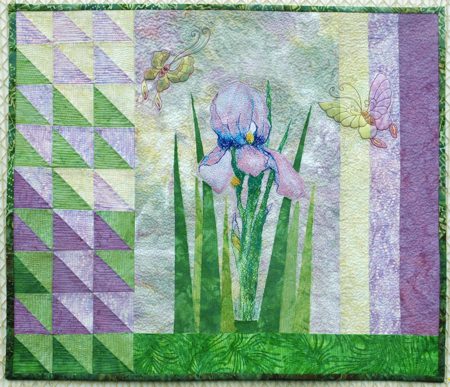
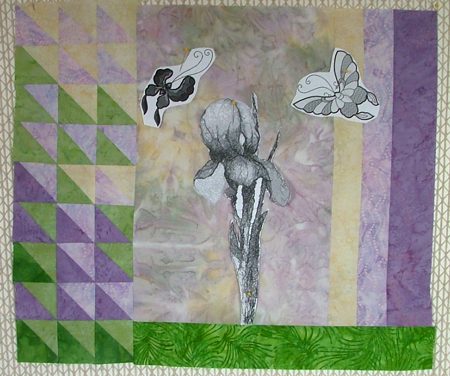
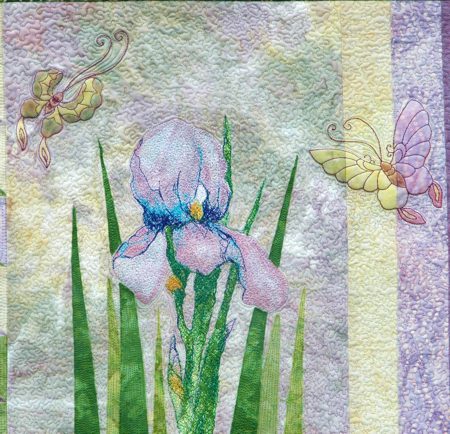
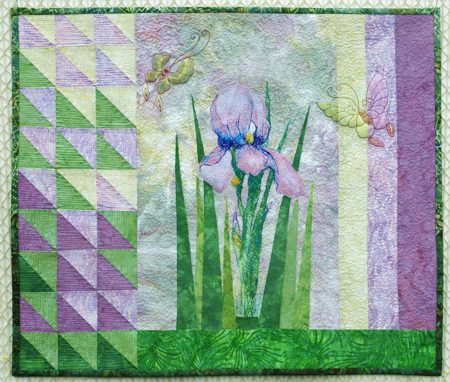
In this small art quilt, we used the designs of the Iris in the photo-stitch technique and 2 butterflies from the Butterfly Redwork Set. The finished size of the quilt is about 18" x 21" ( 45.5 x 53 cm).
|
|
We used scraps of pale yellow, pale lilac, bright lilac, pale green and bright green batiks. For the central part, under the embroidery, we used a piece of pale-colored batik measuring 10 1/2" x 16 1/2".
For the binding we used dark green batik. You will also need polyester craft felt, used both as stabilizer and batting, and fabric for the backing.
For embroidery we used 40-weight rayon embroidery threads. You will also need a fabric glue-stick and any fabric dyes to add color to the butterflies. Altenatively you can use the buttierflies from the multi-colored Butterfly Set. |
Cutting:
|
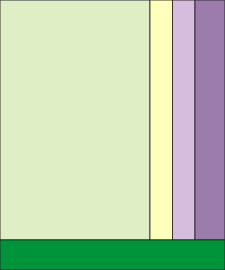
For the central part, cut a piece measuring 10 1/2" x 16 1/2".
Out of pale yellow and pale lilac batiks each, cut a stip measuring 2" x 16 1/2".
Out of darker lilac batic cut a stip measiring 2 1/2" x 16 1/2".
Out of bright green batik cut a strip measuring 2 1/2" x 15 1/2".
For the left part of the quilt, which consists of half-triangles squares, you will need 28 squares measuring 2 7/8" x 2 7/8". It doesn't really matter how many and which batiks you use for these squares, as long as you end up with 28. We cut about equal numbers from each of the batiks we had. |
| Sewing the half-triangle squares: |
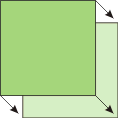
| Position the the 2 7/8" squares in pairs, face to face. You'll get 14 pairs. |
|
| With a pencil, draw a diagonal on the top square. Stitch 1/4" from the pencil line on both sides. |

|
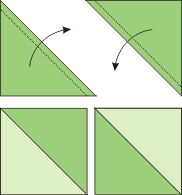
| Cut along the line. Open the new squares. Press the seam towards the red. Trim the "ears". Repeat for all the pairs. You should get 28 new squares measuring 2 1/2" x 2 1/2". As you use differently colored fabrics, you'll get differently colored half-tringle squares. |
|
| Assembly of the Top: |
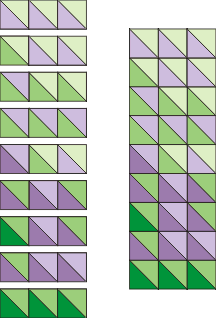
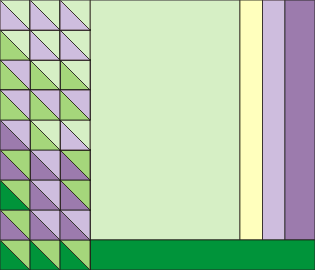
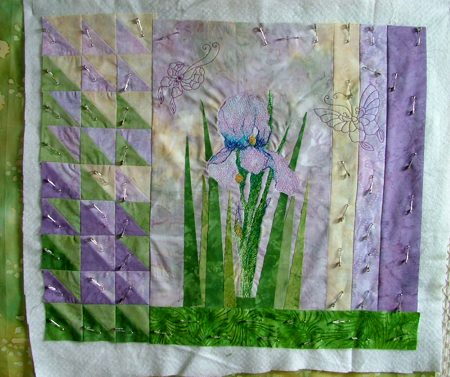
| Arrange your half-triangle squares into 9 rows of 3 squares each. When you like your color arrangement, sew the squares together into rows, then sew the rows into a panel. |
|
| Sew the pale yellow strip to the right edge of the central panel, then attach the pale lilac strip, and finally attach the dark lilac strip: |

|
| Sew the green strip to the bottom of the central part. |
|
| Sew the half-triangle panel to the left edge of the top. |
|
|
Embroidery:
|
| With the paper templates, mark the position of the embroidery. |
|
| Stabilize the fabric with polyester craft felt and embroider the flower first. When you are finished, turn the work to the wrong side and cut away the felt around the embroidery close to the stitches. |

|
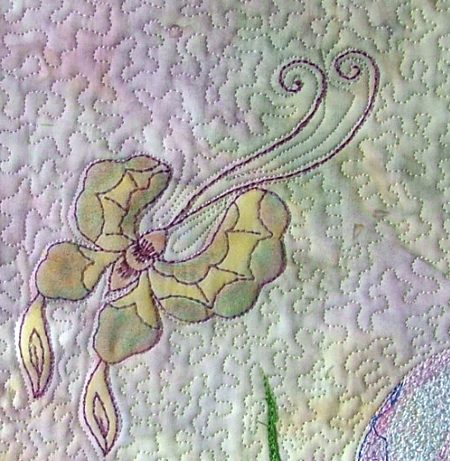
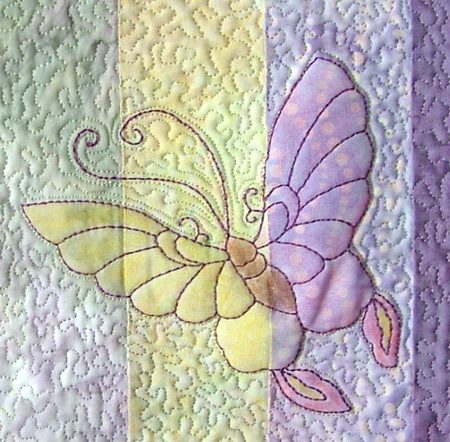
| Embroider the butterflies over the flower in the same way. |
|
|
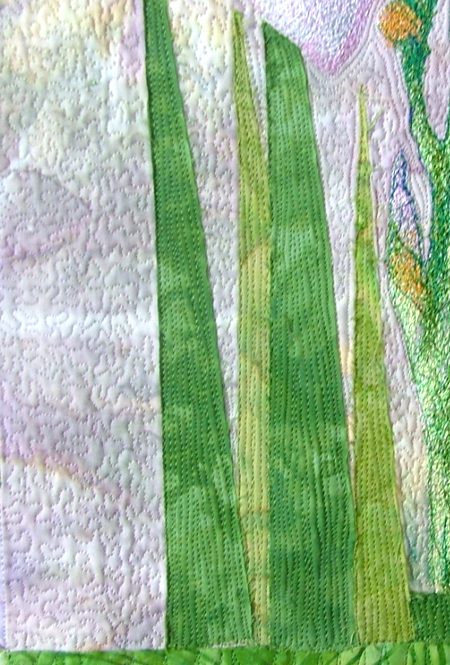
| Out of green batiks, cut The Iris's leaves. Apply small amount of fabric glue to the back of the leaves and adhere them around the flower. |
|
| Quilting and Finishing: |
| Spread the backing on your table, face down. Cover the backing with batting. Cover with the working piece. Pin all three layers together with 1" pins. |
|
| First quilt the appliqued iris leaves. Then we quilted around the embroidery and all over the quilt in a free-motion style with floral patterns. We changed the color of the quilting threads and used pale yellow, pale and dark lilac, pale and dark green to enhance the hues of the fabrics. Remove the pins while working. |
|
| Press the work with heavy steam and square the work -- all corners should be 90 degrees and opposite sides should be of the same length. Finish the raw edges with binding. |
|
|
Enjoy!
|
|
Happy Stitching!
|
|
Back to Iris and Butterfly Redwork Set
|
|
Back to Projects Page
|


