Mobile Menu IconMenu
Advanced Embroidery Designs -- Online Center for Machine Embroidery Designs
Enter code ArborDay24 to get Crescent Moon Tree FREE with Any Order! Shop Now!

Quilted Potholder with Embroidery

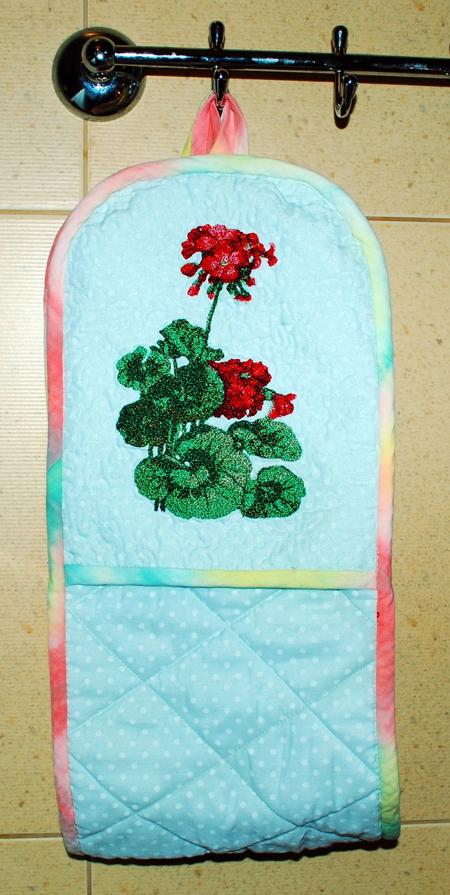
For this charming, old-fashioned potholder, we used the design Geranium for a large, 5" x 7" (130 x 180 mm), hoop.

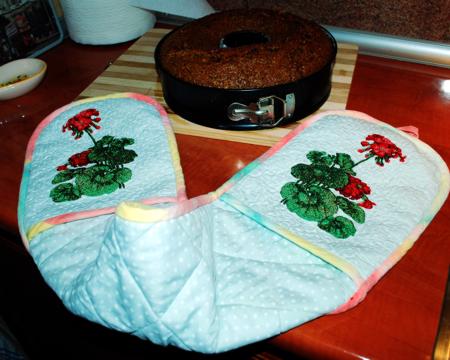
The finished size of the potholder is about 8" x 35 1/2".

Quilted Potholder with Embroidery image 1

Besides embroidery thread (either polyester or rayon), you will need

  • light- to medium-weight cut-away stabilizer,
  • about 3/4 yard of light-colored cotton fabric,
  • a piece measuring 9" x 36" of Therma-Flec Heat Resistant Fabric, or similar product,
  • batting,
  • quilting threads,
  • quilter's ruler and rotary cutter, or a graphic pencil and sharp scissors,
  • removable fabric marker,
  • binding.

Cutting:

Out of heat resistant fabric cut a strip measuring 9" x 36".

Cut strips of the same size out of the cotton fabric and batting.

Also out of the cotton fabric, cut 4 squares measuring 10" x 10". Cut 2 squares of the same size from batting.

Emboridery and Quilting of the "Pockets".

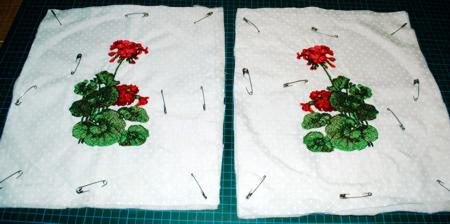
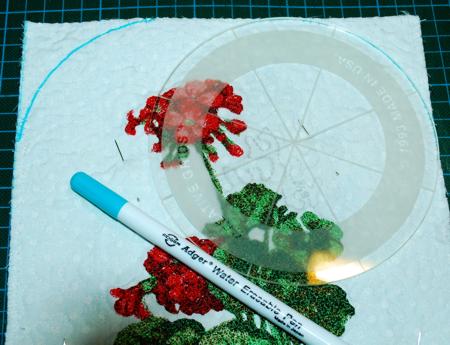
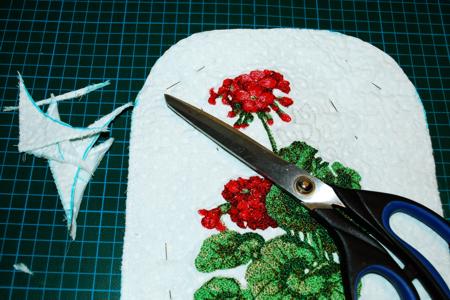
Embroider the Geranium designs on the 10" x 10" squares. Use light- to medium-weight cut-away stabilizer for embroidery. You'll need 2 stitch-outs.
After the embroidery is finished, cut away the excess stabilizer around the embroidery.

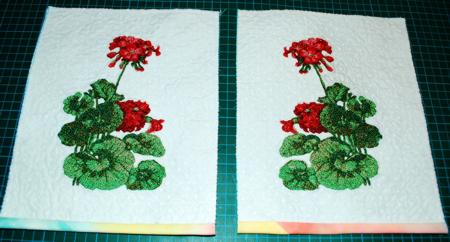
Place the remaining 2 fabric squares on your working surface, face down, and cover with the batting squares. Place your stitch-outs, face up, over the batting. Pin all 3 layers together and quilt in a free-motion style.

Quilted Potholder with Embroidery image 2

Trim the working piece to 8" x 8" square. Finish the lower raw edges with the binding.

Quilted Potholder with Embroidery image 3

Quilting and Assembly:

Lay the heat resistant strip, face down, cover it with the batting strip and place the cotton strip on top.

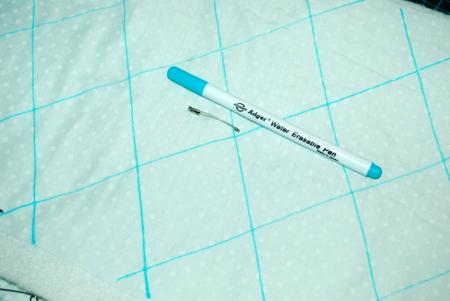
With the removable marker draw a 2" x 2" graph on the cotton strip.

Quilted Potholder with Embroidery image 4

Quilt along the graph lines.

Quilted Potholder with Embroidery image 5

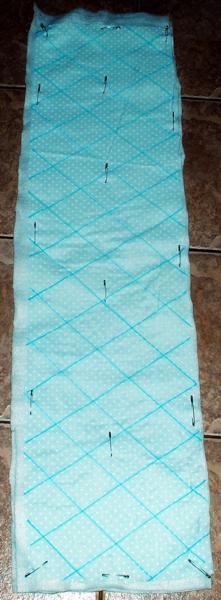
Trim the strip to 8" x 35 1/2".

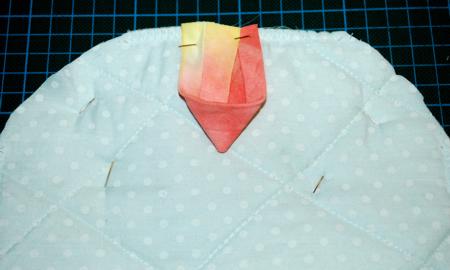
Place the "pockets" on the ends of the quilted strip. Pin in place.

Quilted Potholder with Embroidery image 6

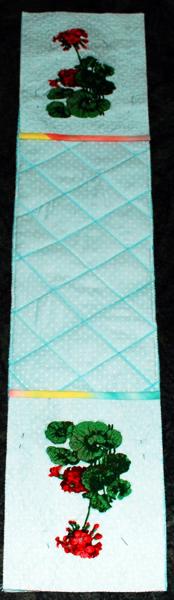
Using a plate, draw a rounded edge on the corners.

Quilted Potholder with Embroidery image 7

Cut away the corners. Using either zig-zag stitch, or straight stitch with 1/4" seam allowance, stitch the pockets to the strip.

Quilted Potholder with Embroidery image 8

Make 2 loops and pin to the short ends.

Quilted Potholder with Embroidery image 9

Finish the raw edges with the binding.

Quilted Potholder with Embroidery image 10

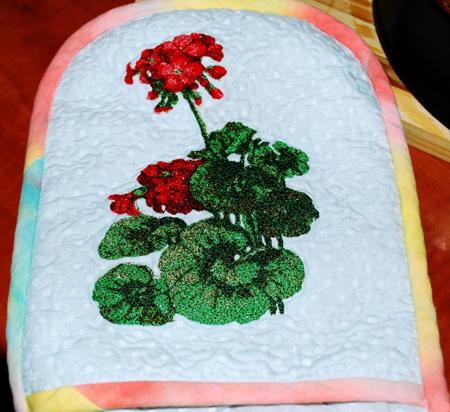
Your potholder is done!

Quilted Potholder with Embroidery image 11

Enjoy!

Happy Stitching!

Back to Geranium

Back to the Project Page

Mailing List
Enter your e-mail for news, discounts and exclusive special offers.


Find us on Twitter

Special Offers
Bonus design on all orders over $25
Coffee Coasters In-the-Hoop

Shop Now!

Announcement
Best Project Contest
The results are in!
Featured Project
Check out our latest project Birds and Blooms Quilted Tablerunner
Tutorials
Never heard of photo stitch? - Check out our What is Photo Stitch? page
Most Popular Designs
|| Home || Shop || Free Designs || New Designs ||
|| Projects || Tutorials || Links || About Us || Contact Us ||
|| Store Policy || Licensing || Accessibility ||

Social Media:

Copyright © Advanced Embroidery Designs. All Rights Reserved.