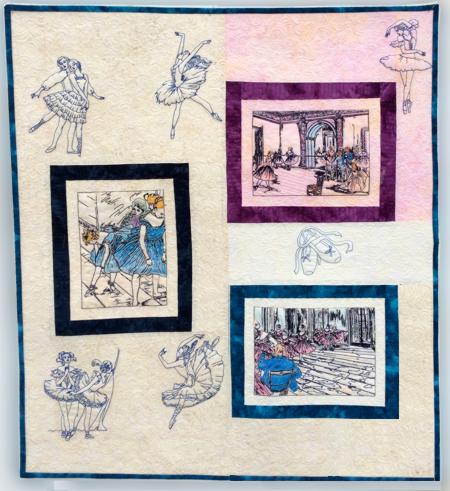
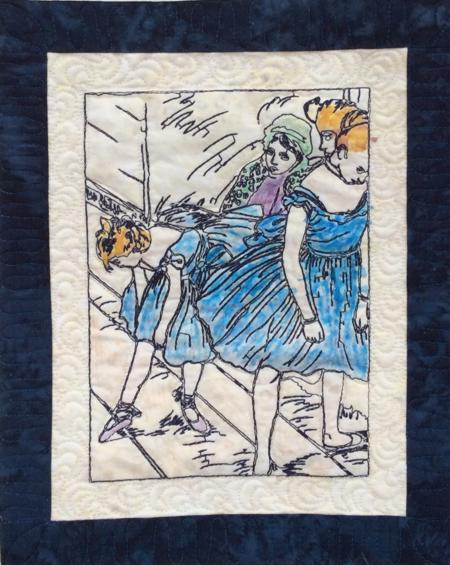
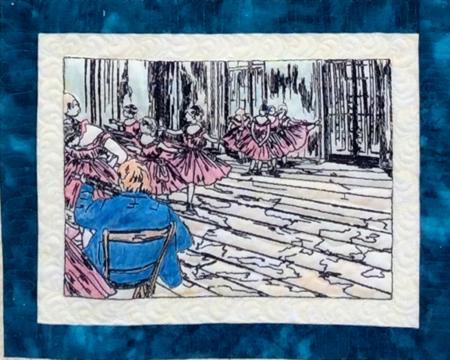
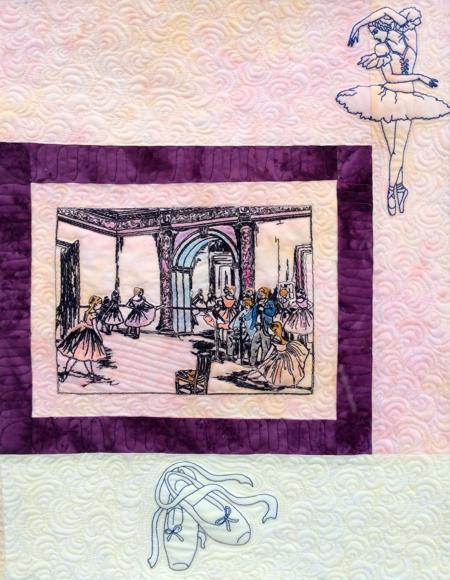
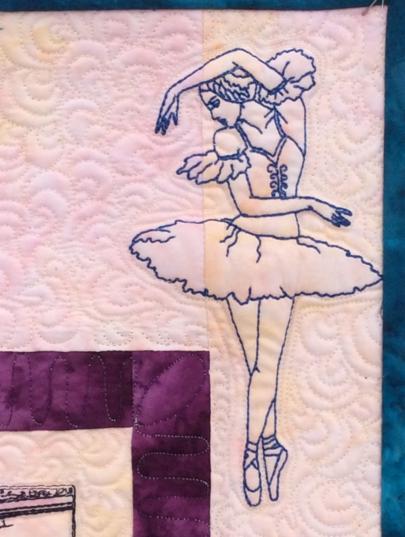
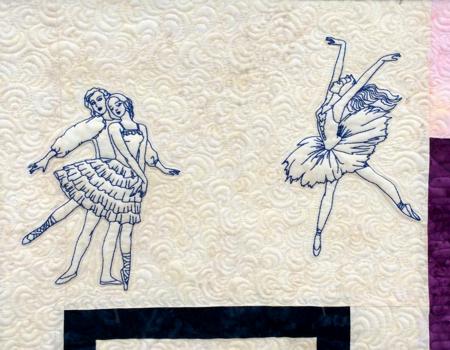
For this wall quilt, we used one-color designs based on paintings by Degas: Dance School, The Dancing Class, Dance Foye. We used fabric dye to add color to these embroideries. We also used the Redwork Ballet Set for embellishment. The ballet shoe design is free and can be downloaded from this page.
The finished size is about 27" x 29".
|
|
You will need
- embroidery thread (either polyester or rayon)
- light-weight cut-away stabilizer,
- about 1 yard of light-colored cotton fabric for the embroidery and background (we actually used several different light fabrics),
- scraps of colored fabrics for the frames,
- fabric inks, pencils, coloring blocks or markers,
- backing, batting and binding,
- quilting threads to match the background fabric,
- quilter's ruler and rotary cutter (or graphic pencil and sharp scissors).
|
Embroidery:
|
| Stabilize the light-colored piece of fabric with light-weight cut-away stabilizer for embroidery. Upload the Degas designs (one by one) into the machine and embroider them with a dark thread - e.g charcoal gray, navy blue, dark green. |
|
| Coloring: |
| Using fabric dyes, color the embroidery. Follow the instructions of the dye manufacturer. If you used wet paints, inks or fixator, leave the stitch-out to dry. |
After you're done coloring, use a ruler and rotary cutter to trim the stitch-outs to 7 1/2" x 9 1/2" rectangles.
Cut away the excess stabilizer around the embroidery. Do not remove the stabilizer under the embroidery. |
|
|
|
Cutting:
|
Out of the colored fabrics, cut strips for 3 frames. For each frame you will need 4 strips measuring 1 1/2" x 9 1/2".
Out of the light fabric or fabrics, cut the following pieces:
- 1 strip measuring 4 1/2" x 11 1/2",
- 1 strip measuring 5 1/2" x 1 1/2,
- 1 strip measuring 2 1/2" x 11 1/2",
- 2 strips measurimg 3" x 27 1/2",
- 1 strips measuring 3" x 28 1/2",
- 1 piece measuring 10 1/2" x 11 1/2" and
- 1 piece measuring 6 1/2" x 12 1/2".
|
Assembly of the Top:
|
| Seam allowance is 1/4" (6mm). |
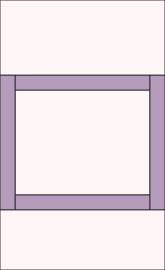
Sew the colored frames to the rectangles with embroidery. First sew the strips to the 9 1/2" long sides, press them open, then sew the strips to the remaining edges.
|
|
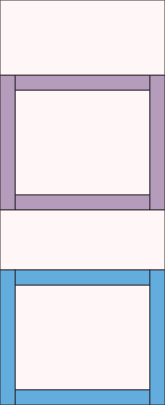
2 of stitch-outs have landscape orientation and one has portrait orientation. We placed both landscape-oriented stitch-outs on the right side of the quilt and the portrait-oriented one on the left side.
Sew the 5 1/2" x 11 1/2" piece to the upper edge of the first landscape-oriented stitch-out.
Sew the 4 1/2" x 11 1/2" piece to the lower edge of this stitch-out. |
|
| Sew the second landscape-oriented stitch-out to the lower edge of the working piece. |
|
| Now sew the 2 1/2" x 11 1/2" strip to the right edge of the portrait-oriented stitch-out. |
|
| Sew the 10 1/2" x 11 1/2" piece to the upper edge and the 6 1/2" x 11 1/2" to the lower edge of the working piece. |
|
| Sew the left and right parts of the quilt top together. |
|
| Sew the 3 1/2" x 27 1/2" strips to the left and right edges. |
|
| Sew the 3" x 28 1/2" strip to the lower edge of the the quilt top. |
|
| Embroidery: |
Embroider the designs from the Redwork Ballet Set all over the quilt.
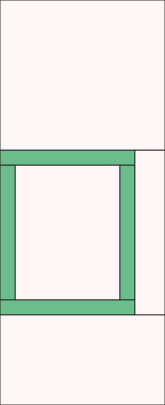
Download and embroider the ballet shoes design in the space between the 2 stitch-outs on the right side of the quilt. |
Ballet Shoes
ART DST EXP HUS JEF JEF+ PES VIP VP3 XXX |
|
|

|
|
| Quilting and Finishing: |
Now place the backing on a flat surface (table) face down. Cover with batting. Spread your working piece over it.
Pin all three layers together with 1" pins and start quilting. We quilted in each around the embroidery and in free-motion style all over the quilt. |
After the quilting is finished, press the work with heavy steam and square the work -- all corners should be 90 degrees and opposite sides should be of the same length.
Finish the raw edges with the binding.
|
|
|
Your quilt is done. Enjoy!
|
Back to Redwork Ballet Set, Dance School, The Dancing Class, Dance Foye,
|
Back to the Project Page
|


