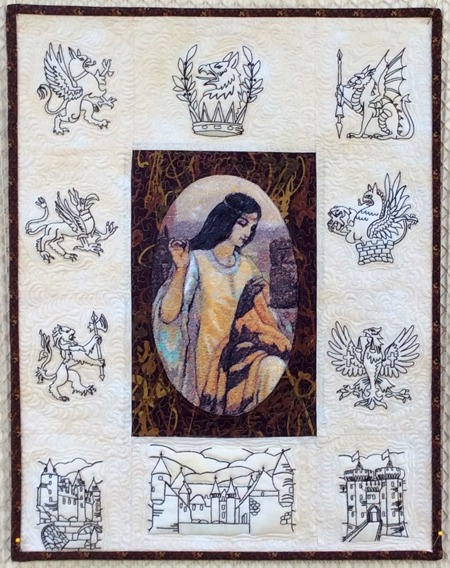
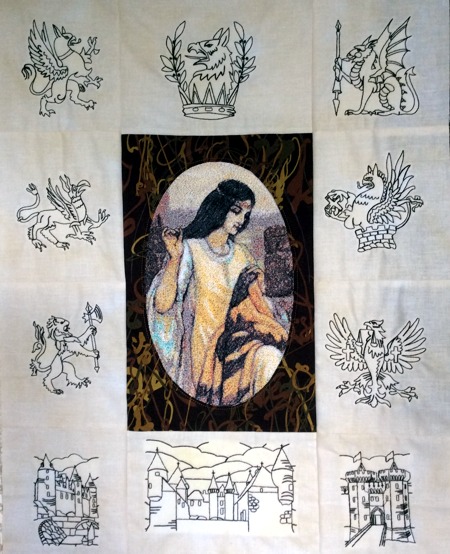
We decided to try a little bit of a medieval theme for this quilt! We used the photo-stitch design Stitching the Standard by E.B. Leighton and one color-designs from the Griffin and Castle sets for the small (4" x 4") hoop.
The finished size is about 22 1/2" x 17 1/2".
|
|
You will need
- embroidery threads,
- polyester craft felt (we used it intead of the stabilizer) or medium-weight iron-on cut-away stabilizer,
- about 1/2 yard of off-white, or cream fasbric for the embroidery,
- about 1/2 yard of dark fabric for the "frame" around the central embroidery and binding,
- backing and bating,
- temporary fabric adhesive, such as Solvy, or similar product (optional)
|
Embroidery:
|
Place a piece of light fabric on a piece of polyester craft felt. Press it and spread with your hands. Usually fabric clings to the felt very well. If in doubt, you can additionally use temporary fabric adhesive. Hoop both layers.
Print out the color card for Stitching the Standard by E.B. Leighton and select threads according to it.
Upload the file and embroider it.
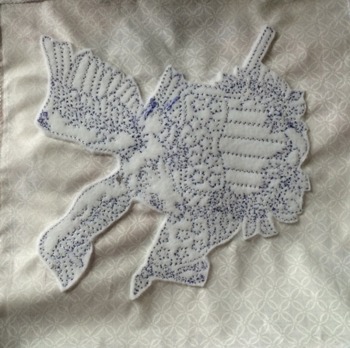
Cut out the stitch-out leaving about 1/4" margin for seam allowance. |
Sewing the Central Part:
|
| To sew the central part, you need to download the file with the oval opening. |
| Download the file with the template. To open and print the template, which is a PDF file, you will need Adobe Reader or a similar program. The program is free to download and install.. |
| Template Download (PDF file) |
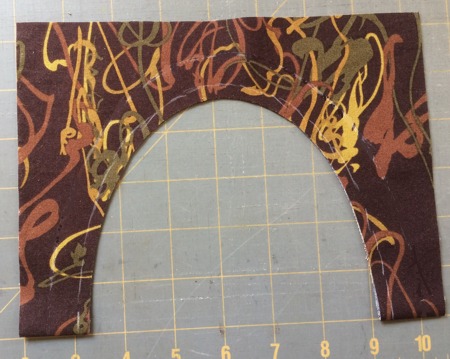
Print out the template, which is half of an oval. Cut it out along the inner line. This will match the border of the embroidery. The outer line is for those who would like to make an additional border/frame around the stitch-out. We chose to make only one.
Out of the fabric for the border, cut a piece measuting about 10" x 14". Fold it widthwise. Position the template over the folded fabric. Trace the inner line onto the fabric and cut the center out about 3/8" from the line (for seam allowance). |
|
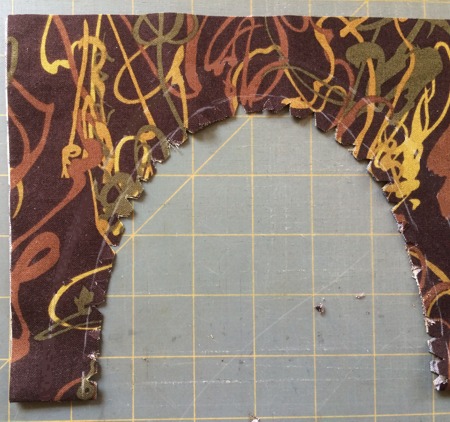
| Cut notches into the seam allowance from the edge to the inner line. Fold the notched fabric back and press. Using temporary fabric adhesive, adhere the notches to the fabric (optional). Leave to dry. |
|
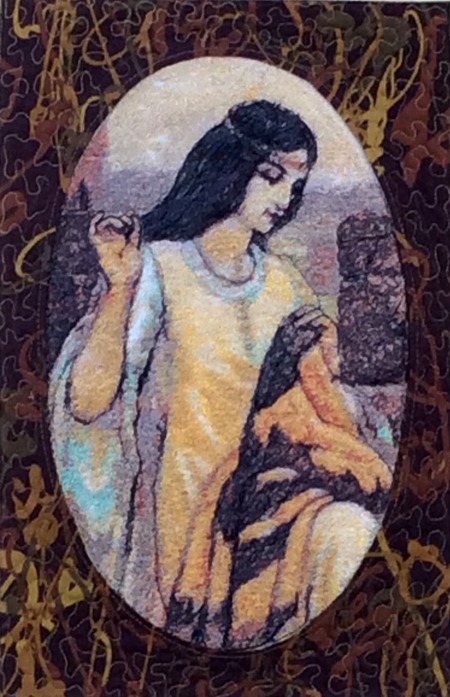
Position the "frame" over the stitch-out, pin the oval neatly around embroidery.
Topstitch the border in place 1/8" from the edge. |
| Trim the piece to a 8" x 12 1/2" rectangle. |
|
| Embroidery: |
Cut the light-colored fabric into 10 pieces measuring about 8" x 8", so that you can hoop them easily. Stabilize each piece with polyester craft felt (it will give you a trapunto effect after quilting) or with cut-away stabilizer.
Embroider the files from the Griffin and Castle sets for the small (4" x 4") hoop. Choose a dark thread to match the color of the border around the central stitch-out. We used the following files:
From the Castle set:
From the Griffin set:
- file 2
- file 3
- file 4
- file 5
- file 8
- file 9
- file 10
Feel free to choose different files from the sets if you'd like to. |
| Cut out the felt/or stabilizer around the embroidery close to the stitches. |
|
| Assembly of the Top |
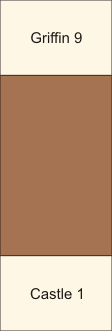
Trim the stitch-outs with Griffin file 9 and Castle file 1 to 5 1/2" x 8".
Sew the Griffin piece to the upper edge of the central part and the Castle part to the lower edge. |
|
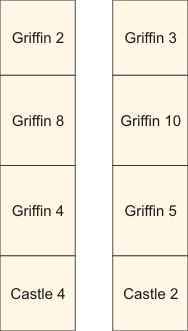
| For the side borders, trim the stitch-outs in the following way: the corner stitch-outs (griffin 2, griffin 3, castle 2 and castle 4) should be squares measuring 5 1/2" x 5 1/2" and the remaining 4 stitch-outs should measure 5 1/2" x 6 1/2". |
| Sew the stitch-outs into 2 vertical strips. The left border consists of the embroidered blocks Griffin 2, Griffin 8, Griffin 4 and Castle 4. The right border consists of the embroidered blocks Griffin 3, Griffin 10, Griffin 5 and Castle 2. |
|
| Sew the strips to the left and right edges of the central part. |
|
| Quilting and Finishing: |
Now place the backing on a flat surface (table) face down. Cover with batting. Spread your working piece over it.
Pin all three layers together with 1" pins and start quilting. We quilted with a meandering pattern around the central embroidery and in a freemotion style on the borders. |
After the quilting is finished, press the work with heavy steam and square the work -- all corners should be 90 degrees and opposite sides should be of the same length.
Finish the raw edges with the binding.
|
|
Your wall quilt is done. Enjoy!
|
|
Back to Stitching the Standard by E.B. Leighton
|
Back to the Project Page
|


