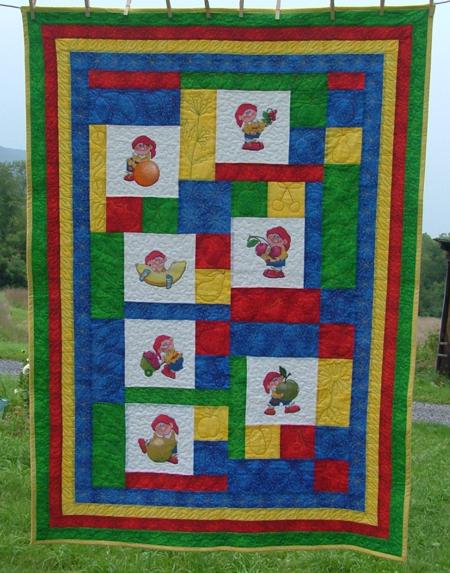
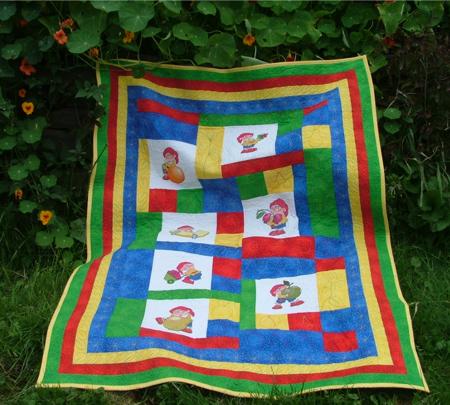
| The finished size of the quilt is about 46" x 60". The embroidery designs used are Dwarves with Fruit Set in the cross-stitch technique for 5" x 7" hoops. The same designs are available in the satin stitch technique for small (4 "x 4") hoop.
Each quilt block is unique
You can purchase this wall quilt from our Etsy store!
|
|
| We used 5 brightly-colored 100% cotton fabrics in white, red, green, yellow, and blue. You will need about 3/4 yard of red, green and blue, about 1 yard of yellow (this includes binding) and about 1 yard of white fabric. All seam allowances are 1/4". Do not forget to press each seam after you make it.
|
| Embroidery: |
| We embroidered the designs first. Out of white, or light cream fabric, cut squares measuring 12" x 12". Stabilize the fabric with low loft DreamPoly batting, or polyester craft felt. Embroider the designs. Note that cross-stitch designs are very dense and pull the fabric a lot, so tighten the hoop as far as it will go. |
After the embroidery is finished, press it and cut away the excess stabilizer as close to the embroidery as possible.
Lay the embroidered squares flat and trim them to 8 1/2" x 8 1/2". |
| The first block: |
Out of yellow fabric cut a strip measuring 2 1/2" x 12 1/2"
Out of blue fabric cut a strip measuring 4 1/2" x 10 1/2"
Out of green fabric cut a square measuring 4 1/2" x 4 1/2"
Out of red fabric cut a square measuring 4 1/2" x 4 1/2" and a strip measuring 2 1/2" x 10 1/2" |
Assemble the block:
1. Join the red and green 4 1/2" x 4 1/2" squares (unit 1);
2. Attach unit 1 to the bottom of the first embroidered white square (unit 2);
3. Attach the yellow 2 1/2" x 12 1/2" strip to the left side of unit 2 (unit 3);
4. Attach the blue 4 1/2" x 10 1/2" strip to the upper edge of unit 3 (unit 4);
5. Attach the red 2 1/2" x 10 1/2" strip to the upper edge of unit 4 (block 1). |
|
| The second block: |
Out of yellow fabric cut a strip measuring 4 1/2" x 10 1/2"
Out of blue fabric cut a square measuring 4 1/2" x 4 1/2"
Out of green fabric cut a square measuring 4 1/2" x 4 1/2" and a strip measuring 2 1/2" x 12 1/2"
Out of red fabric cut a strip measuring 2 1/2" x 16 1/2". |
Assemble the block:
1. Join the green and blue 4 1/2" x 4 1/2" squares (unit 1)
2. Attach unit 1 to the right side of the second embroidered square (unit 2)
3. Attach the red 2 1/2" x 16 1/2" strip to the bottom of the unit 2 (unit 3)
4. Attach the yellow 4 1/2" x 10 1/2" strip to the left side of the unit 3 (unit 4)
5. Attach the green 2 1/2" x 12 1/2" strip to the upper side of the unit 4 (block 2) |

|
| The third block: |
Out of yellow fabric cut a square measuring 4 1/2" x 4 1/2"
Out of blue fabric cut a strip measuring 2 1/2" x 12 1/2"
Out of green fabric cut a strip measuring 4 1/2" x 10 1/2"
Out of red fabric cut a square measuring 4 1/2" x 4 1/2" |
Assemble the block:
1. Join the yellow and red 4 1/2" x 41/2" squares (unit 1)
2. Attach unit 1 to the right side of the third embroidered square (unit 2)
3. Attach the blue 2 1/2" x 12 1/2" strip to the bottom of unit 2 (unit 3)
4. Attach the green 4 1/2" x 10 1/2" strip to the left side of unit 3 (block 3) |
|
| The fourth block: |
Out of yellow fabric cut a square measuring 4 1/2" x 4 1/2"
Out of blue fabric cut a strip measuring 2 1/2" x 12 1/2"
Out of green fabric cut a square measuring 4 1/2" x 4 1/2"
Out of red fabric cut a strip measuring 4 1/2" x 10 1/2" |
Assemble the block:
1. Join the yellow and green 4 1/2" x 4 1/2" squares (unit 1)
2. Attach unit 1 to the upper edge of the fourth embroidered square (unit 2)
3. Attach the blue 2 1/2" x 12 1/2" to the right side of unit 2 (unit 3)
4. Attach the red 4 1/2" x 10 1/2" strip to the bottom of unit 3 ( block 4) |
|
| Putting the first four blocks together: |
Out of blue fabric cut a 6 1/2" x 6 1/2" square.
Assemble the four blocks in the following way:
1. Attach the blue 6 1/2" x 6 1/2" to the second block, do not stitch to the end, leave a 1/4" unfinished (unit 1)
2. Join the first block and unit 1 (unit 2)
3. Join the third block and unit 2 (unit 3)
4. Join unit 3 and block 4 (unit 4) |
|
| Adding sashing to the four blocks: |
Out of yellow fabric cut a square measuring 4 1/2" x 4 1/2"
Out of blue fabric cut two 4 1/2" x 4 1/2" squares
Out of green fabric cut a strip measuring 4 1/2" x 14 1/2"
Out of red fabric cut a strip measuring 2 1/2" x 4 1/2" |
Assemble these pieces in the following order:
red strip - blue square - yellow square - green strip - blue square |

|
| Attach this sashing to the right side of the 4-block unit. The first half of the top is ready. |
|
| The fifth block: |
Out of blue fabric cut a 4 1/2" x 4 1/2" square and a 4 1/2" x 10 1/2" strip
Out of green fabric cut a 2 1/2" x 12 /12" strip
Out of red fabric cut a square measuring 4 1/2" x 4 1/2" |
| Assemble the block: |
1. Join the blue and red 4 1/2" x 4 1/2" squares (unit 1)
2. Attach unit 1 to the right side of the fifth embroidered square (unit 2)
3. Attach the green 2 1/2" x 12 1.2" strip to the bottom of unit 2 (unit 3)
4. Attach the blue 4 1/2" x 10 1/2" strip to the left side of unit 3 (block 5) |

|
| The sixth block: |
Out of yellow fabric cut a square measuring 4 1/2" x 4 1/2"
Out of blue fabric cut a 4 1/2" x 4 1/2" square
Out of green fabric cut a 4 1/2" x 10 /12" strip
Out of red fabric cut a 2 1/2" x 12 1/2" strip |
| Assemble the block |
1. Join the blue and yellow 4 1/2" x 4 1/2" squares (unit 1)
2. Attach unit 1 to the right side of the sixth embroidered square (unit 2)
3. Attach the red 2 1/2" x 12 1/2" strip to the bottom of unit 2 (unit 3)
4. Attach the green 4 1/2" x 10 1/2" strip to the left side of unit 3 (block 6) |

|
| The seventh block: |
Out of yellow fabric cut a square measuring 4 1/2" x 4 1/2" and a strip measuring 4 1/2" x 8 1/2"
Out of blue fabric cut a 4 1/2" x 4 1/2" square and two strips measuring 4 1/2" x 10 1/2"
Out of green fabric cut a 2 1/2" x 12 /12" strip
Out of red fabric cut three 4 1/2" x 4 1/2" squares |
| Assemble the block |
1. Attach the yellow 4 1/2" x 8 1/2" strip to the right side of the seventh embroidered square (unit 1);
2. Join the blue, red and yellow 4 1/2" x 4 1/2" squares (unit 2);
3. Attach unit 2 to the bottom of unit 1 (unit 3);
4. Attach the green 2 1/2" x 12 1/2" strip to the left side of unit 3 (unit 4);
5. Join each blue 4 1/2" x 10 1/2" strip to a red 4 1/2" x 4 1/2" square (units 5 and 6)
5. Attach unit 5 to the upper edge of unit 4
6. Attach unit 6 to the bottom of the unit 4. |
|
| Assemble Blocks 5-7: |
| To assemble the second part of the quilt top, first join the 5th and the sixth blocks, then attach the seventh block to the right side of the unit. |
|
| Join both halves of the quilt top: |
|
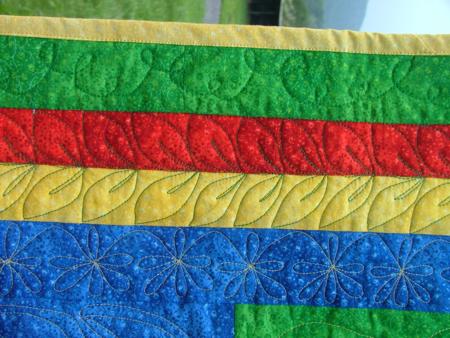
| Borders: |
| There are four 2" wide borders - blue, yellow, red and green. |
| For the first blue border you will need 2 strips measuring 2 1/2" x 48" (attach them to the left and to the right of the quilt top) and two strips measuring 2 1/2" x 34" (attach them to the upper and bottom side of the quilt. |
|
| For the yellow border you will need 2 strips measuirng 2 1/2" x 52" (attach them to the left and to the right of the quilt top) and 2 strips measuring 2 1/2" x 38" (attach them to the upper and bottom side of the quilt. |
|
| For the red border you will need 2 strips measuring 2 1/2" x 56" (attach them to the left and to the right of the quilt top) and 2 strips measuring 2 1/2" x 42" (attach them to the upper and bottom side of the quilt. |
|
| For the green border you will need 2 strips measuring 2 1/2" x 60" attach them to the left and to the right of the quilt top) and 2 strips measuring 2 1/2" x 46" (attach them to the upper and bottom side of the quilt. |
|
| Now place the backing on a flat surface (table) face down. Spread the batting over it and spread your working piece over the batting. Pin all layers together with 1" pins and start quilting. |
| With an invisible thread, quilt around the embroidery boundaries. This quilting will help to keep the embroidery in place and give a trapunto effect. Continue quilting with a cotton thread. On the white background we placed meandering with white thread. If you like, you can quilt in the ditch around the blocks and along the sashing and borders. Work with one block at a time.
We did not quilt in the ditch, but quilted everything free-motion with contrasting threads. We used the free-motion to create outlines of different fruit, leaves and flowers.
|
| Press the quilt with heavy steam. Square the quilt and finish the edges with binding. We made binding out of the same yellow fabric we used in the quilt top. |
|
|
Back to Dwarves with Fruit Set
|
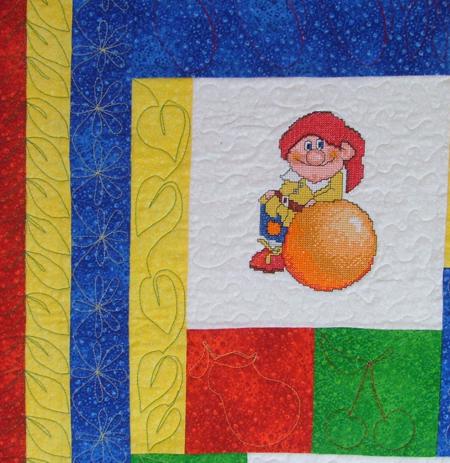
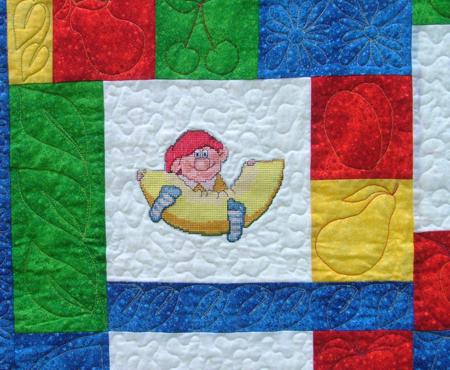
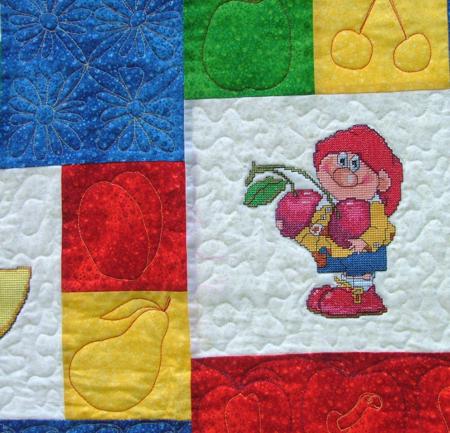
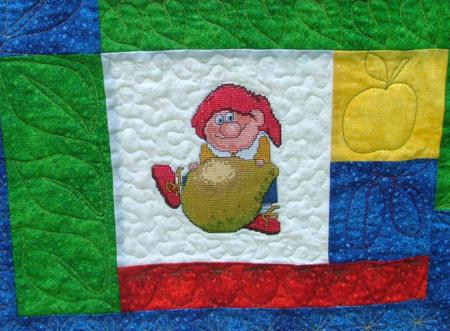
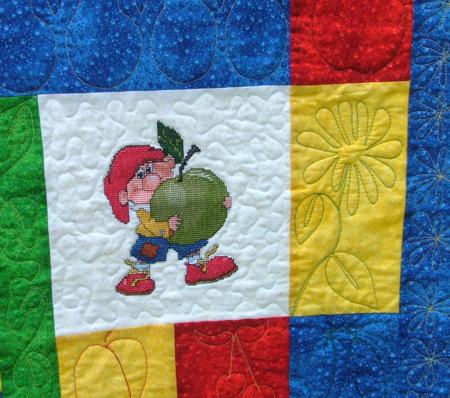
| Here are some close-ups of the quilt: |
|
| The dwarf with orange. |

|
| The dwarf with current. |
|
| The dwarf with melon. |
|
| The dwarf with cherry. |
|
| The dwarf with pear. |
|
| The dwarf with apple. |
|
| We hope that you liked our idea and will come up with many of your own. |
|
Back to the Projects Page
|


