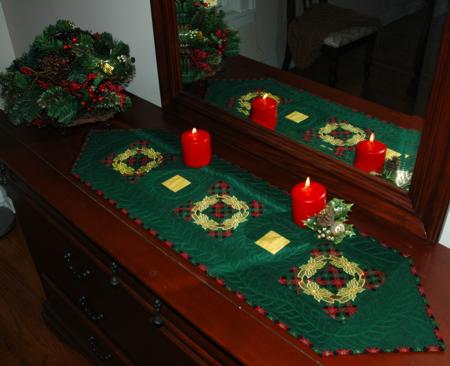
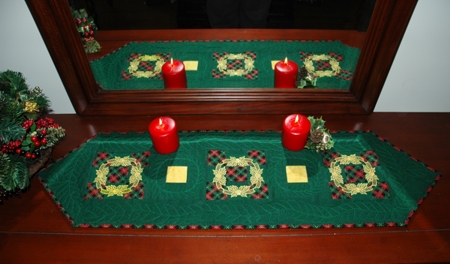
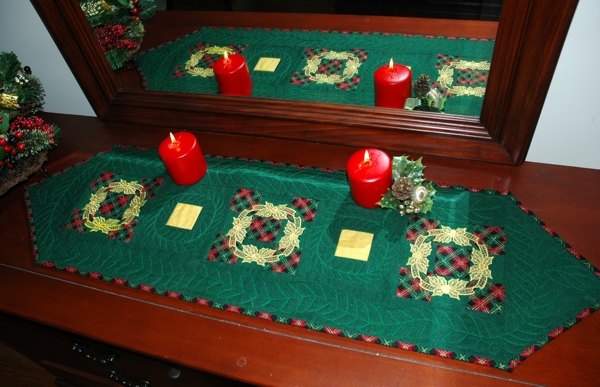
This handsome table runner is easy to piece together, and makes a charming center-piece. The bright, golden yellow embroidery beautifully accents the red and green tones of the fabric. We used the designs from the Christmas Border Set II.
The finished size of the tablerunner is 42" x 12".
We used 3 different 100% cotton fabrics: bright yellow - 2 squares measuring 2 1/2" x 2 1/2"; 1/4 yard of checkered fabric; 1/2 yard of forest green fabric.
You will also need fabric for the backing and a piece of batting.
Cutting and Assembly:
All measurements are based on 40" wide fabric and include 1/4" seam allowance. Out of the checkered fabric: Cut 5 strips 2 1/2" wide and as long as the width of the fabric. Subcut one of the strips into 15 squares 2 1/2" x 2 1/2". Use the other four strips for the binding.
Out of the forest green fabric, cut: A strip 2 1/2" wide and as long as the width of the fabric. Subcut the strip into 16 squares measuring 2 1/2" x 2 1/2" and 2 strips measuring 2 1/2" x 6 1/2". Two strips 3 1/4" wide and 30 1/2" long. Two rectangles measuring 12" x 6".
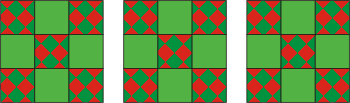
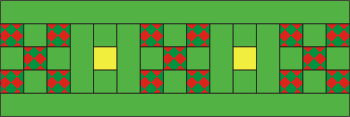
Assemble the 15 checkered and 12 green squares into 3 nine-patch blocks:
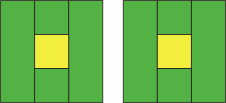
Assemble the 2 yellow and 4 green squares and strips into 2 blocks:
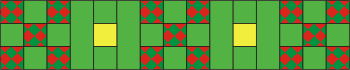
Sew the blocks into a row, alternating them. Start and finish with the nine-patch.
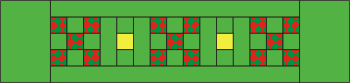
Add the green borders to the long sides:
Add the green borders to the short sides:
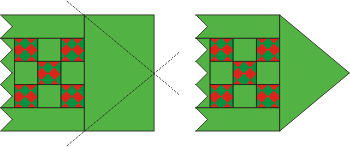
Mark the middle point on one of the short sides. Using a ruler and a roller cutter, cut away the corner. Repeat for all four corners of the table runner, to give it tapered ends.
Embroidery:
Make the embroidery over the nine-patch blocks. We used threads to match the golden yellow of the yellow squares. Use any cut-away stabilizer. We used the designs from the Christmas Border Set II.
After the embroidery is finished, press the piece, make a quilting sandwich and quilt it in a free-motion style.


