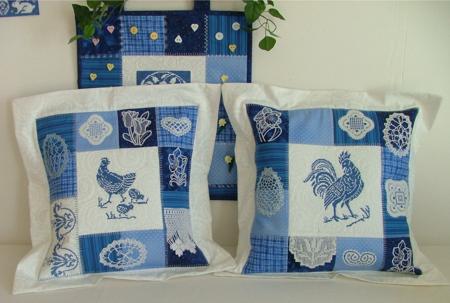
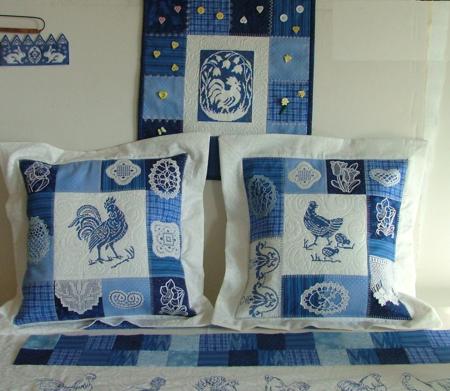
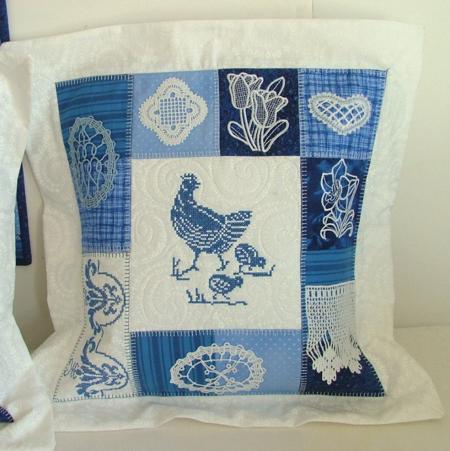
These quilted pillows embellished with spring-themed embroidery are fun and easy to make. They are a beautiful addition to your home decor in the coming season. We chose a blue and white color scheme, but you can choose any combination you like.
The finished size of the pillow shells is 18" x 18". They will fit 14" x 14" pillow shapes.
We used scraps of different blue fabrics, about a yard of white cotton fabric and 2 pieces of white polyester felt measuring about 16" x 16".
For embroidery on fabric, we used embroidery rayon threads and cut-away stabilizer. For the lace motifs, we used cotton Signature thread and water-soluble mesh.
The embroidery designs we used are: Porcelain Chicken Family Set, Flower Embellishment Set III, Porcelain Motif Embellishment Set, FSL Crochet Easter Egg Set, FSL Battenberg Miniature Lace Set, FSL Crochet Shell Doily Set, Tulip FSL Chrochet Edge Lace, and FSL Crochet Dangling Flowers Border.
Embroider several flowers on different blue fabrics.
Embroider the lace on water-soluble mesh according to the intructions you received with the lace designs.
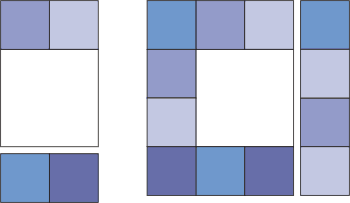
For each pillow, cut 12 squares measuring 4" x 4" out of different blue fabrics. Some of your blue squares should already have flower embroidery from the previous step.
Out of white fabric, cut one 7 1/2" x 7 1/2" square for the center of the pillow;
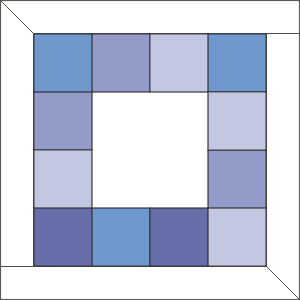
four strips measuring 2 1/2" x 20" for the borders, and
two rectangles measuring 18" x 12" for the back of the pillow
All seam allowances are 1/4". Assemble the pillow's front panel according to the diagram below. First stitch the blue squares into two pairs. Attach them to the top and bottom of the 7 1/2" x 7 1/2" white square. Then, stitch the rest of the blue squares into two strips of four squares each. Attach them to the left and right of the working piece.
Attach the white borders. We made mitered corners. Use your favorite method. You can also make borders with boxed corners.
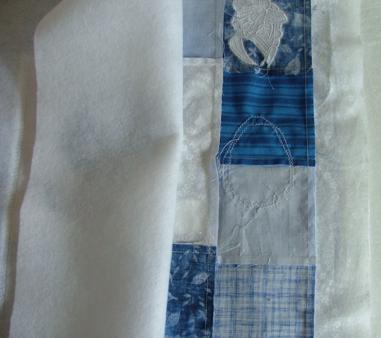
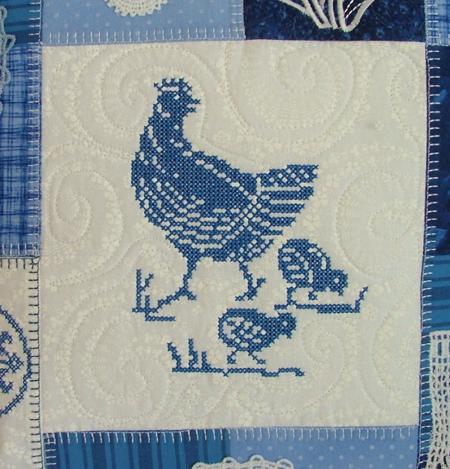
Spread the pillow's front panel over the polyester felt. Hoop the central white square and felt and embroider a rooster or hen from .... The felt will serve as a stabilizer.
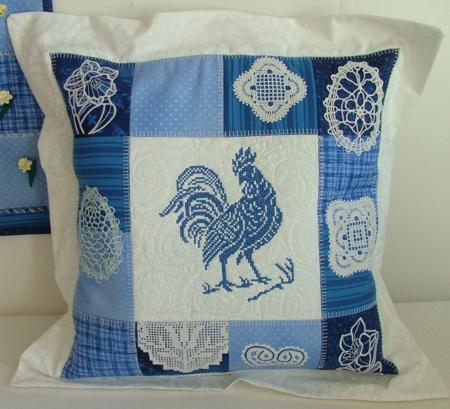
Using zig-zag and matching thread, attach the lace to the blue squares. When attaching lace, stitch it only to the fabric, folding the felt out of the way.
Press your working piece. Start quilting. Echo-quilt aroung the central embroidery, then free-motion quilt the white square.
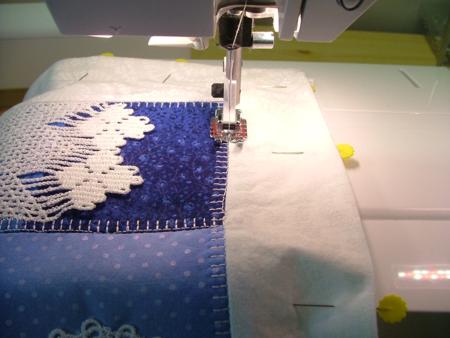
Using a blanket stitch from your sewing machine, stitch around the central white square, then along the inner edge of the white borders.
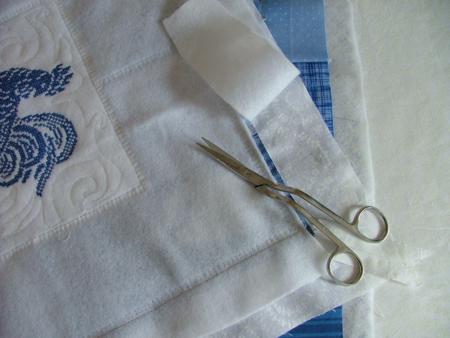
Turn the working piece face down and with a pair of sharp scissors, cut away the excess felt as close to the stitches as possible.
To make the back panel, take the two 12" x 18" rectangles. Place them on your working table face down. Working with one at a time, fold back 1" on one 18" long side and press. Fold back another 1" and press. Using a blanket stitch, stitch in place. Repeat for the second rectangle.
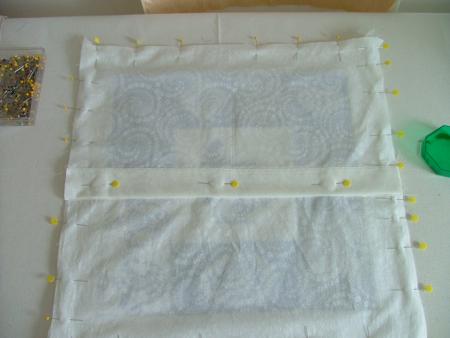
Place the front panel on your working table face up. Cover with both the back rectangles, face down. The back rectangles should overlap each other. Align all sides.

Pin the edges of the front panel and back panels together.
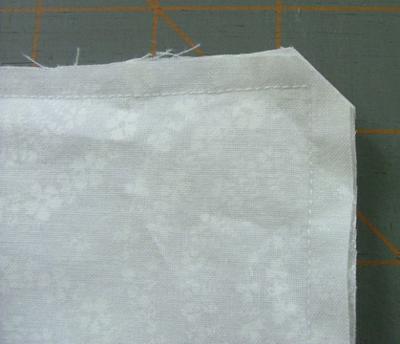
Stitch around all the edges. Seam allowance is 1/4".
Cut away the corners as shown below:
Turn the pillow out. Press. Top stitch along the blue borders of the front panel to make flange.
Insert a pillow shape into the shell. Your pillows are ready. Enjoy!
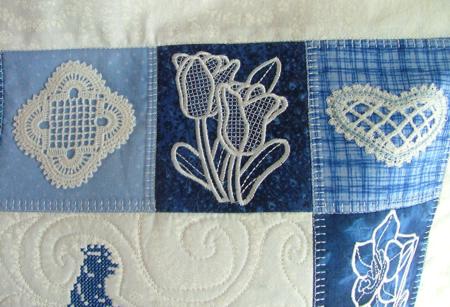
Here are some more close-ups:
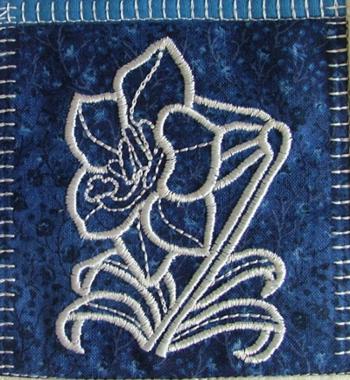
The flower design is from the Flower Embellishment Set III.
The egg design is from the FSL Crochet Easter Egg Set.

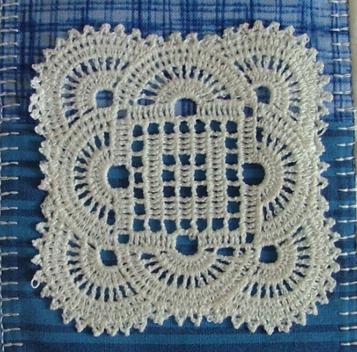
The lace design is from the FSL Crochet Shell Doily Set.
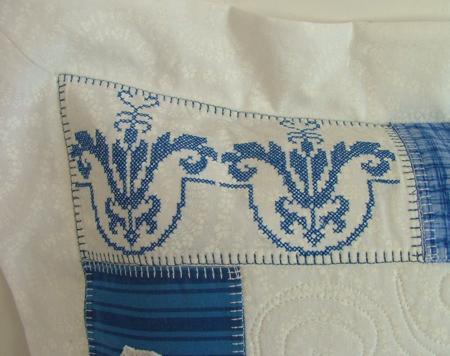
The decoratif motif is from Porcelain Motif Embellishment Set.
We hope that you liked our idea and will come up with many of your own.