The idea of removing disposable plastic bags from our supermarkets and exchanging them for reusable canvas bags is becoming more popular every day. Plastic is not normally found in nature, and when plastic bags are thrown away, they stay around for thousands of year, cluttering up the natural environment and presenting a hazard to animals. Not to mention that plastic bags just look ugly.
It will take you about half an hour to make a plain canvas tote. An easy way to add a little spice is by using machine embroidery. By the time you're done, you'll have a one of a kind and very special bag for your groceries. It's easy to make different totes of varying sizes to give to your family and friends.
For our totes, we used the Cherry Cutwork Appliqué Lace and Fruit Appliqué Set
designs.
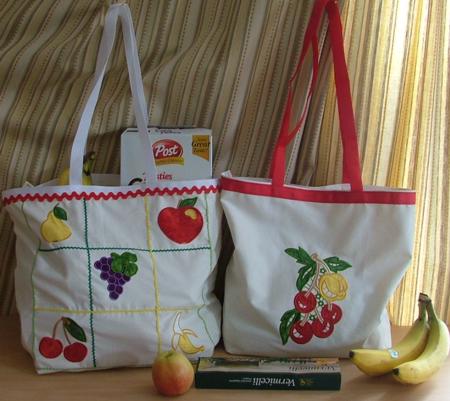
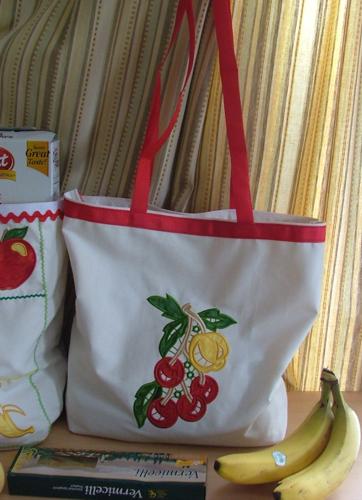
The finished size of the tote on the left is 15" long x 16" high x 7" wide. The finished size of the tote on the right is 13" long x 15" high x 5" wide.We describe how to make both of them in this project.
You will need canvas or duckcloth for the totes, webbing (about 3 yards per tote), rick rack of different colors and widths and scraps of cotton fabrics for applique.
Step One:
Out of canvas cut 2 rectangles measuring 23" x 21".
Cut the webbing into 2 pieces 23" long, and 2 pieces 34" long. The latter pieces are for the handles, so you can adjust their length to fit your needs.
Step Two:
Place both canvas pieces wrong side to wrong side and cut 3 1/2" x 3 1/2" squares out of the left and right bottom corners.
Step Three:
Finish all the raw edges of each piece with a zig-zag stitch.
Fold the upper edges of both pieces 1" to the right side and press with a hot iron.
Step Four:
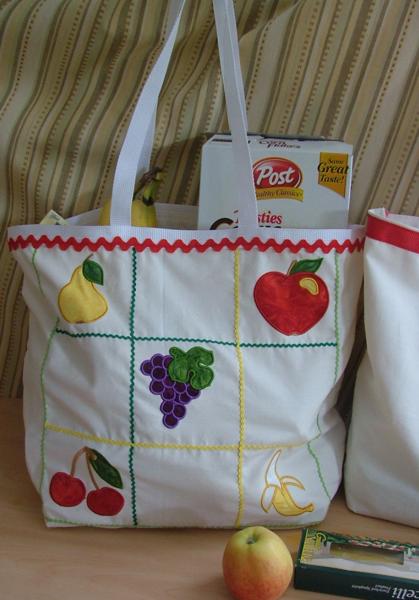
Using a fabric marker or a graphic pencil draw the following grid on the front piece:
In the grid cells embroider the fruit appliqué from the Fruit Appliqué Set. We used designs for a 4" x 4" hoop.
Step Five:
After the embroidery is finished, press with steam. Attach pieces of rick rack over the drawn grid lines. We used the very fine "baby" rick rack.
Step Six:
Place both panels of the tote right side up. Place 23" pieces of the webbing along the upper edges and pin in place. Tuck the ends of the handles under the webbing, 8" from each side.
Stitch the webbing to the panels, attaching the handles.
Step Seven:
Place both panels of the bag right side to right side. Stitch the pieces together along the bottom edge, leave 1/2" of seam allowance. Press the seam open and topstitch 1/4" on each side of the seam.
Step Eight:
Put the right sides together again and stitch the pieces along the two side edges, leaving 1/2" seam allowance. Press the seams open and topstitch 1/4" on each side of the seam.
Step Nine:
Now pinch each corner so that the end of the side seam matches the end of the bottom seam (see the diagram below; the ends of the side seams and the ends of the bottom seams are marked in red). Pin. Stitch through all the layers across the bottoms of the corners (see the last picture in the diagram below). This will square the bottom of the bag. Now you can turn the bag right side out.
Turn the working piece right side out. The first tote is ready.
Step One:
Out of canvas, cut 2 squares measuring 19" x 19".
Cut the webbing into 2 pieces 19" long, and 2 pieces 34" long. The latter pieces are for the handles, so you can adjust their length to fit your needs.
Step Two:
Place both canvas pieces wrong side to wrong side, and cut 3" x 3" squares out of the left and right bottom corners.
Step Three:
Finish all raw edges of each piece with a zig-zag stitch.
Step Four:
Embroider the the Cherry Cutwork Appliqué Lace design in the center of the front panel. We did only appliqué, and did not do the cutwork.
Step Five:
Place both panels of the tote right side up. Place 19" pieces of the webbing along the upper edges and pin in place. Tuck the handles under the webbing, 7" from each side.
Stitch the webbing to the panels to attach the handles.
Follow Steps 6-9 of the first tote to assemble.
We hope that you liked our idea and will come up with many of your own.


