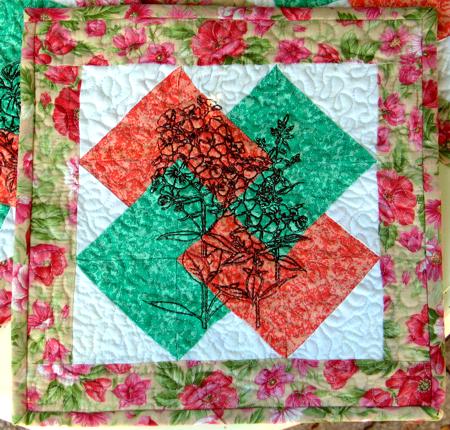
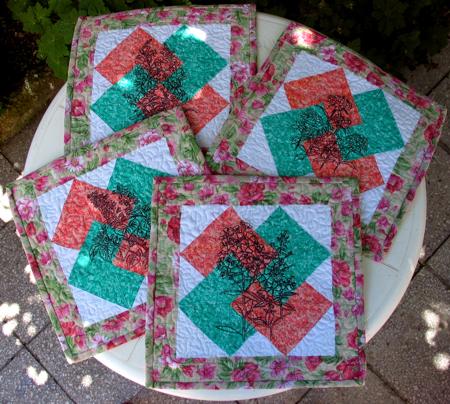
These quilted placemats are based on the "Card Trick" block. They're extremely easy to make, look absolutely charming and are a great exercise in piecing and machine embroidering.
We used the the designs from the Redwork Wild Flowers Set to quilt and embellish the placemats.
The finished size of each placemat is about 16" x 16".
For each placemat you will need 4 fabrics: white or light cream (a fat quater), green (a fat quarter, pink (a fat quater) and about a 1/4 yard of patterned green-and-pink fabric for the borders and binding. You will also need backing and batting, each piece measuring about 18" x 18". Please note that we give the requirements for 1 placemat.
Out of white fabric, cut 2 squares measuring 4 7/8" x 4 7/8", and
2 squares measuring 5 1/4" x 5 1/4".
Out of green fabric cut 2 squares measuring 4 7/8" x 4 7/8", and
2 squares measuring 5 1/4" x 5 1/4".
Out of pink fabric cut 2 squares measuring 4 7/8" x 4 7/8", and
2 squres measuring 5 1/4" x 5 1/4".
Out of patterned green-and-pink fabric, cut 2 strips measuring 2" x 12 1/2" and 2 strips measuring 2" x 16". Also cut 2 strips 2" wide and the length of the width of the fabric for the binding.
For this block you will need to make nine squares:
two white-pink half-square triangles;
two white-green half-square triangles;
two pink "Rocky Mountain"squares;
two green "Rocky Mountain"squares;
one pink-green quater-square triangle.
Step One: Take a pink 4 7/8" x 4 7/8" square and cover it with a white 4 7/8" x 4 7/8" square, face-to-face. Align all edges.
With a sharp graphic pencil draw a diagonal from one corner to the other. Stitch a scant 1/4" on each side of the line.
Press the unit, and cut along the line. Open the two new squares, and press the seams towards the dark fabric.
You will get two pink-white 4 1/2" squares. Set them aside for a while.
Repeat for the green fabric to get two green-white squares.
Step Two: Take a pink 5 1/4" x 5 1/4" square and cover it with a white 5 1/4" x 5 1/4" square, face-to-face. Align all edges.
With a sharp graphic pencil draw a diagonal from one corner to the other. Stitch a scant 1/4" on each side of the line.
Press the unit, and cut along the line. Open the two new squares, and press the seams towards the dark fabric.
You will get 2 pink-white 4 7/8" squares.
Take each of the new pink-white squares, and place it on top of a green 4 7/8" x 4 7/8" square, face-to-face. Align all edges.
Draw a line from one corner of the square to the opposite one, making sure to bisect each of the two fabrics. Stitch a scant 1/4" on each side of the line.
Press the unit and cut along the line. Open the new squares. You will have two new green "Rocky Mountain" squares needed for the block.
Repeat the procedure, but switching the green and pink fabrics to get two more blocks:
Step Three: Take a pink 5 1/4" x 5 1/4" square and cover it with a green 5 1/4" x 5 1/4" square, face-to-face. Align all edges.
With a sharp graphic pencil draw a diagonal from one corner to the other. Stitch a scant 1/4" on each side of the line.
Press the unit, and cut along the line. Open the two new squares.
You will get 2 green-pink 4 7/8" half-square triangles.
Now place these squares, face-to-face, so that the pink corner of one falls on top of the green corner of the other. Align all edges.
Draw a line from one corner of the square to the opposite, making sure to bisect each of the two fabrics. Stitch a scant 1/4" on each side of the line.
Press the unit and cut along the line. Open the new squares. You will have 2 new squares. You need only one of them for the Card Trick block. Save the second one for the next placemat.
Assemble the block by the rows as shown:

Add the borders. First attach the left and right borders (patterned strips measuring 2 x 12 1/2"), then attach the upper and lower borders (patterned green strips measuring 2" x 16")
Now place the backing on a flat surface (table) face down. Cover with low-loft batting. Spread your working piece over it. Baste along the borders in the ditch. Hoop and make the embroidery on the block through all three layers.
Rip the baste and quilt with stippling all over the mat.
After the quilting is finished, press the work with heavy steam and square the work -- all corners should be 90 degrees and opposite sides should be of the same length.
Finish the raw edges with the binding.