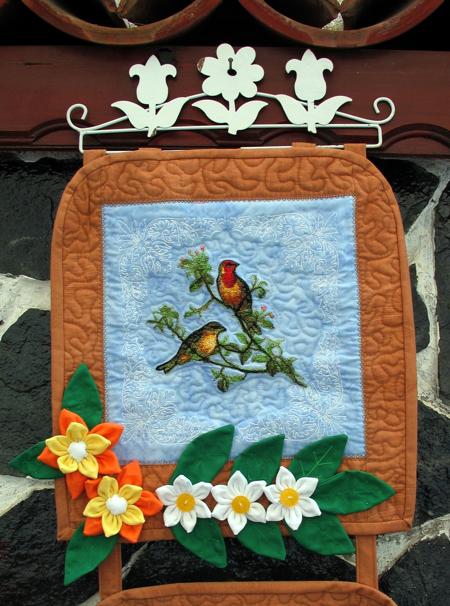
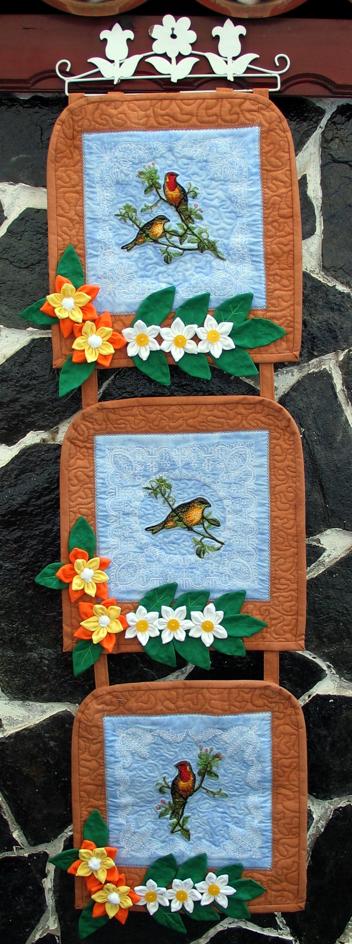
This quilted wallhanging is easy to make, but has a very interesting, original look.
We used the designs from the Red-Faced Woodland Warbler Set and Redwork Flower Corner Set.
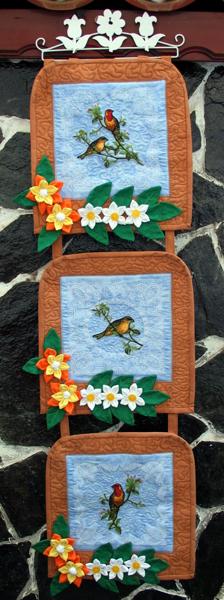
The finished size of the wallhanging is about 12" x 41".
You will need 2 fabrics: light blue for the central parts of the blocks (about 1/2 yard), and light brown for the borders, binding and hanging loops (about 1/2 yard). You will also need backing and batting, 3 pieces measuring about 14" x 14".
For the 3D flowers, use scraps of white, green, red, orange, or any other colors you like.
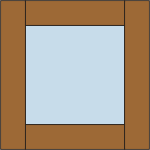
Out of blue fabric, cut 3 squares measuring 8 1/2" x 8 1/2".
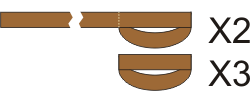
Out of brown fabric cut 6 strips measuring 2 1/2" x 8 1/2" and 6 strips measuring 2 1/2" x 12 1/2". For the binding and hanging loops, cut 8 strips 2 1/2" wide and the length of the width of the fabric.
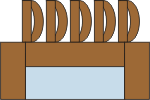
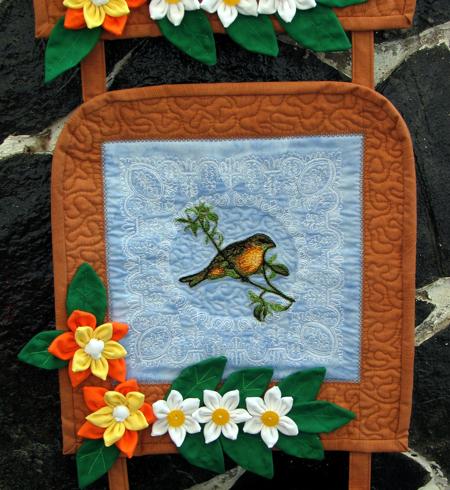
Assemble 3 blocks, like the one shown below:
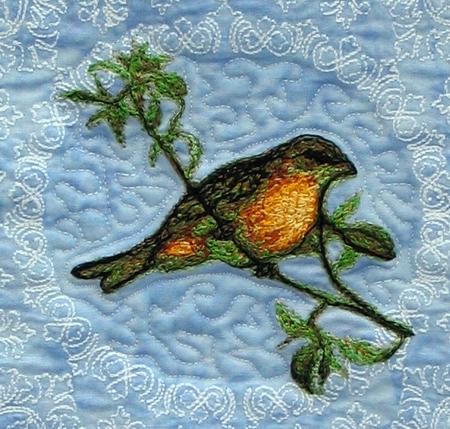
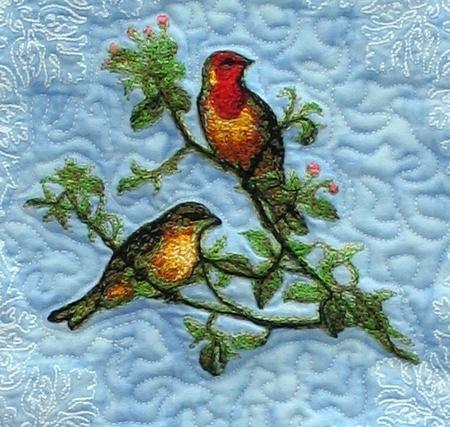
Stabilize the central part of each block with iron-on cut-away stabilizer. Make the embroidery. Cut away the excess stabilizer.
First we embroidered the redwork designs from the corner set, which make the frame for the embroidery of the bird. We embroidered the birds after the redwork designs.
Now place the backing on a flat surface (table) face down. Cover with batting. Spread your working piece over it.
Pin all three layers together with 1" pins and start quilting. We quilted along the lines of the bird embroidery and made stippling inside the redwork frame and on the brown borders.
After the quilting is finished, press the work with heavy steam and square the work -- all corners should be 90 degrees and opposite sides should be of the same length. You can leave the three small quilts square, or you can slightly round the upper corners, as we did.
Finish the raw edges with the binding, using 5 strips measuring 2 1/2" x 40"-42".
Take the remaining 3 strips measuring 2 1/2" x 40"-42" and join them to get one long strip.
Fold the strip lengthwise and stitch 1/4" from the raw edge.
Turn the tube the right side out. Press. Topstitch 1/8" from both long edges.
Cut the strip into 2 strips 46" long and 3 strips 5" long.
Fold one end of each 46" long strip 2 1/2" back and topstitch to make a loop.
Fold the three 5" long strips in half and topstitch 1/4" from the raw edge to make a loop.
On your working table, place the long strips parallel to each other. Position the quilted panels on the strips, starting with the upper one. The strips should be behind the quilt borders. Pin the quilt to the strips from the face side.
Possition the second quilt on the strips about 2" lower. Pin from the side of the quilt.
Possition the third quilt in the same way. Topstitch in the ditch to secure the quilts to the strips.
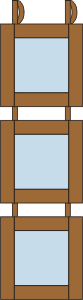
Attach the remaining loops to the top of the first quilt.
To make the 3D flowers, we used the instructions of Laura Ingalls Wilder (https://sewritzytitzy.blogspot.com/2008/11/from-annas-gardenfabric-flower-tutorial.html)

Here are some more close-ups:


