Our FSL Bowls are embroidered in the same way as ornaments. So please read the General Guidelines first.
Some points to remember from the General Guidelines:
Use Vilene water soluble stabilizer;
Use the same thread for the upper and bobbin to get two-sided embroidery.
DO NOT embroider several designs in one hoop.
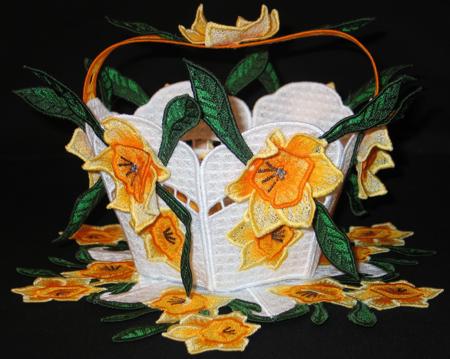
These are the instructions on how to assemble the Daffodil Bowl, Basket and Doily Set from our catalog.
Along with the embroidery files, you will get the color card, which will help you to select the threads, and also sort out the many parts of the design.
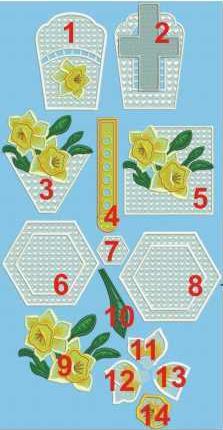
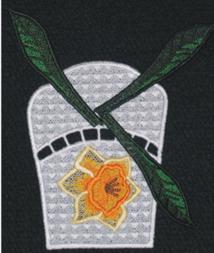
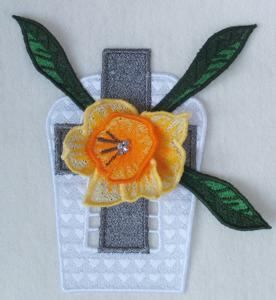
Step One: To make a bowl, you'll have to embroider six panels. You have a choice of two. You can embroider either six daffodil panels (marked "1" on the picture), or six cross panels (marked "2" on the picture). You can also embroider three of one kind and three of the other and alternate them. The choice is up to you.
Use 2 layers of water-soluble Vilene stabilizer; use the same thread for both the needle and the bobbin. If you embroider the cross with metallic thread, use a special needle for metallic threads.
Rinse away the stabilizer and leave to air dry.
Step Two: Now you need to choose the correct design for the bottom of the bowl. Choose the file called "polygonBowl" (marked "6" on the picture) if your panels are with daffodils. Choose the file called "polygonCross" (marked "8" on the picture) if your panels are with crosses or a mix of crosses and daffodils.
Embroider the design. Rinse away the stabilizer and leave to air dry.
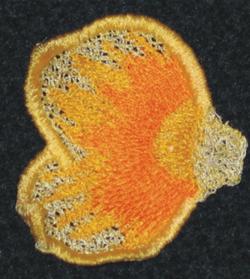
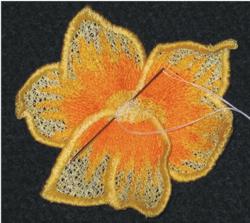
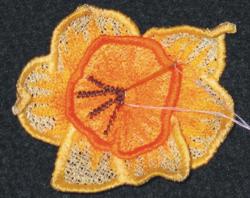
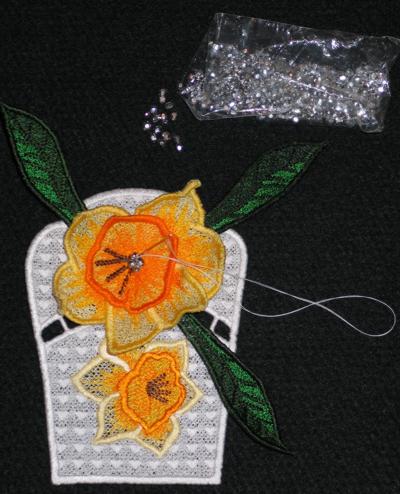
Step Three: To make a 3D daffodil, first embroider its parts (marked 10-14 on the picture). Use the same thread for the needle and bobbin.
Rinse the stabilizer and leave to air dry. Do not press them! This way, the part will have a more natural crinkled appearance. Start assembling the flower as shown on the photos below.
 |
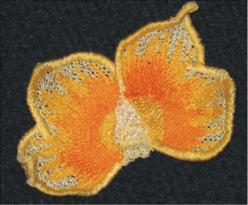 |
First arrange the petals (parts 11-13) and sew them together, then sew middle part of the flower (part 14) over the petals.
 |
 |
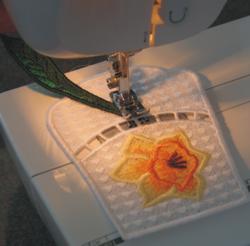
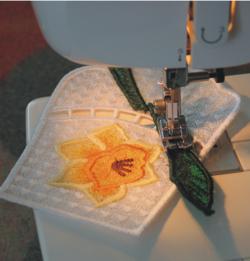
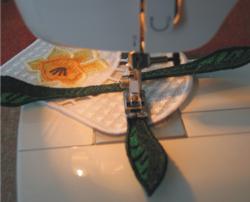
Step Four: Machine-stitch the leaves (part 10) onto the bowl panels, as shown on the photos:
 |
 |
 |
 |
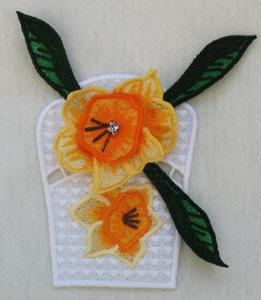
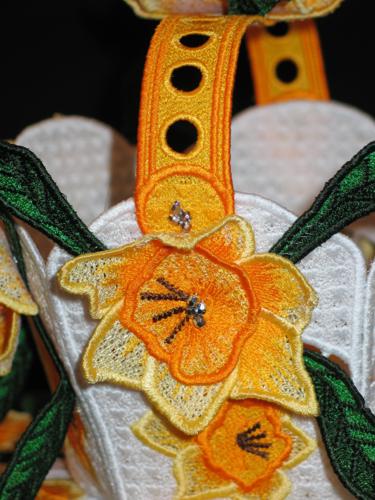
Step Five: Place the flower over the leaves and stitch it to place. Use small beads to decorate the stitches.
 |
 |
Step Six: Now assemble the bowl, as instructed in Assembling a Freestanding Bowl.
Step Seven: If you are making a bowl, embroider the handle part twice (part 4 on the picture). Rinse away the stabilizer and air dry the parts. Place the straight ends together and zigzag them. Sew a 3D daffodil over the seam. Stitch the handle to the bowl. Use small beads to decorate the stitches.
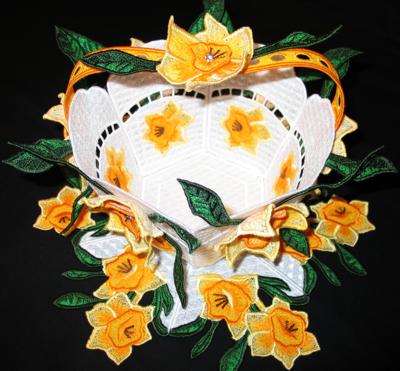
To make a doily (fig. 3 and 7 on the picture) you should embroider part 3 six times and part 7 once. Rinse away the stabilizer. Air dry. Press with steam and sew together using zigzag and invisible thread.
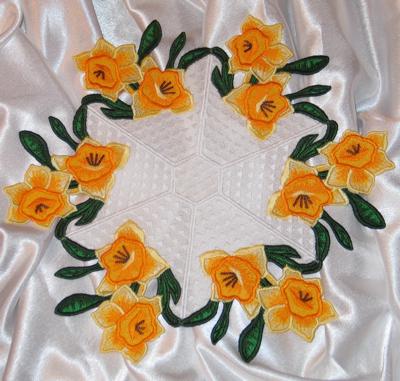
The square part (part 5 on the picture) is a coaster. If you wish, you can zigzag four coasters together to get a doily.
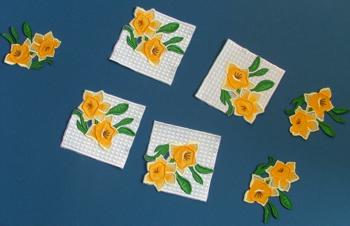
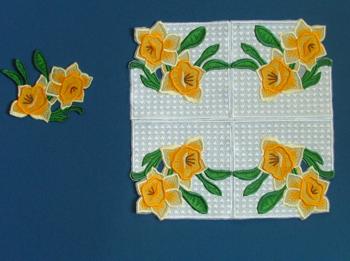
The two daffodils (part 9 on the picture) is a separate part that can be used for hang-up ornaments or for bookmarks.
We hope that you found this tutorial helpful. Enjoy!