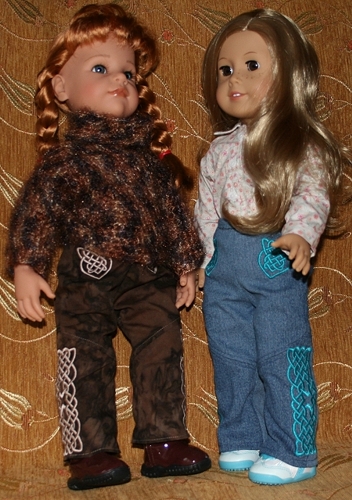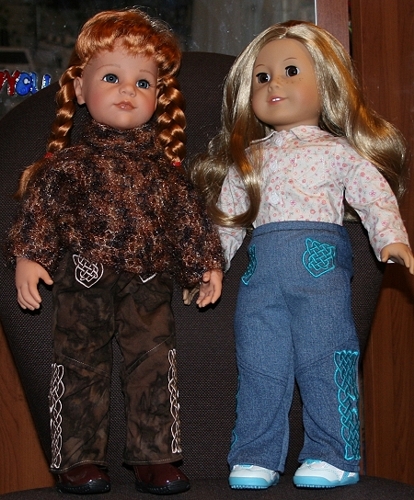
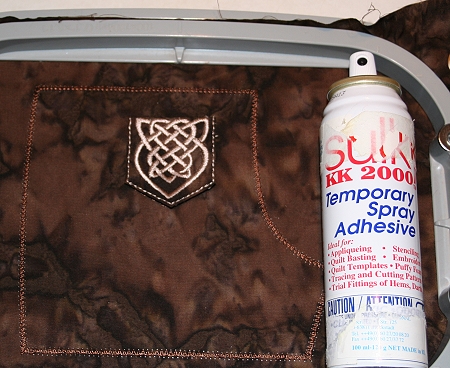
You will need a fat quarter of fabric, light-weight tear-away stabilizer, sticky water-soluble stabilizer, embroidery and sewing threads, an elastic tape for the belt and a temporary fabric adhesive (optional).
Step One: Hoop the fabric with light-weight tear away stabilizer. Embroider the file "pockets". Remove the stabilizer.
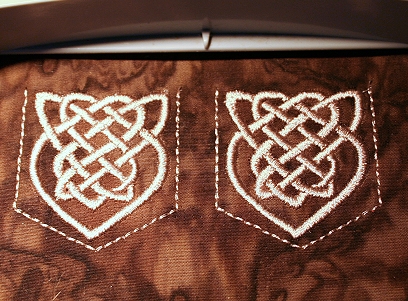
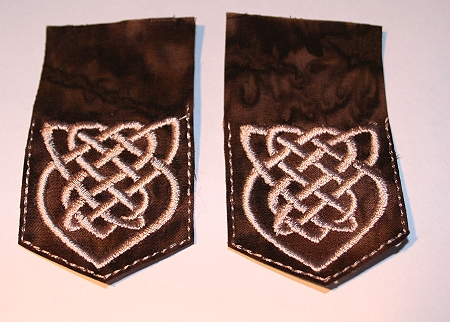
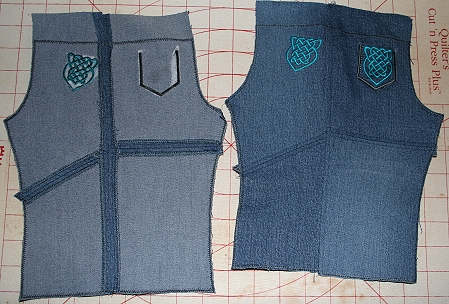
Cut the pockets out as shown on the photo below - leaving about 1/2" seam allowance on the top and about 1/8" around the outline. Turn the upper seam allowances to the back and press.
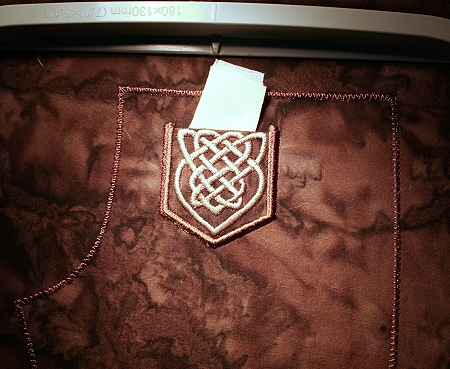
Step Two: Embroider the file "back-upper-1".
After the machine makes the outline of the pocket on the pants it will stop. Place the ready pocket on this outline, secure in place with a pin or a temporary fabric adhesive. Start the machine. It will stitch the pocket in place.
Repeat with the file "back-upper-2", which is a mirror image of the file "back-upper-1".
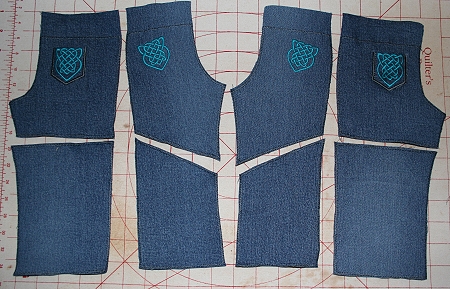
Step Three: Embroider the files: "back-lower-1", "back-lower-2", "front-upper-1", "front-lower-1", front-upper-2" and "front-lower-2". Remember to hoop the fabric so that the lengthwise grain runs parallel to the long sides of the hoop.
Step Four: Cut out all parts along the embroidered outline. Leave 1" seam allowance on all upper parts for the belt.
Step Five: Join the lower and upper parts. The seam allowance is 1/4". Press the seams open.
Step Six: Join the sides. The seam allowance is 1/4". Press the seams open.
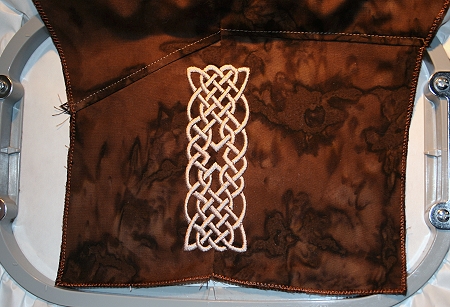
Step Seven: Hoop a piece of sticky watersoluble stabilizer. "Glue" the first half of the pants onto the stabilizer, right side up as shown on the photo below. Embroider the file "motif". Repeat for the second half of the pants.
Note: If you do not have a sticky watersoluble stabilizer, you can use "Solvy" heavy water soluble stabilizer. Hoop the stabilizer, moisten it a little bit and "glue" the working piece onto it. You can also use a mesh water-soluble or a heat-away stabilizer. Hoop the stabilizer and baste or pin the working piece onto it..
Step Eight: Finish the hem of the pants. You can either stitch it in place, or use a fusible web to "glue" it in place.
Join the inner seams on each half of the pants.
Step Nine: To join the halves of the pants, turn one half right side out. Place the right-side-out half into the wrong-side-out half.
Now match the raw edges and join the halves with one seam.
Turn the pants right side out.
Step Ten: Turn the upper edge of the pants inside and stitch in place, leave an opening for the elastic tape. Insert the elastic tape inside, join the ends and slip-stitch the opening.