Mobile Menu IconMenu
Advanced Embroidery Designs -- Online Center for Machine Embroidery Designs
Enter code ArborDay24 to get Crescent Moon Tree FREE with Any Order! Shop Now!

Step-by-Step Guide to Embroidering a Design That Consists of 2 or More Parts

If your machine doesn't have a large hoop and you wish to embroider a large design you have to embroider part of it, then rehoop and embroider another part. The biggest difficulty is connecting the parts seamlessly. Below are step-by-step instructions to accomplishing this often troublesome task.
Guide to Embroidering a 2-Part Design image 1
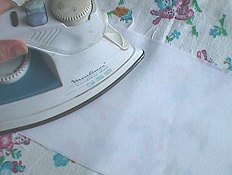
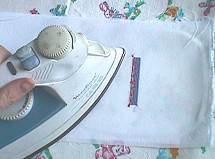
Step One: Iron the stabilizer onto the fabric.
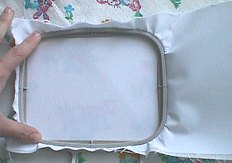
Guide to Embroidering a 2-Part Design image 2
Step Two: Hoop it.
Guide to Embroidering a 2-Part Design image 3
Step Three: Download the file Tutor1 and embroider it. Remove jump stitches.
Tutor1.pes
Tutor1.hus
Tutor1.dst
Guide to Embroidering a 2-Part Design image 4
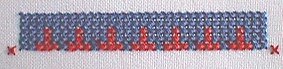
Step Four: The first part is ready.
Guide to Embroidering a 2-Part Design image 5
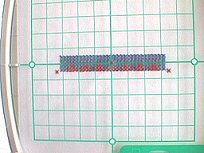
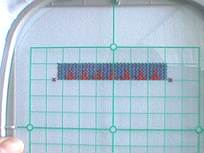
Step Five: This is how the first part of the sample looks in the hoop with the template. Please note the placement of the sample along the grid.
Guide to Embroidering a 2-Part Design image 6
Step Six: Take the fabric out of the hoop and iron it thoroughly.
Guide to Embroidering a 2-Part Design image 7
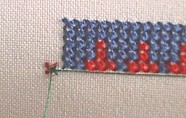
Step Seven: Now hoop the fabric again using the template. You have to move it to one side so there is enough space to embroider the second half.
Guide to Embroidering a 2-Part Design image 8
Step Eight: Download the file Tutor2 and load it onto your machine.
Tutor2.pes
Tutor2.hus
Tutor2.dst
Guide to Embroidering a 2-Part Design image 9
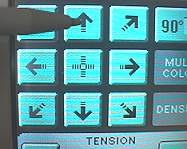
Step Nine: Using Layout & Trial on your machine place the X-marks of the second part to match the X-marks of the first part.
Guide to Embroidering a 2-Part Design image 10
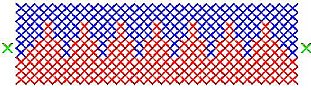
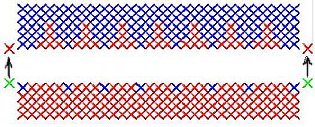
Step Nine: You may run the machine without the upper thread to check proper placement. Note that on the diagram the X-marks are green to make them more contrasting. These marks are sewn by the 'zero color', which is not on the color card. After they are embroidered, the machine will stop and embroidery of the actual design will begin.
Guide to Embroidering a 2-Part Design image 11
Step Ten: After you have matched the X-marks properly you can embroider the second part of the design.
Guide to Embroidering a 2-Part Design image 12
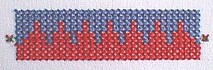
Step Eleven: Your sample is ready!
In some of our designs we use marks other than X to match the parts. Use the same procedure.

Oriental Flowers Series: Daffodil
Oriental Flowers Series: Poppy
Oriental Flowers Series: Camellia
Ship by Ivan Aivazovsky
Golden Autumn by Vasily Polenov
Small House
Small Cottage
Autumn by Konstantin Vasiliev
Mailing List
Enter your e-mail for news, discounts and exclusive special offers.


Find us on Twitter

Special Offers
Bonus design on all orders over $25
Coffee Coasters In-the-Hoop

Shop Now!

Announcement
Best Project Contest
The results are in!
Featured Project
Check out our latest project Birds and Blooms Quilted Tablerunner
Tutorials
Never heard of photo stitch? - Check out our What is Photo Stitch? page
Most Popular Designs
|| Home || Shop || Free Designs || New Designs ||
|| Projects || Tutorials || Links || About Us || Contact Us ||
|| Store Policy || Licensing || Accessibility ||

Social Media:

Copyright © Advanced Embroidery Designs. All Rights Reserved.