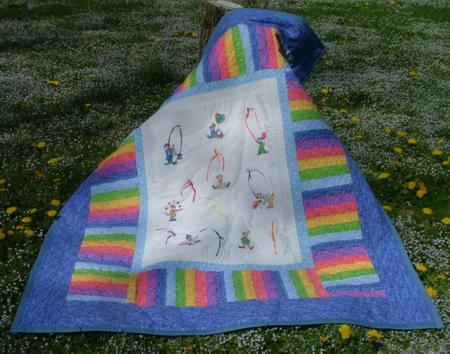
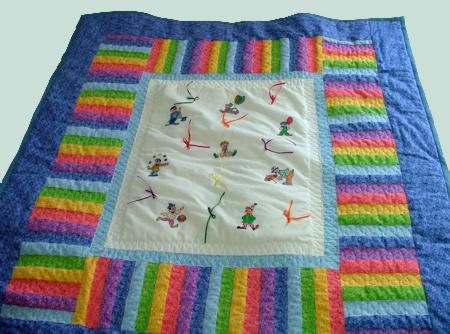
This clown quilt for kids uses the designs from Merry Clowns set.
The final size of the quilt is 52" x 58".
For the quilt, we used:
a 23" x 29" piece of plain white cotton fabric for the embroidered insert;
6 fabrics with the same pattern but in different colors (red, yellow, green, light blue, royal blue and purple), about 36" x 20" each;
About 30" x 8" of fabric for the inner borders (we used light blue)
About 58" x 20" of fabric for the outer borders (we used royal blue);
a piece of fusible polyester batting about 54" x 60";
cotton muslin for the backing measuring 54" x 60";
quilt binding tape;
tear-away or water-soluble stabilizer and
satin ribbons for decoration.
Pre-wash all fabrics.

Out of plain white cotton fabric, cut a central rectangle measuring 22" x 28" for the embroidery. Add 1/2" for seam allowance on each side.
Out of the light blue fabric, cut 2 strips 22" x 1" and 2 strips 30" x 1". Add 1/2" for seam allowance on each side.
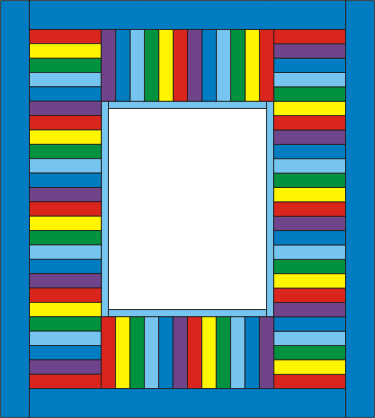
Out of the royal blue fabric, cut 2 strips 44" x 4" and 2 strips 58" x 4". Add 1/2" for seam allowance on each side.
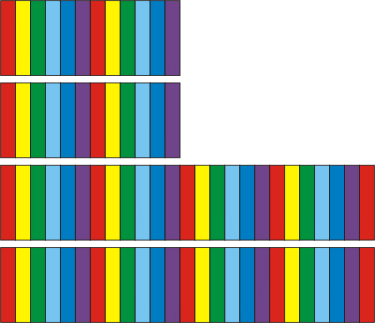
Out of the 6 colored fabrics, cut a total of 74 strips measuring 10" x 2". That means 12 strips of each color, plus two more of any color. Add 1/2" for seam allowance on each side.
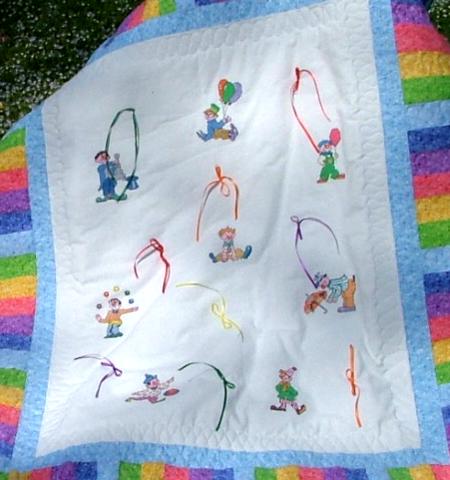
Print out snapshots of each design. Cut them out and arrange them on the white rectangle. Mark the place of each design with a removable fabric marker. Hoop the piece with tear-away stabilizer and do the embroidery. Remove the stabilizer.
Take the light blue strips and attach them to the embroidered piece. Press the seams and put this piece aside for a time.

Take 24 colored strips and sew them together in the following order: red, yellow, green, light blue, blue, violet. Press the seams.
Take another 24 colored strips and sew them together in the same order. Press the seams.
Take 30 colored strips and sew them together. Press the seams.
Tale the rest 30 strips and sew them together. Press the seams.
Attach the 20-strip pieces to the upper and lower edges of the embroidered piece.Press the seams. Attach the 32-strip pieces to the left and right edges of the embroidered piece. Press the seams.
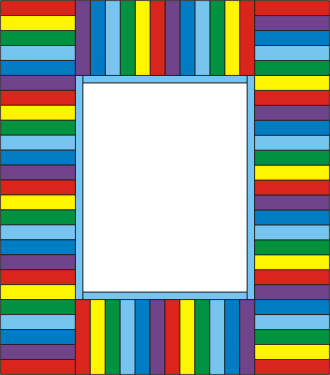
Now attach the borders.
On a large even surface, table or floor, spread the muslin backing, cover it with batting and then cover with the quilt's top. Pin all layers together with the safety quilter's pins.
Start quilting. We quilted using decorative stitches from our machine. Quilt all the field around the embroidered piece.
Now quilt and decorate the embroidered part with ribbons. Thread the darning needle with a thin satin ribbon about 8" long. Do not knot the end. Push the needle through all the way to come out on the other of the quilt. Push the needle back through approximately 1/8" away from where the needle came out.
Pull both ends of the ribbon and tie a knot and a bow. Repeat for other points.
Align all edges and finish with the quilt binding.

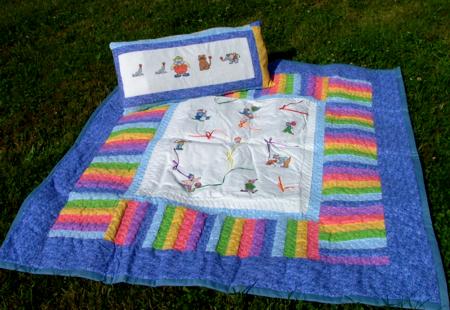
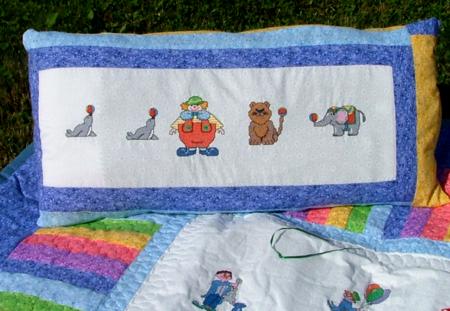
We used the left-over fabric to make a pillow, using embroideries from the Circus Set.


