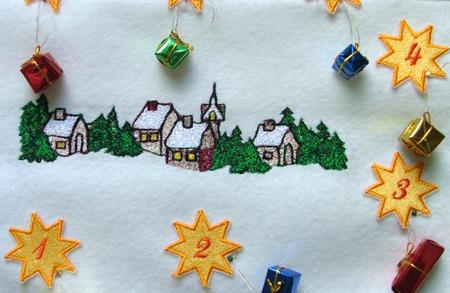
Advent, or Countdown to Christmas, Calendars are very popular for about 150 years. We offer our version of the calendar to you. The traditional Advent Calendar has 24 days to count down. In the United States the 25th day also appears for small kids to count it on the Christmas morning. That is why we prepared 25 stars, though we used only 24.
To make this lovely Countdown Calendar, we used the designs Angel with Stars, Countdown Stars Set (we used 24, you can use all 25), and Snowy Village. You will also need two pieces of white felt 12 " x 34" and about 14" x 36", bias tape 110" long, a rod 13" long and 1/4" in diameter, 24 (25) small chocolates and 24(25) pins (or hooks).
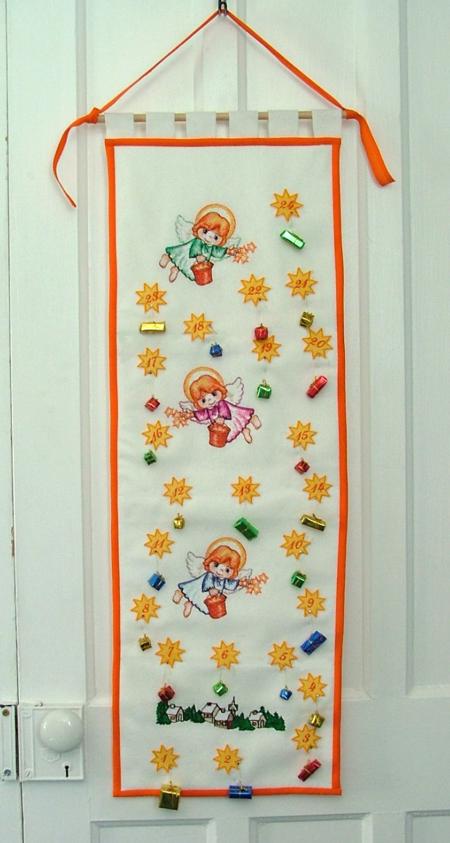
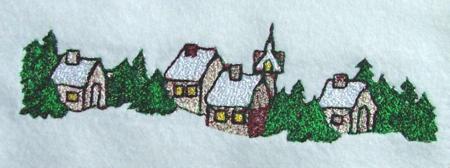
Step One: Take the larger piece of felt -- this is where we're going to embroider. With a removable marker mark the layout for the calendar. Start embroidering the Snow Village at the bottom.
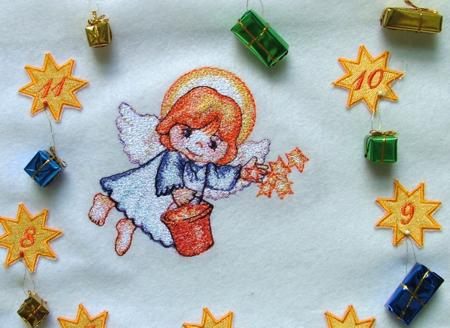
Step Two: Then re-hoop and embroidery the Angels. There is only one design, but it has three color cards. Flip the angel that goes in the middle to make it seem that they're going in different directions.


Step Three: After the village and the angels are done, embroider the stars. If you do not like the idea of rehooping multiple times, you can embroider the stars in neat rows on a separate piece of felt, cut them out and glue them to your working piece. In the latter case it is easier to fiddle with the position of the stars and find the configuration that you like best.
Step Four: After you finished with the embroidery, place your embroidered piece on a flat surface such as a table and trim it to a size of 12" x 34". Place it on top of the second piece of felt and pin both layers together.
Step Five: Use your bias tape and finish the raw edges.
Step Six: Out of scraps of felt, cut out 6 strips measuring 1 1/2" x 4" and stitch them as loops to the upper edge of the hanging.
Step Seven: If you're making the calendar for small children, take hooks and attach one under every star. If the calendar is for older kids and grown-ups you can use either safety pins or pins with decorative heads.
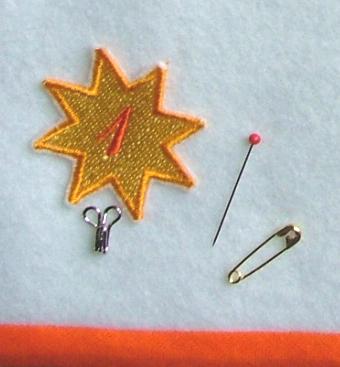
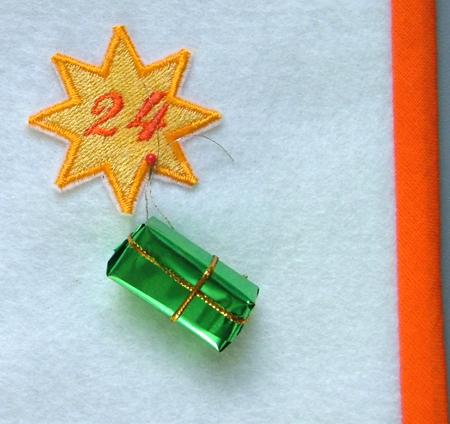
Step Eight: Slip the rod through the loops at the top and hang the calendar on a wall. Pin or hook small chocolates under every star.
Here are some more close-ups of the wall-hanging: