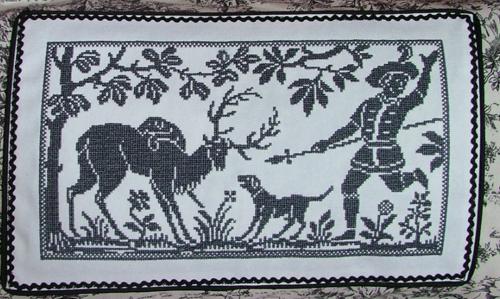
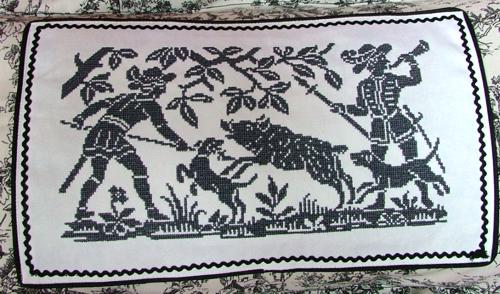
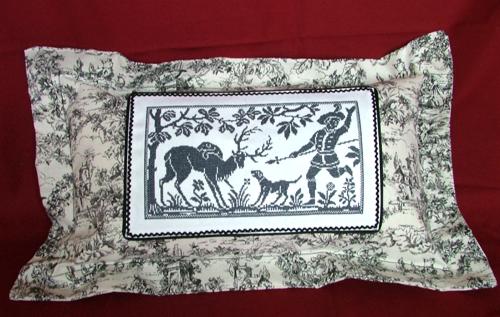
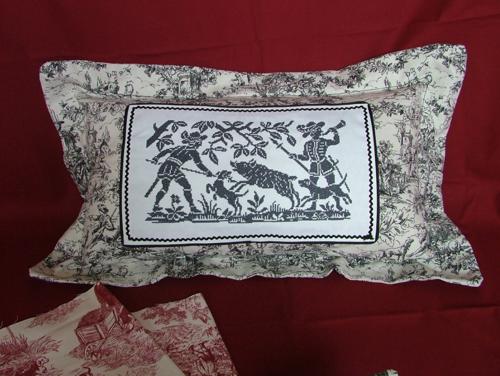
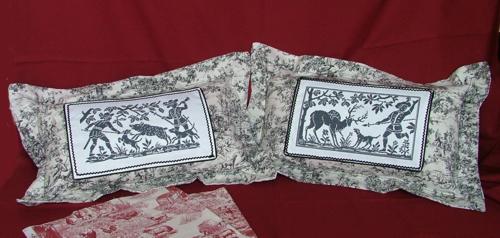
For these pillows we used the cross-stitch designs Tapestry Hunting Scene I and Tapestry Hunting Scene II. The designs match the toile fabric nicely and the pillows make a perfect gift for toile fans.The designs are one-colored, which means that you can choose any color to match the color of your toile. We embroidered them in pewter to match ours.
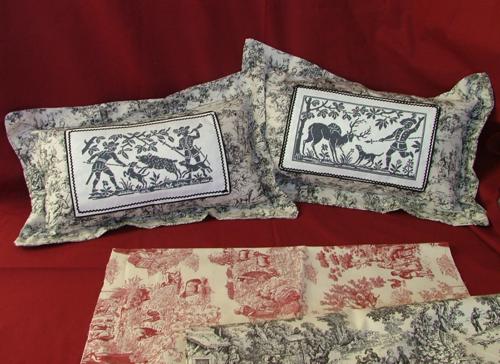
The pillows are rectangular flange pillows. The final size is about 26" x 16". For each pillow, you will need about 23" x 54" of toile, about 15" x 10" of plain cream or off-white cotton/linen blend fabric for embroidery, about 42" of black piping and 42" of small rick rack, about 16" of Velcro tape and a 12" x 22" pillow insert.
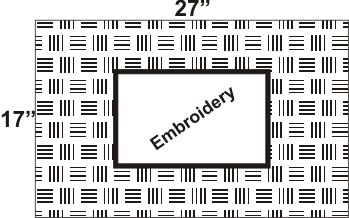
Step One: Embroider the Hunting Scene on a piece of the plain fabric, using a light-weight tear-away stabilizer. Iron the embroidery and cut out a rectangle around it measuring 13 1/2" x 8 3/4" , these measurements include 1/4" for seam allowance. Fold back 1/4" of the fabric, iron and baste the piping along the edges. Place rick rack 1/4" from the edges and machine stitch.
Step Two: Out of toile, cut the front of the pillow, a rectangle measuring 27" x 17", this includes 1/2" seam allowances. Mark the center. Pin the embroidered piece to the center and machine-stitch in place.
Step Three: For the back of the pillow, out of toile, cut two rectangles measuring 27" x 11 1/2", this includes 1/2" seam allowance.

Step Four: Fold back and press 1" twice on the long sides of both rectangles for a double fold. Edge-stitch or blind-stitch the hem in place.
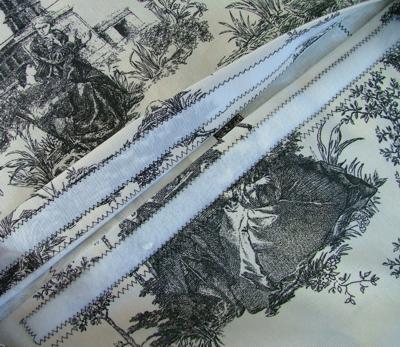
Step Five: Take 14-16" of Velcro tape. Sew one half of it to the front, top edge of one rectangle and sew the other half to the back, bottom edge of the second rectangle.
Step Six: Place the front part of the pillow on a table, face up, and cover it with the back part of the pillow, face down. Pin the edges and machine stitch them. Clip the corners. Turn right side out and press.
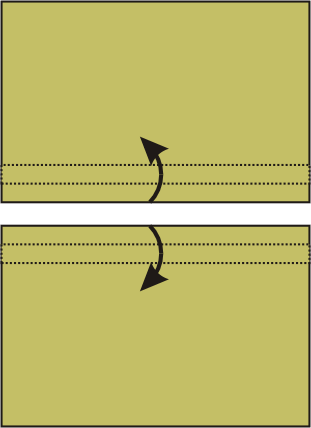
Step Seven: Measure 2" from the edges of the pillow cover to mark the depth of flange on each side. Pin layers together. Stitch over marked lines to form the flange.
Step Eight: Insert a pillow form into the pillow.
 |
 |
 |
 |


