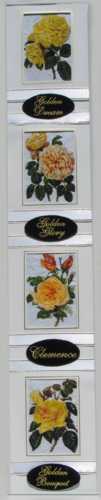
We made a wall hanging using all 4 pictures. It is supposed to imitate stained glass.

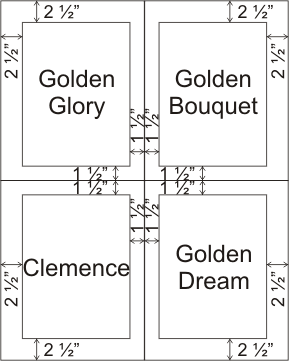
Step One: Embroider each picture separately. We used Timtex Interfacing without stabilizer. Then, draw fields around each picture and cut away the excess fabric. Make sure that the outer field is 1" wider than the inner field, like in the diagram below.
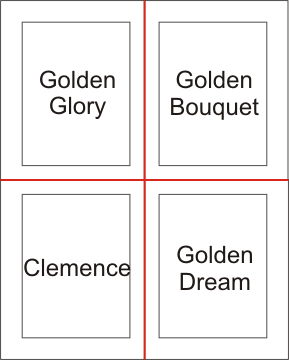
Step Two: Place the pictures together and connect using wide zigzag stitch. This is marked in red in the diagram below.
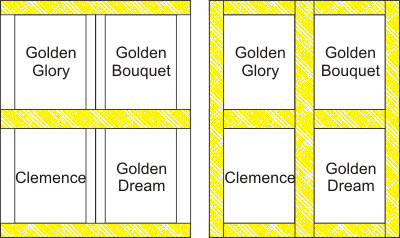
Step Three: Cover the fields with strips of pale yellow fabric and top stitch them in place. Do first the horizonal strips, then the vertical ones. We used a decorative stitch from our machine.
Step Four: Take two strips of 1/4" wide fusible bias tape, one of which should be about 18" long and the other 22" long, and press them onto the working piece as shown. If you do not have fusible bias tape, use an ordinary 1/4" wide single fold bias tape and fusible net. First press the fusible net onto the working piece, then take off the paper and press the bias tape onto the fusible net.
Step Five: Cut out a backing. Place the working piece face down and cover with fusible net. Iron onto the back of the working piece. Peel the paper off and cover with the backing. Press to glue the backing to the working piece.
Step Six: Finish the raw edges with the black quilt binding (double fold bias tape).
Step Seven: Out of quilt binding cut four pieces 6" long each. Fold to make loops and stitch to the back of the wall hanging close to the upper edge. Insert a rod. Tie a piece of cord with tassels to the ends of the rod.

You are basically finished. If you'd like to attach the tags with the roses names, then embroider them as freestanding designs. You'll need fabric-like water-soluble stabilizer (Vilene).
Use 2 layers of Vilene-type water-soluble stabilizer; use the same thread for both the needle and bobbin to get 2-sided embroidery.
Rinse the stabilizer and leave to air dry. Press with steam. Stitch in place.
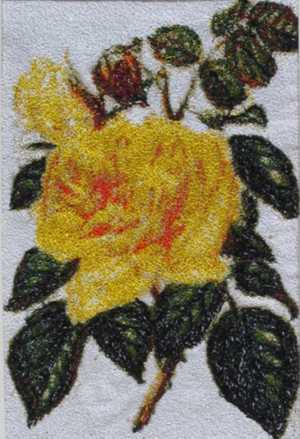
Golden Bouquet
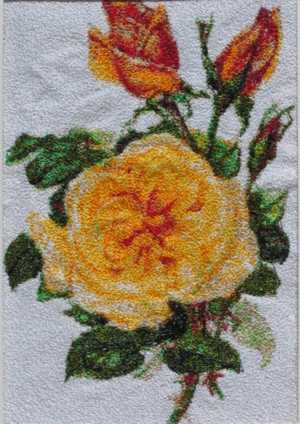
Clemence
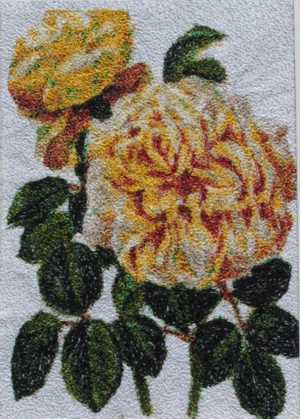
Golden Glory
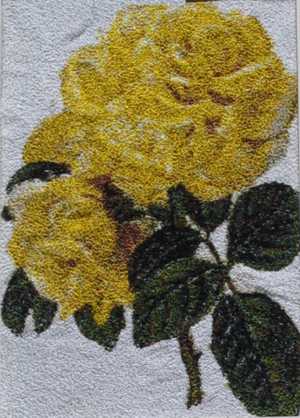
Golden Dream
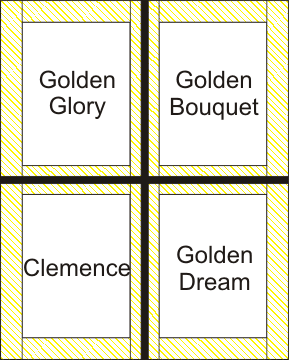
| Of course, each picture can be framed separately, or together, as you can see on the photo on the right. |
 |


