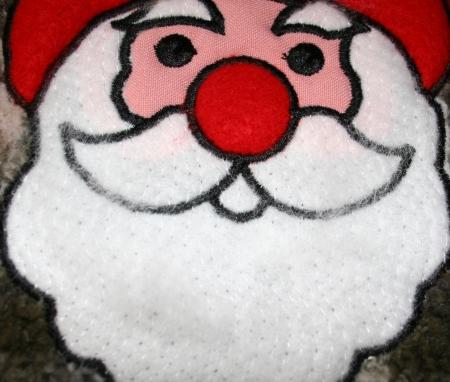
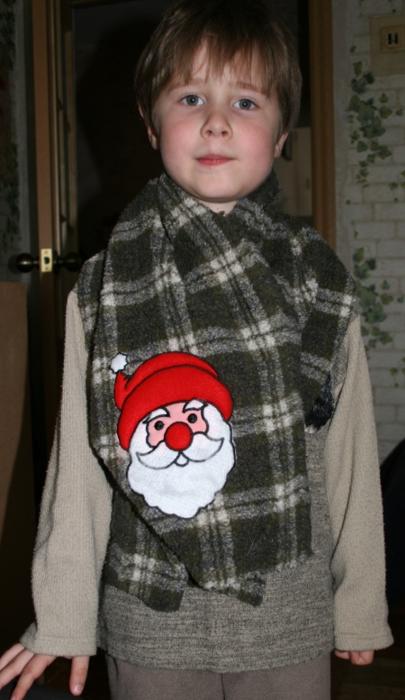
These are intructions on how to embroider the Santa Claus Appliqué. The design shows 10 colors, but you will need only white and black threads. Different colors are used in the design to mark stops. Besides embroidery threads (white and black), you will also need red, white and pink fabrics - flannel (cotton or wool) or felt (wool or polyester) are the best. We used the design to embellish a child's fleece scarf.
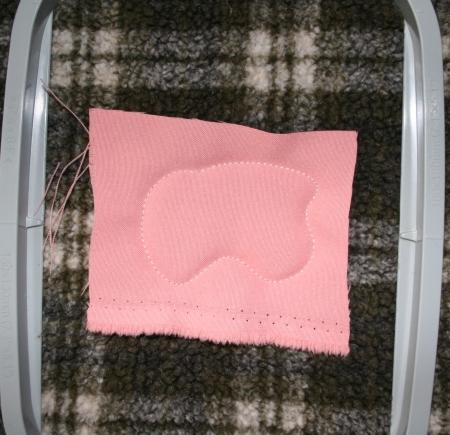
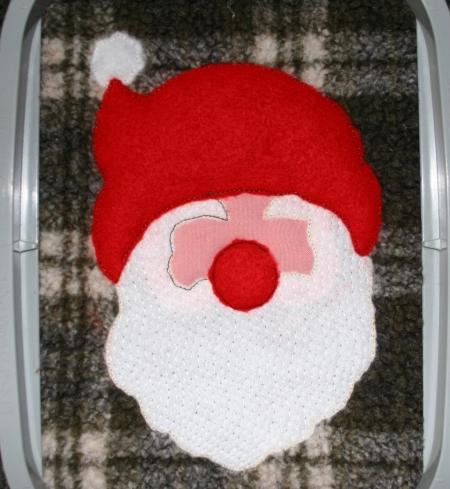
Step One: Hoop the base fabric (we used a scarf). We did not use any stabilizers, but if your base fabric is thin, you might consider using a layer of tear-away stabilizer. Thread the needle with white thread. Start embroidering. The machine will embroider an outline of the face and stop. Place a piece of pink fabric over the outline, and start the machine. It will embroider the outline of the face again, this time over the pink fabric. With a pair of sharp scissors cut away the excess fabric as close to the outline as possible.
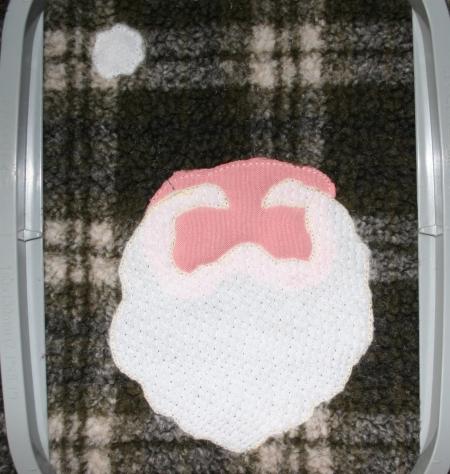
Step Two: Continue to use white thread. Return the hoop into the machine. The machine will make an outline for the hat's pom-pom and the beard and will stop.
Place a piece of white fabric over the pom-pom outline, and start the machine. After it makes the outline over the pom-pom part and stops, cut away the excess fabric.
Place a piece of fabric over the outline of the beard, start the machine. After it makes the beard outline and stops, cut away the excess fabric.
Return the hoop into the machine and start embroidering. The machine will embroider the beard.
Step Three: Thread the needle with a black thread. Return the hoop into the machine. The machine will make an outline of the nose and hat and will stop.
Place a piece of red fabric over the outline of the nose. Start the machine. After it makes the nose outline and stops, cut away the excess fabric.
Place a piece of red fabric over the outline of the hat. Start the machine. After it makes the hat's outline and stops, cut away the excess fabric.
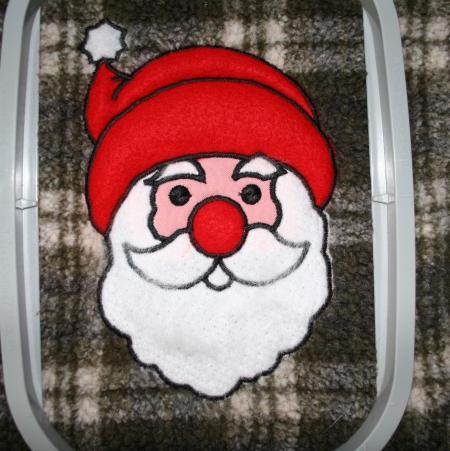
Step Four: Return the hoop into the machine and finish the embroidery. Continue to use the black thread.
You can comb a felt beard a little bit to make it fluffy.