A couple of years ago we tested how a pattern would look in silver metallic thread on blue patterned fabric. The embroidery turned out nice and the idea was used in a large quilt, while the test stitch-out was set aside and forgotten.
This summer, while looking through a pack of old stitch-outs, we came accross this one and it looked so pretty that we decided to use it in a small wall hanging. We squared the stitch-out to make a rectangle measuring 9 1/2" x 11 1/2". If your stitch-outs are on smaller pieces of fabric, you might need to change some of our measurements around.
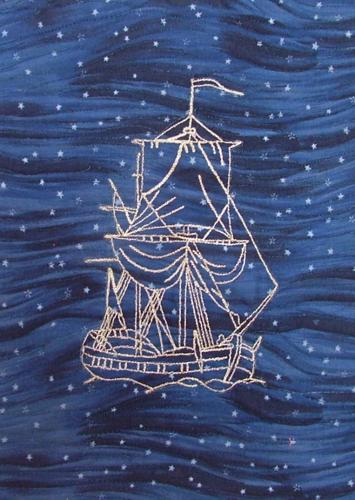
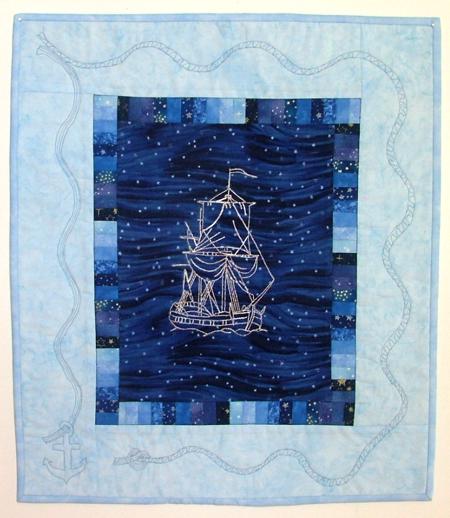
Usually, when making a quilt, we first piece the top and then embroider it, but in this quilt we used a test stitch-out, so the central part was pre-embroidered.
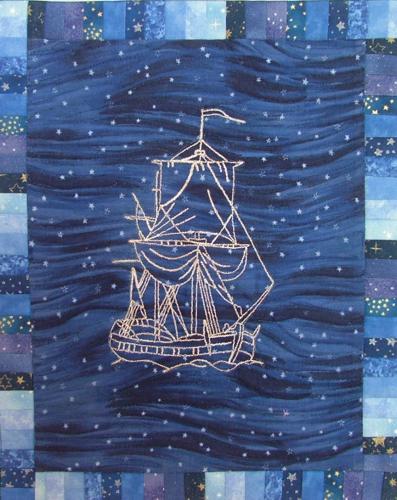
We decide to make two borders. The first one is 1" wide. We pieced it out of 1" wide strips of fabric that we cut from any scraps of blue fabric that we had. We stitched the strips together to get a striped piece, each stripe of which was 1/2" wide. Don't forget to press the seams.
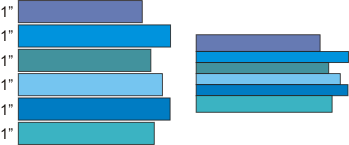
Then we cut the piece into 1 1/2" wide strips.
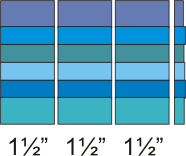
We stitched those 1 1/2" strips together to make four borders - two of them 9 1/2" long and two 13 1/2" long.

For the outer borders of the quilt, we cut four strips 3 1/2" wide. The strips for the upper and the lower borders are 11 1/2" long; and the strips for the left and the right border strips are 19 1/4" long.
The rest is done as usual - press the top; make a sandwich out of the backing, batting and quilt top; pin all the layers together and then hand- or machine-quilt.
In the center of the quilt, we echo-quilted the embroidery, then quilted along the pattern of the fabric. The first border was quilted in the ditch. The outer borders were quilted with wavy lines, imitating ropes; and on the rope ends we also quilted a small anchor and a knot.
Finally, square the quilt and finish the raw edges.
We hope that you liked our idea and will come up with many of your own.


