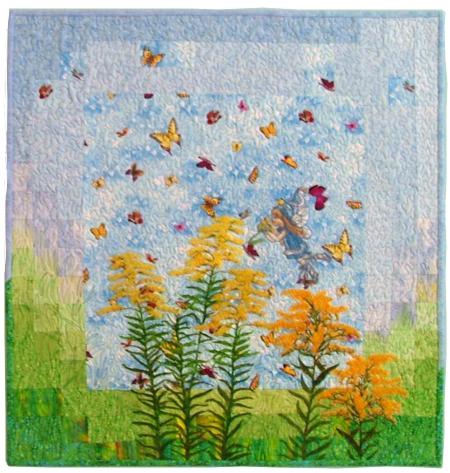
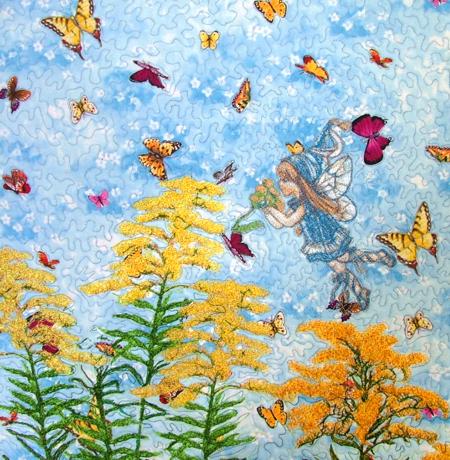
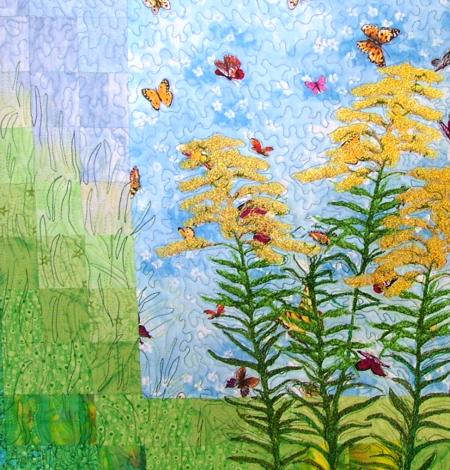
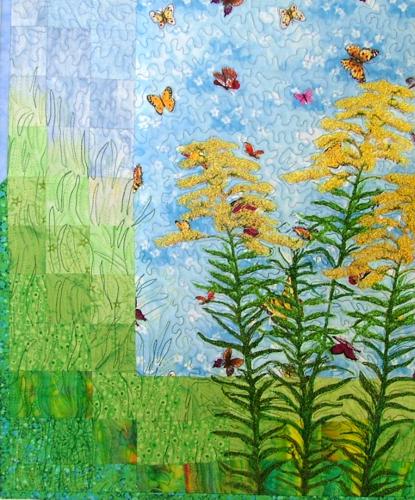
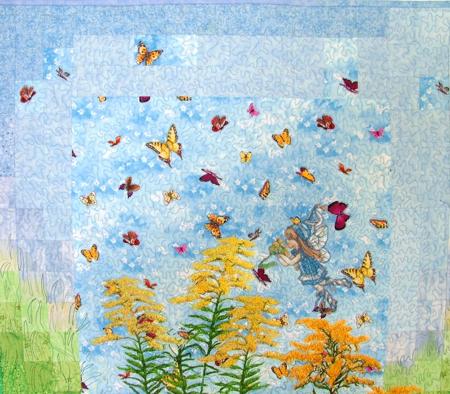
In this small quilt we used the designs of the Little Blue Fairy, Goldenrod I and Goldenrod II. The finished size of the quilt is about 23 1/2" x 25".
You will need: a fat quarter of sky blue patterned fabric (we used fabric with a small butterfly pattern), scraps of green and blue fabrics, fusible 2" grid, batting, fabric for backing and binding, and blue and green cotton threads for sewing and quilting. For the embroidery you will need embroidery threads and your favorite tear-away stabilizer.
Note: You can buy fusible grid in any quilt store or at www.junetailor.com.
Step One: Assemble the quilt top first.
For the central part cut a piece 15 1/2" wide and 16 1/2" long.
To make the pieced borders, you will need to cut four pieces of the 2" x 2" fusible grid: two pieces measuring 3 x 10 grid squares for the upper and lower borders, and two pieces measuring 3 x 16 grid squares for the left and right borders.
Out of scraps of blue and green fabrics, you need to cut 2" x 2" squares. You will need a total of 156 squares. About 90 of them should be blue and the rest green.
Step Two: Place the four pieces of fusible grid on a flat surface and lay your 2 " x 2" squares over them to form sky and greenery. When you are satisfied with your layout, follow the manufacturer's instructions to fuse the squares to the grid and stitch along the grid lines. Iron the finished pieces.
Attach the upper and bottom borders to the central piece first, then attach the left and right borders. Press.
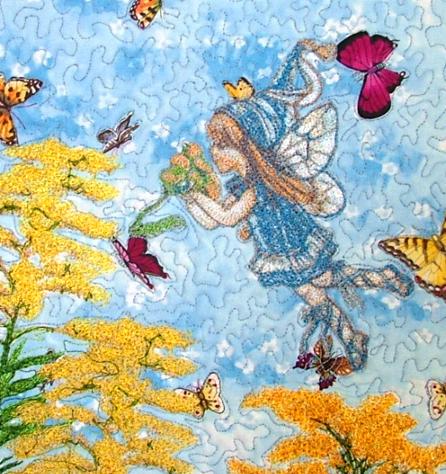
Step Three: Now the top is ready for the embroidery. Out of your embroidery software, print the snapshots of the designs and with their help decide on where exactly you want to make the embroidery. Cut out a piece of stabilizer -- it should extend 4"- 5" beyond the area which you will be embroidering.
First do the digitized embroidery.
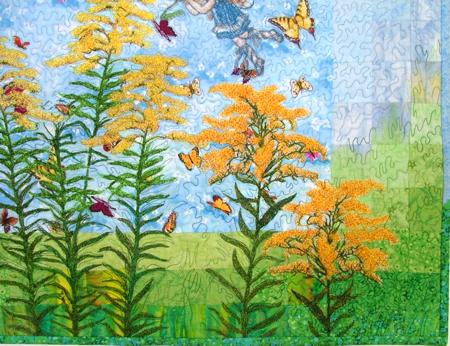
Then, either manually or using your regular sewing machine, embroider stems and leaves for the goldenrods to make them longer. Use free motion mode.
Step Four: When you're finished with embroidery, make a sandwich out of the backing, batting and top, and machine quilt the work.
Note: though the fusible grid is very soft, it's very difficult to hand-quilt works that use it, so it's better use your machine.
Step Five: After quilting, press the work with heavy steam, square it and finish the raw edges with binding. Our binding is two-colored, we pieced it of blue and green strips, then attached it so that the green part is along the bottom of the quilt and the blue part is along the sides and top.
We hope that you like our idea and will come up with many of your own.


