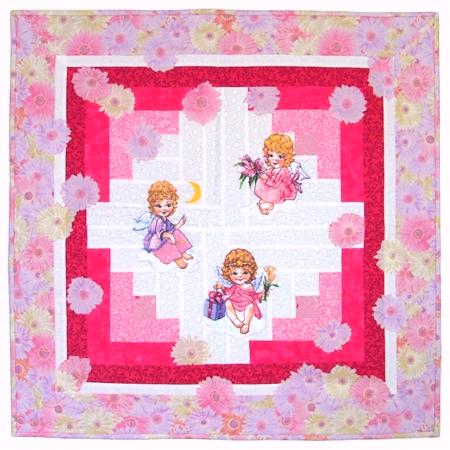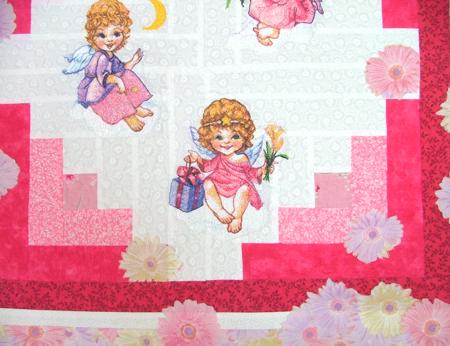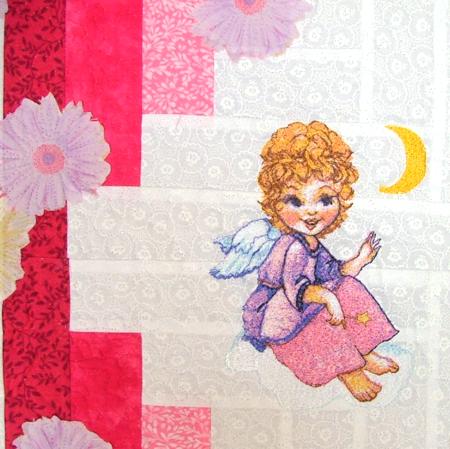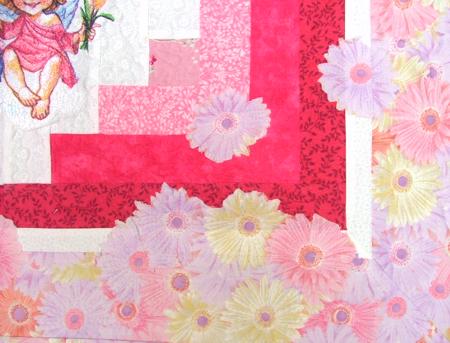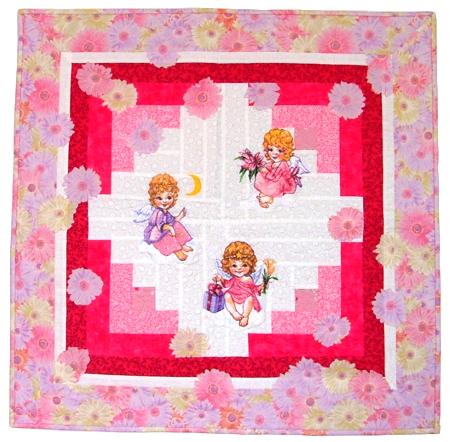
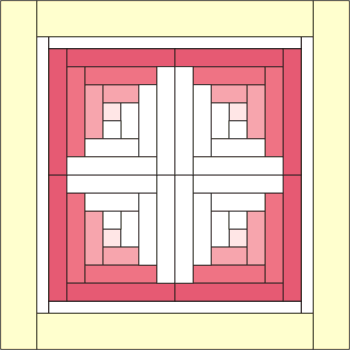
The top is made out of four log cabin blocks and two borders. We used 5 fabrics for the blocks: one white fabric with a faint print and four pink fabrics, which range from light pink to bright magenta-pink. The first border is a narrow white strip, using the same fabric as in the blocks. The second, wider border, is made from fabric patterned with large pastel-colored daisies. We also made the binding from the same fabric and cut out some daisies to use as appliques.
Fabric requirements
All measurements are based on 42" wide fabric and 1/4" seam allowance.
You will need:
1/2 yard of white fabric for the blocks and the first border
2" x 8" of the first pink fabric (the palest one)
2" x 40" of the second pink fabric (darker than the first one)
4" x 42 of the third pink fabric (darker than the second one)
8" x 42" of the forth pink fabric (the darkest one)
about 3/4 of yard of patterned fabric for borders and binding
Step One:
From the white fabric, cut: four 2" x 2" squares
four 2" x 4" strips
four 2" x 6" strips
four 2" x 8" strips
four 2" x 10" strips
four 2" x 12" strips
two 1 1/2" x 21" strips and two 1 1/2" x 23 1/2" strips for the inner border, if you're making square corners; if you're making mitered corners, cut four strips measuring 1 1/2" x 26".
From the first pink fabric (the palest one), cut:
four 2" x 2" squares
From the second pink fabric (darker than the first one), cut:
four 2" x 4" strips
four 2" x 6" strips
From the third pink fabric (darker than the second one), cut:
four 2" x 8" strips
four 2" x 10" strips
From the fourth pink fabric (the darkest one), cut:
four 2" x 12" strips
four 2" x 14" strips
From the patterned fabric for borders and binding, cut:
two 3 1/4" x 23 1/2" strips and two 3 1/4" x 29 1/2" strips if you want square corners; for mitered borders, cut 4 strips measuring 3" x 36"
strips for binding totalling 2" x 120".
Step Two: Assemble each block in accordance with the diagram below (the numbers indicate the order in which the strips should be attached). Don't forget to press each seam towards the newly attached strip as soon as it's done.

Step Three: Stitch all four blocks together - first stitch them into rows, press the seams, then stitch the rows together. Press the seams.
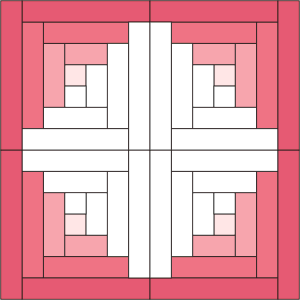
Step Four: Add the narrow white borders. Press the seams. Add the wide patterned borders. Press the seams.
If you make mitered corners, we recommend to stitch the white and patterned strips together first - mark the centers of each strip, match them up and sew them together. Press the seams. Then, make the borders using your favorite method.
Step Five: When your top is ready, stabilize it with your favourite tear-away stabilizer and do the embroidery. Remove the excess stabilizer. If you're doing some applique, do it now, after the embroidery.
Step Six: On an even surface (table) spread the backing fabric, face down, cover it with batting and cover with the quilt top. Baste or pin all three layers together. If you pin, use 1" pins every 3".
Quilt, starting from the center of the quilt.
We used stippling around the embroidery and all over the blocks. The patterned borders were quilted around the daisies, which makes the flowers stand out a little.

Step Seven: Press with heavy steam. Square all corners and even the edges. Finish the raw edges with binding.
Step Eight: Add a sleeve to the back, through which you can slide a pole.