Mobile Menu IconMenu
Advanced Embroidery Designs -- Online Center for Machine Embroidery Designs
Easter Sale! 50% OFF EVERYTHING! 3 Days Only! Shop Now!

Quilted Christmas Banner

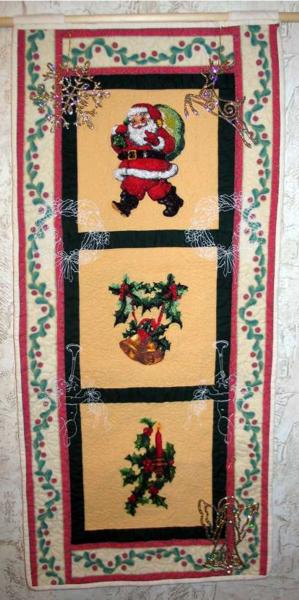
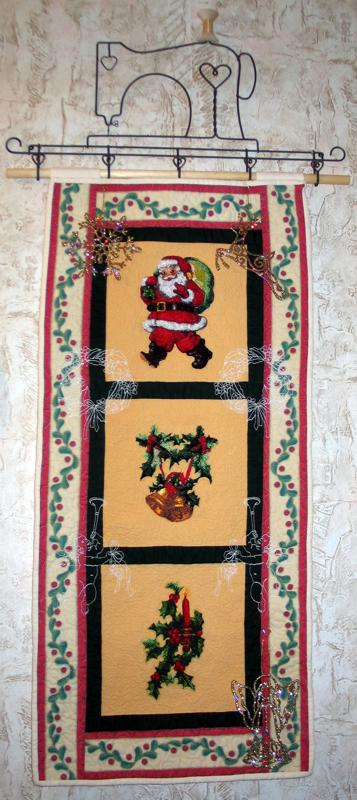
This easy project is great for beginners. It's good for hanging up in a hallway, on a door or anywhere you can't put up a full-size wall quilt.

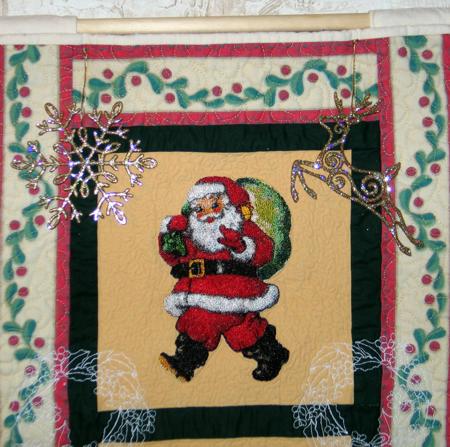
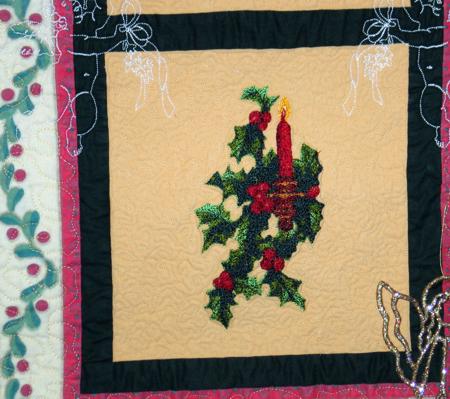
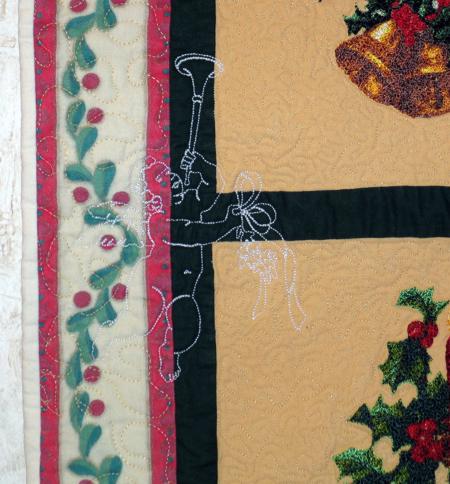
This quilted wall hanging features the Christmas designs of Santa Clause with Gifts , Christmas Bells with Holly Garland, and Candle with Holly. For quilting, we used the Christmas Redwork Set.

The finished size of the quilt is about 16" x 36".

Quilted Christmas Banner image 1

For the project you will need

  • about 1/4 yard of light fabric for the blocks
  • 1/8 yard of green fabric for the sashing
  • 1/2 yard of patterned Christmas fabric for the borders.
You will also need fabric for backing and binding and a piece of batting.
For embroidery, you will need embroidery threads, either iron-on cut-away stabilizer or polyester craft felt to be used instead of stabilizer.

Cutting:

Out of light colored fabric cut 3 squares measuring 9" x 9".
Out of dark green fabric, cut

  • 4 strips measuring 1 1/2" x 9"
  • 2 strips measuring 1 1/2" x 30".
Out of fabric for the borders, cut
  • 2 strips measuring 3 1/2" x 11 1/2"
  • 2 strips measuring 3 1/2" x 36 1/2".

Sewing the Top

Sew the short green strips to the upper and lower edges of the 2 light squares.

Quilted Christmas Banner image 2

Sew the remaining light square between the squares with green strips.

Quilted Christmas Banner image 3

Sew the long green strips to the long sides of the working piece.

Quilted Christmas Banner image 4

Sew the short border strips to the short sides of the quilt.

Quilted Christmas Banner image 5

Sew the long border strips to the long sides of the quilt.

Quilted Christmas Banner image 6

Embroidering:

Stabilize the light colored squares with cut-away iron-on stabilizer, or polyester craft felt, and make the embroidery of Santa Clause with Gifts , Christmas Bells with Holly Garland, and Candle with Holly in each square.

Cut away the excess stabilizer/felt around the embroidery.

Quilting:

Now place the backing on a flat surface (table) face down. Cover with batting. Spread your working piece over it.

Pin all three layers together with 1" pins. Do not place the pins densely. Quilt along the lines of the embroidery.

Print out the screenshots of the redwork designs for quilting. Arrange them on the quilt top where you want them.

Quilted Christmas Banner image 7

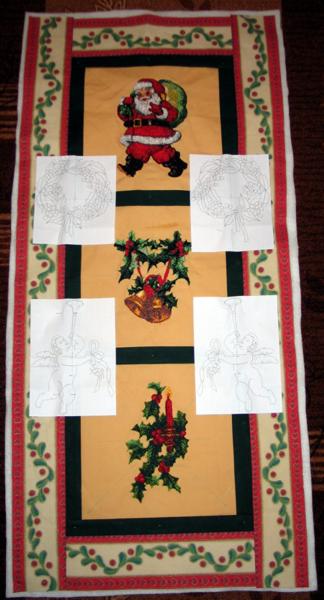
Embroider the quilting designs one by one. Then quilt in free motion style all over the piece.

Quilted Christmas Banner image 8

After the quilting is finished, press the work with heavy steam and square the work -- all corners should be 90 degrees and opposite sides should be of the same length.

Finish the raw edges with the binding.

We also attached a hanging sleeve to the back of the upper edge.

Quilted Christmas Banner image 9

The wall hanging is ready. Enjoy!

Quilted Christmas Banner image 10

Quilted Christmas Banner image 11

Quilted Christmas Banner image 12

Happy Stitching!

Back to the Projects Page

Mailing List
Enter your e-mail for news, discounts and exclusive special offers.


Find us on Twitter

Special Offers
Bonus design on all orders over $50
Daffodils and Eggs Set

Shop Now!

Announcement
Best Project Contest
The results are in!
Featured Project
Check out our latest project Birds and Blooms Quilted Tablerunner
Tutorials
Never heard of photo stitch? - Check out our What is Photo Stitch? page
Most Popular Designs
|| Home || Shop || Free Designs || New Designs ||
|| Projects || Tutorials || Links || About Us || Contact Us ||
|| Store Policy || Licensing || Accessibility ||

Social Media:

Copyright © Advanced Embroidery Designs. All Rights Reserved.