This Christmas-themed wall hanging featuring Santa is put together from basic, traditional quilt blocks, which gives it a simple, timeless appeal. It makes a great gift or charity project.
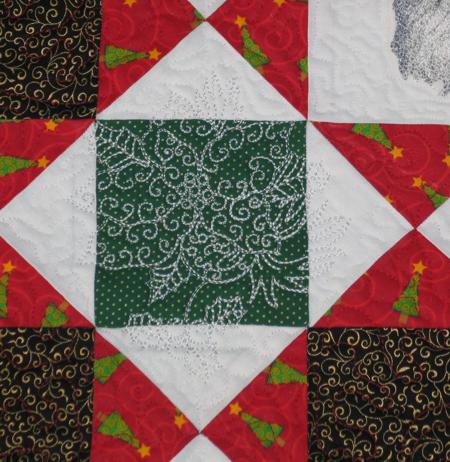
The center block features Vintage Santa design for a large (5" x 7") hoop.
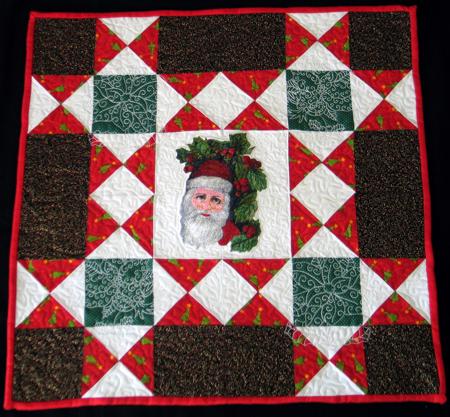
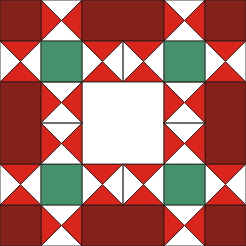
The finished size of the quilt is about 21 1/2" x 21 1/2".
We used:
You will also need a piece of batting and fabric for backing.
For embroidery, we used embroidery polyester threads.
Out of white fabric, cut
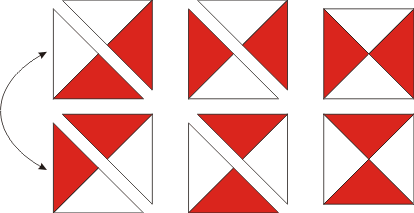
For the quilt, you will need 16 red-and-white blocks. To make each block, place a
4 1/2" red square on top of a 4 1/2" white square. The fabrics should face inwards. Align all the edges.
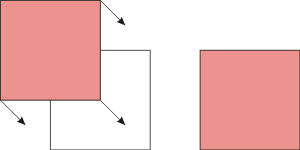
With a graphic pencil, draw a diagonal. Machine stitch a scant 1/4" on both sides of the diagonal.
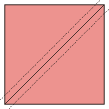
Cut along the diagonal.
Open the half-triangle squares and press.
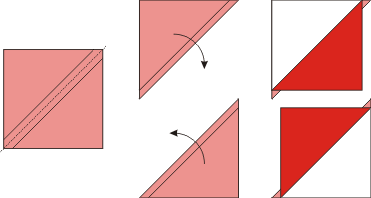
Cut the new squares along the diagonal. Out of each square you will get two 2-color triangles.

Re-arrange the triangles into new squares. Machine stitch scant 1/4". Open and press.
You will get 16 new squares, each measuring 4" x 4".
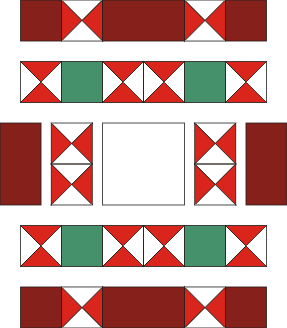
Assemble the top by the rows, as shown on the diagram below.
Stabilize the central, white, block with polyester craft felt instead of stabilizer. Baste the quilt top to the felt in the ditch along the colored borders. Embroider the Vintage Santa design for a large hoop.

After the embroidery is finished, rip the baste and cut away the excess felt around the embroidery.
Now place the backing on a flat surface (table) face down. Cover with batting. Spread your working piece over it.
Pin all three layers together with 1" pins and start quilting the white central block with embroidery.
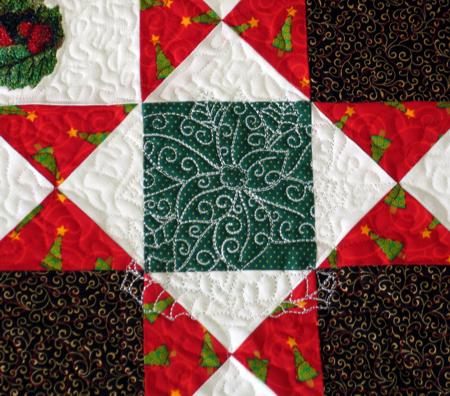
We quilted the green squares with the redwork designs from the Christmas Poinsettia Set.
After the embroidery-quilting is done, continue quilting in a free-motion style.
After the quilting is finished, press the work with heavy steam and square the work -- all corners should be 90 degrees and opposite sides should be of the same length.
Finish the raw edges with the binding.


