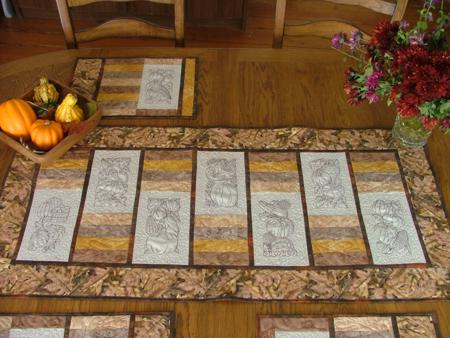
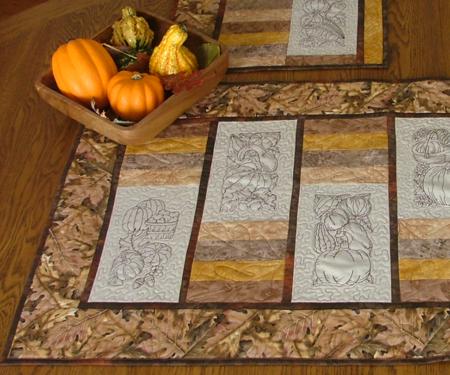
We created this attractive set consisting of a table runner and 4 place mats. We used batiks in Fall colors, and a patterned fabric with a print of fallen leaves, to match the season. In this part of the project, we explain how to make the table runner. You can read about how to make the place mats in Part I.
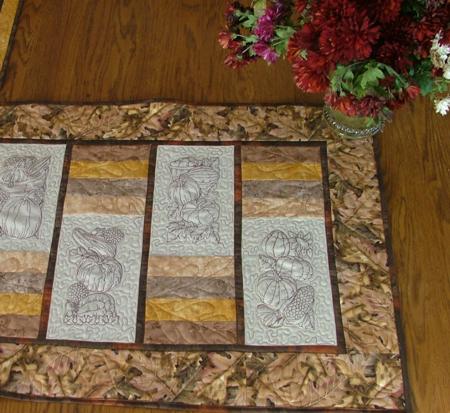
The embroidery designs used are from the Pumpkin Redwork Set.
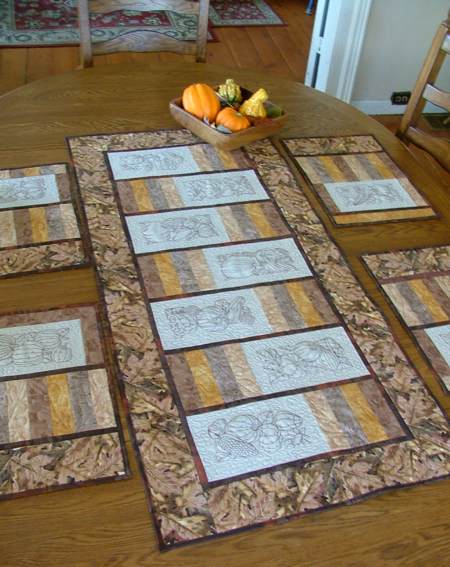
The finished size of the table runner is about 22 1/2" x 48", of the place mat is 12" x 17".
For the project, you will need 3/4 yard of brown fabric, 1/2 yard of patterned faric in brownish colors (we used a fallen oak leaves pattern), fat quarters of four fabrics in beige, yellowish, brownish hues.
For the embroidery, we used Osnaburg cotton fabric and light-weight cut-away stabilizer. If you don't have Osnaburg, you can substitute it with light-beige or cream-colored cotton fabric.
You will also need batting and fabric for the backing.
With a removable fabric marker, graph you embroidery fabric into 8" x 11" rectangles. Do not cut them out! Stabilize the fabric with light-weight cut-away stabilizer and embroider the designs from the Pumpkin Redwork Set. Try to make the embroidery in the center of each rectangle.
Cut out and trim each rectangle to 6" x 9 1/2". You'll have margins of about 1 1/4" on each side around the embroidery.
You will need 7 embroidered rectangles for the table runner and 4 rectangles for the place mats.
Cut the fat quarters into 2" x 6" strips. You will need 28 strips for the table runner.
Out of dark brown fabric, cut 8 strips measuring 1" x 15 1/2" and 2 strips measuring 1" x 43".
Out of the same fabric cut the binding - strips measuring 2 1/2" and as long as your piece of fabric permits. You'll need about 150" of the binding.
Out of patterned fabric cut 2 strips measuring 4" x 16 1/2" and 2 strips measuring 4" x 48".
Sew four 2" x 6" strips into 7 blocks. Press the seams.

Sew four blocks to the upper edges of four embroidered panels.
Sew three blocks to the lower edge of three embroidered panels. Press the seams.
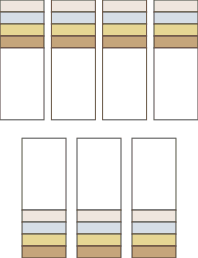
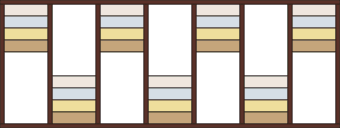
On your working table or designer wall, position the new panels alternating the ones with embroidery on the bottom with the ones that have embroidery on the top.
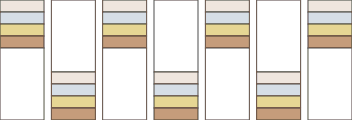
Sew the 1" x 15 1/2" brown strips between the panels. Press the seams. Sew the panels together. Press the seams.
Sew the remaining two of the 1" x 15 1/2" strips to the left and right edges of the top. Press the seams.
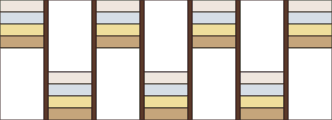
Sew the two 1" x 43" strips to the upper and lower edges of the top. Press the seams.
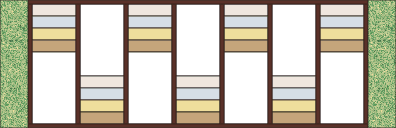
Sew the patterned 4" x 16 1/2" borders to the left and right edges of the top. Press the seams.
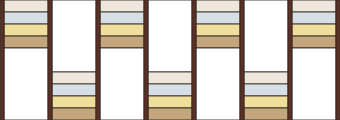
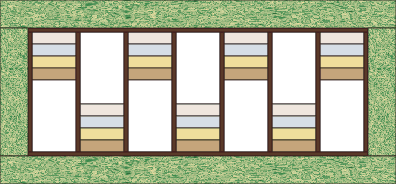
Sew the patterned 4" x 50" borders to the top and bottom edges of the top. Press the seams.
Now place the backing/lining on a flat surface (table) face down. Cover with batting. Spread your working piece over it.
Pin all three layers together with 1" pins and start quilting. We quilted around the embroidery and quilted foliage patterns in a free-motion style all over the piece.
After the quilting is finished, press the work with heavy steam and trim the work - the opposite sides should be straight and of the same length.
Finish the raw edges with binding.