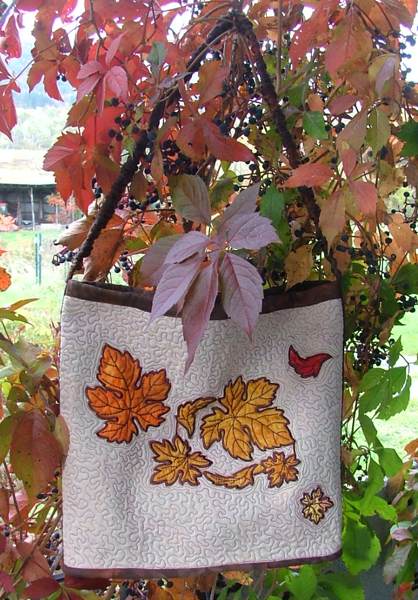
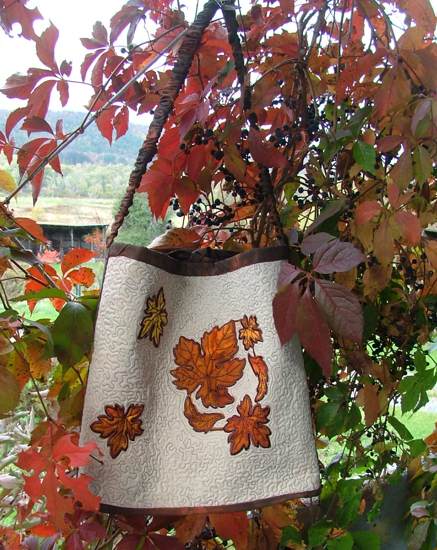
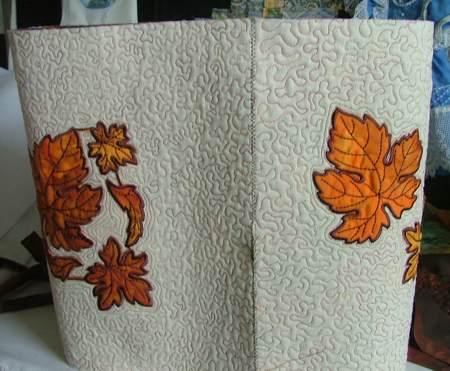
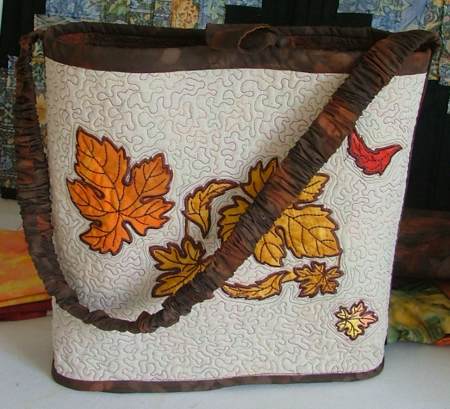
This charming tote is elegant enough for formal occasions, and at the same time roomy enough to suit all your needs. The designs used on the front and back of the tote are appliques from the Autumn Leaves Applique and Cutwork Set.
For the outer bag we used 1/2 yard of Osnaburg fabric and 1 yard of brown batik. You will also need:
For embroidery, we used embroidery polyester threads, and light-weight cut-away stabilizer.
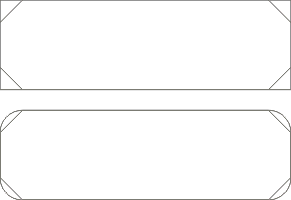
On a piece of paper draw a rectangle measuring 4" x 13".
Measure 1" from each corner along each side, and place a mark.
Using a ruler, connect the marks with straight lines. Then draw curves over the corners. Cut out the template.
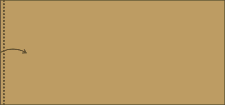
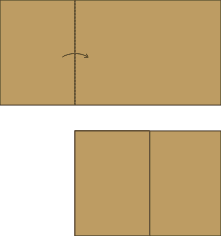
Out of Osnaburg fabric, cut a rectangle measuring 13" x 32".
Out of the brown fabric, cut
Stabilize the Osnaburg rectangle with light-weight cut-away stabilizer and make the applique embroidery from the Autumn Leaves Applique and Cutwork Set. Embroider as many leaves as you like.
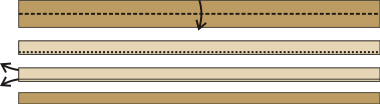
Place the backing/lining on a flat surface (table) face down. Cover with batting. Spread the embroidered piece over it.
Pin all three layers together with 1" pins and start quilting. We quilted around the embroidery and made stippling all over the piece, using variegated cotton Sulky thread for machine quilting.
After the quilting is finished, press the work with heavy steam and trim the work - the short sides should be 12" long and the long sides should be 31" long, all corners should be 90 degrees.
Take the brown rectangles measuring 5" x 14". Place them back to back. Inserta piece of batting between them. Quilt the sandwich as you like. Press with heavy steam.
Take the brown strip measuring 7" x 15".
Fold one of the short edges 1/4" back. Press. Finish the edge with zig-zag stitch.
Fold the finished edge 5" onto the rest of the strip. Press. Finish the side edges with zig-zag. Press.
Take the 3" x 40"-44" strips and sew them into one long strip.
Fold the strip lengthwise, face inside. Machine-stitch 1/4" from the raw edge to make a long tube.
Turn the tube right side out.
Put one end of the PellonPeltex 1" x 60" strip on a safety pin and insert it into the tube. Make pleats/ruffles closer to the middle of the handle.
With safety pins fasten the ends of the Peltex strip to the ends of the fabric tube.
Fold the 2" x 17" brown strips in half lengthwise, face inwards. Topstitch 1/4" from the raw edge.
Turn the right side out. Press. Finish one of the ends, the second end may remain open.

Take the quilted 5" x 14" rectangle. Position the template of the bottom over it. Trace the outline with fabric marker or chalk. Cut out the bottom.
Fold the working piece in a tube, align the edges of the short sides butt to butt. With wide and sparse zig-zag stitch the edges together. You'll get a tube.
Take the strip measuring 1" x 12", turn the edges 1/4" inside and press. Cover the zig-zag stitch from the inside of the bag with the strip. Topstitch it in place 1/8"-1/16" from the edges.
Fold the tube so that the seam looks at you.
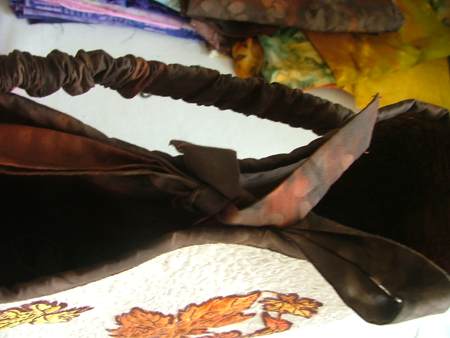
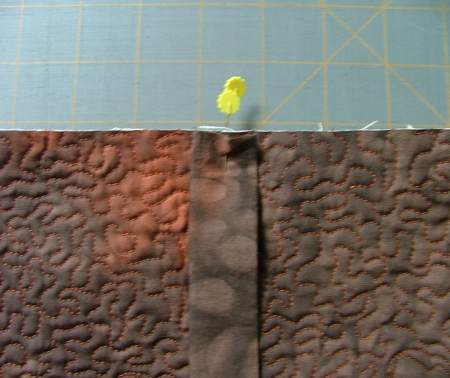
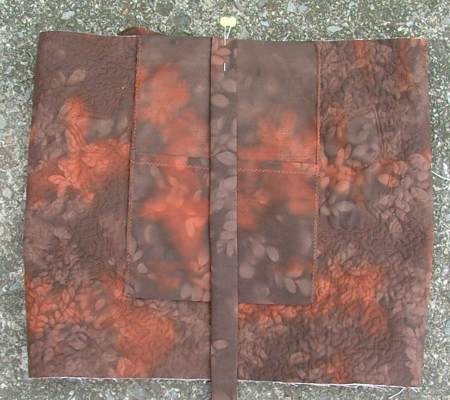
Position the pocket in the middle, align its upper edge with the upper edge of the bag. Position one tie over the pocket on the equal distance from each side. Pin in place.
Position the second tie in the same manner on the other side of the tube. Pin.
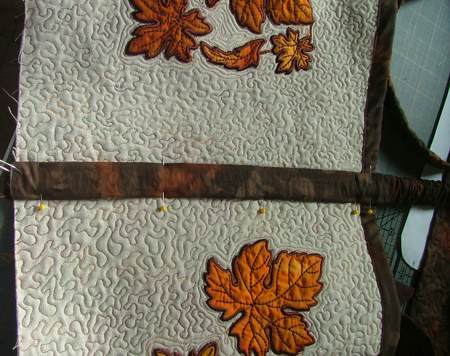
Fold the 3" x 33" strip in half legthwise to get the binding.
Pin the binding along the upper edge of the tube.
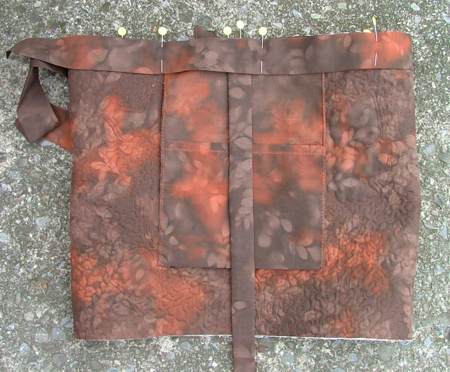
Machine-stritch along the upper edge, with seam allowance slightly larger than 1/4".
Press. Fold the binding over the right side of the bag. Topstitch in place.
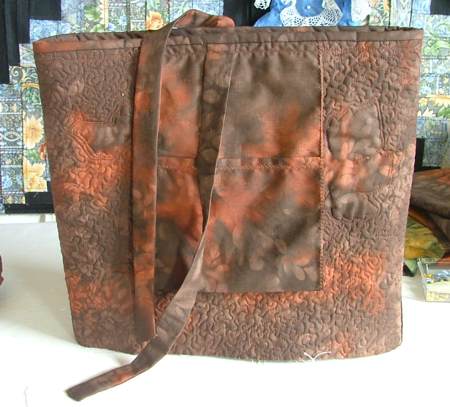
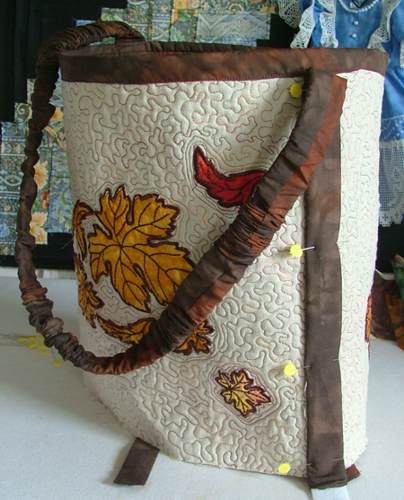
Turn the bag right side out. Position one end of the handle over the zig-zag stitch. Pin in place. Please note that there are no pleats on this part of the handle.
Carefully turn the bag right side inside and topstitch the handle in place. We first stitched along the edges, then quilted the handle in place in a free motion style.

In the same manner pin the second half of the handle to the opposite side of the tote.
Check that the handle is the right length for you. If you'd like the handle shorter, pull the end of the interfacing, and cut it away to the needed length.
Please note that all pleats should be in the middle part of the handle.
Topstitch the second end of the handle in place.
Pin the bottom to the lower part of the bag.
Topstitch 1/4" from the edge.
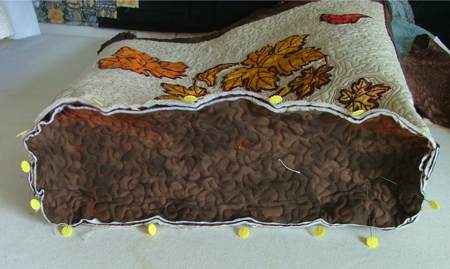
Finish the seam with the 1 1/2" x 33" bias strip.
Tie the ties.