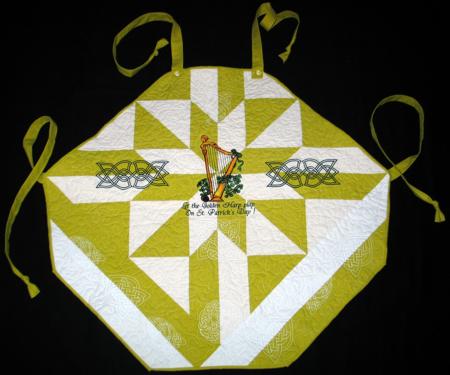
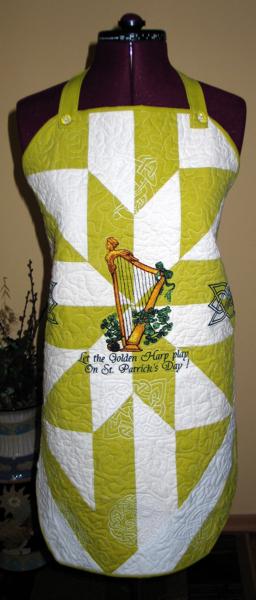
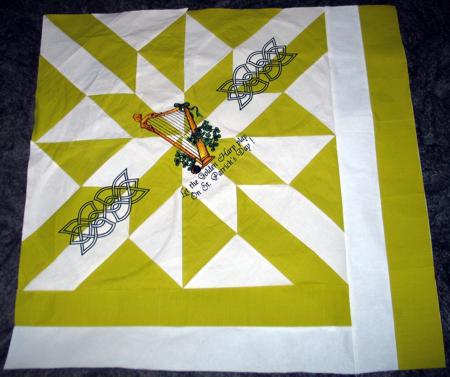
We made this beautiful apron in a green-and-white St. Patrick's Day theme, but of course you can make it any colors and with any embroidery that you like.
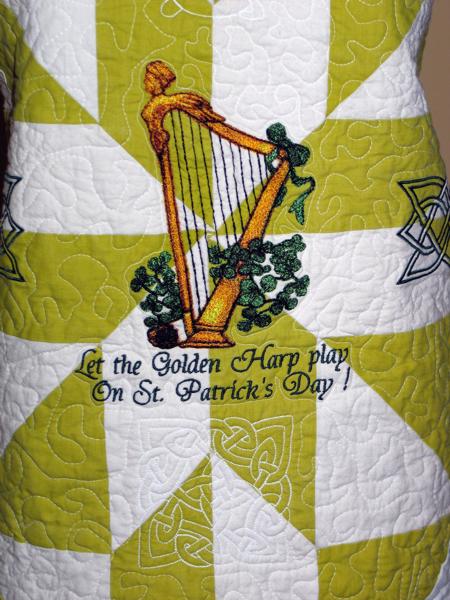
We used designs from the Celtic section of our Catalog: Golden Harp (for a large, 5" x 7", hoop), Celtic Motif Set I and Celtic Redwork Set.
You will need:
For embroidery, we used embroidery polyester threads and medium weight cut-away stabilizer.
Out of white fabric, cut
Take one of the green strip. Cut the end at a 45 degrees angle. Measure 5 1/2" along the upper edge and mark a spot, and 5 1/2" along the lower edge and mark a spot. Connect the two spots and cut along the line. You will get a parallelogram.
In this way, cut a total of 4 green parallelograms. Then repeat the process with a white strip to cut 4 white parallelograms.
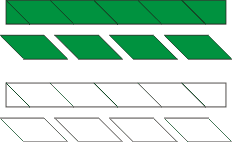
Take another green strip. Cut the end at a 45 degrees angle. Measure 5 1/2" along the upper edge and mark the spot, and 11 1/2" along the lower edge and mark the spot. Make a cut at a 45 degree angle.You will get a trapezoid shape.
In the same way, cut a total 4 green and 4 white trapezoid shapes.

Cut the white and green squares along a diagonal. You'll get 8 white and 8 green triangles.
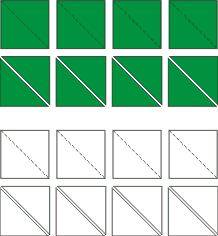
Please note that green parts should border the white parts. Seam allowance is 1/4". Press seams to the green parts.
Place the green and white parallelograms in pairs and stitch as shown.
Place the parts into a star and stitch together the short sides.

Place the green and white trapezes in pairs and stitch as shown. You will have 4 pairs.
Place the green and white triangles in 4 pairs and stitch together to make 4 squares.
Place the new squares between long tails of the star and stitch together.

Place the trapeze pairs between the star's short tails and stitch together.

Place the left-over triangles between the trapezes and squares and stitch.

Stitch the remaining green and white strips into pairs. Cut them into two new strips 22" and 27 1/2" long

Stitch the 22" long strip to the bottom edge of the working piece.
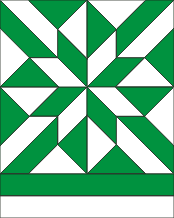
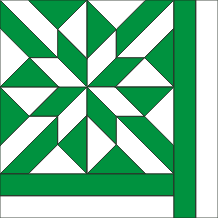
Stitch the 27 1/2" long strips to the right edge of the piece.
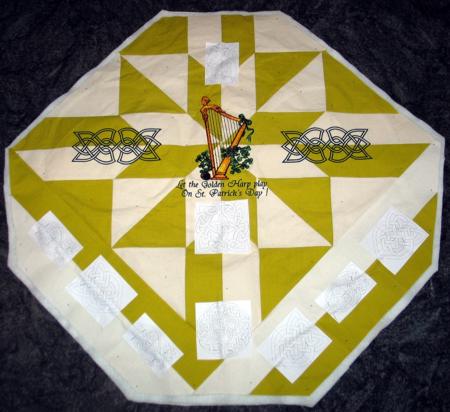
Stabilize the central part of the apron with medium-weight cut-away stabilizer. Embroider the Golden Harp.
Embroider the designs from the Celtic Motif Set I on the left and on the right from the harp.
Now place the backing on a flat surface (table) face down. Cover with batting. Spread your working piece over it.
Pin all three layers together with 1" pins and start quilting. Quilt in the ditch, removing the pins white quilting. Press with steam.
Make the print-outs of the Celtic Redwork Set designs and decide where you'd like them to be. Hoop the work and embroider the designs one by one, they will also quilt your work.
You may leave the work as it is or additionally quilt it in a free-motion style.
After the quilting is finished, press the work with heavy steam and trim the edges. Cut away the corners of the square to turn it into an octagon.
Finish the raw edges with the binding and stitch the ties.