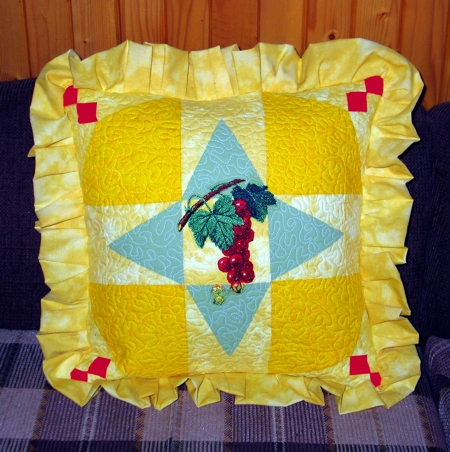
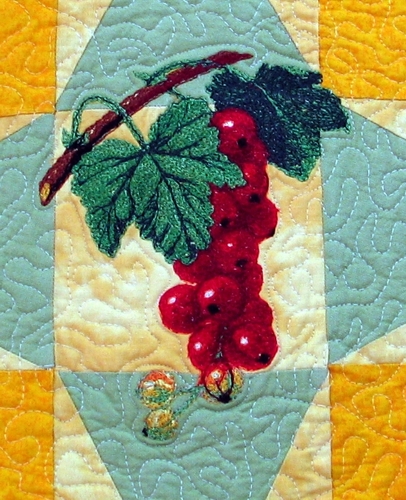
This eye-catching quilted cushion features the Red Currant embroidery pattern. We picked bright primary colors for a fashionable modern look. More subdued colors give the cushion a classic appearance.
You will need:
For embroidery, we used embroidery polyester threads, and polyester felt as stabilizer and batting.
Out of light yellowish beige fabric, cut
Out of red fabric, cut a strip measuring 1 1/2" x 12".
Take the beige and red 1 1/2" x 12" strips . Place them face to face, align all edges, sew along one of the long sides. Seam allowance 1/4".
Unfold and press.
Subcut the strip into 8 two-color strips measuring 1 1/2" x 2 1/2".

Take 2 strips at a time and sew them into a 2 1/2" x 2 1/2" squares. Make 4 such squares.
Take the four 3" x 5" beige strips. Cut them diagonally to get 8 beige triangles.
Take the four 3" x 5" yellow strips. Cut them diagonally to get 8 yellow triangles.
Taking one beige and one yellow triangle, sew them into 8 new rectangles.
Take the 4 blue squares. Mark the center of one of the sides. Use the ruler to connect the mark with one of the opposite corners. Cut along this line. Move the ruler to connect the mark with the other corner and cut again. You'll get 4 blue triangles.
Take the four 2 3/4" x 5 1/2" beige strips. Cut them diagonally to get 8 triangles.

Sew 2 beige triangles to each side of the blue triangle. Make 4 units.
Make 2 of the following strip out of the parts you just made:
red-beige square - beige-yellow strip - beige strip - beige-yellow strip - red-beige square

Make 2 of the following strip out of the parts you just made:
beige-yellow strip - yellow square, beige-blue square- yellow square - beige-yellow strip:
Make just one of the following strip:
beige strip - beige-blue square - beige square - beige-blue square - beige strip.

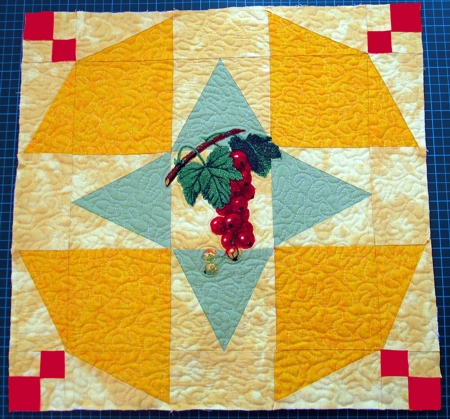
Assemble all the strips as shown and sew them together.
Place the top on a piece of polyester craft felt. The piece of felt should be slightly larger than the quilt top. The felt will work as the stabilizer and batting. Baste the quilt top to the felt. After the embroidery is finished, rip the baste.
Iron the working piece, pin both layers together with 1" pins and start quilting. We quilted around the embroidery and made stippling all over the quilt.
After the quilting is finished, press the work with heavy steam and square the work -- all corners should be 90 degrees and opposite sides should be of the same length.
Finish the raw edges with zig-zag stitch.
Measure the quilted top and cut out the back. It should be 1"-2" larger. For example, if your front panel is 16 1/2" x 16 1/2", cut the back 17 1/2" or 18".
Place the back on a piece of craft felt, press, pin, then quilt.
Press again and square. Trim to the size of the front panel. Finish the raw edges with zig-zag stitch.
If you want to make ruffles, cut out and sew a strip measuring 5" x 64".
Sew the short sides of the strip to get a ring. Fold the ring in half lengthwise, face outside. Press. Baste along the raw edge. Pull the thread to make ruffles.
Place the top/front panel face up. Place the ruffle over the top and align the raw edges of the top and the ruffle. Pin or baste in place.
Topstitch the ruffle to the top, 1/4" from the edge.
Now cover the top with the back panel, face to face. Topstitch 1/4" along the edges, leaving an opening about 8" long.
Step 1/8" from the first stitched line and topstitch again.
Turn the pillow right side out through the opening. Put the stuffing through the opening.
Machine stitch, or hand stitch, the opening closed.


