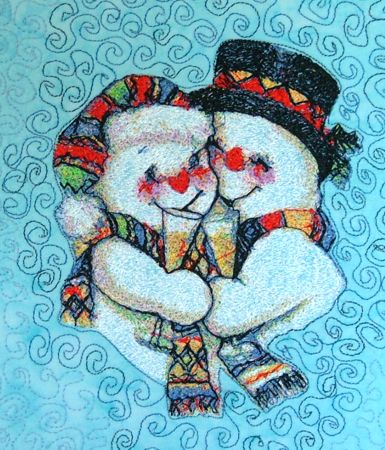
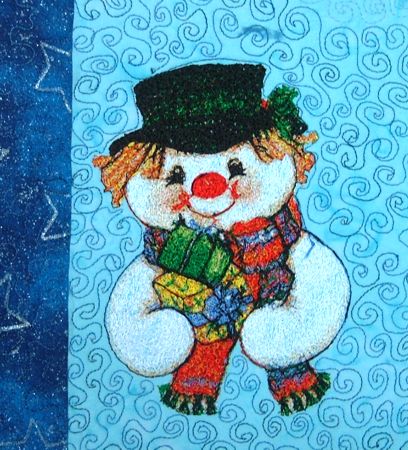
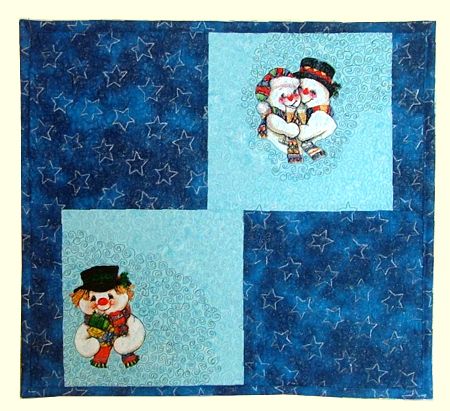
| This Winter-themed wall hanging is very easy to piece and looks very attractive. It's great for the holiday season. The embroidery designs used are the Snowman Couple and Snowman with Gifts. Lace Snowflakes and Christmas Bells are used as additional embellishments.
The finished size is about 20" x 22".
You can purchase this wall quilt from our Etsy store!
|

|
You will need:
- 1/2 yard of bright blue patterned fabric,
- a fat quarter of ice blue batik,
- low-loft batting,
- fabric for the backing,
- a piece of narrow ribbon, yarn or tape.
For the freestanding embellishments, we used rayon embroidery threads. For the Snowmen embroidery we used polyester embroidery threads and polyester felt as a stabilizer under the fabric.
|
|
Cutting:
|
Out of ice-blue fabric cut 2 squares measuring 10 1/2" x 10 1/2".
Out of bright blue fabric cut:
- 2 squares measuring 10 1/2" x 10 1/2",
- 2 strips measuring 2 1/2" x 10 1/2",
- 3 strips measuring 2 1/2" and the length of the width of the fabric for the binding.
|
|
Assembling the Top
|
| Sew the bright blue and ice-blue squares and bright-blue strips into 2 rows. |
|
| Sew the rows together as shown. |

|
| Press the top. |
|
Embroidery
|
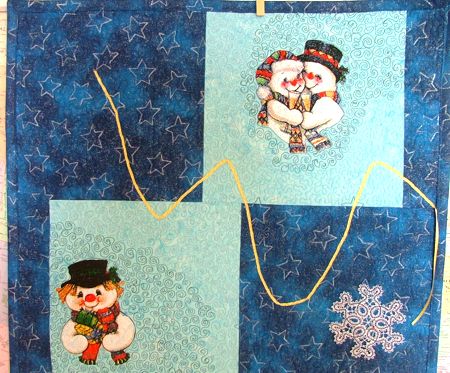
| We embroidered the Snowman Couple in the upper right corner and the Snowman with Gifts in the lower left corner. Stabilize the upper right corner with a piece of polyester craft felt. Baste the quilt top to the felt outside the embroidery area. Make the embroidery. After the embroidery is finished, rip the baste and cut away the excess felt around the embroidery.
|
|
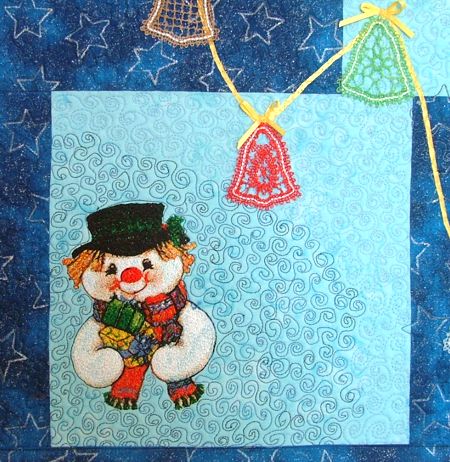
| In the same way, embroider the Snowman with Gifts in the lower left corner. |
|
|
Quilting:
|
| Now place the backing on a flat surface (table) face down. Cover it with batting. Spread your working piece over it. Pin all three layers together with 1" pins and start quilting.
|
| We quilted in a free-motion style. After the quilting is finished, press the work with heavy steam and square the work -- all corners should be 90 degrees and opposite sides should be of the same length.
Finish the raw edges with the binding.
|
| The quilt is basically finished, but it looks somewhat empty. We added small winter- or Christmas-themed embellishments of all kinds - buttons, beads, ribbons, crystals, ornaments, etc to fill up the space. |
|
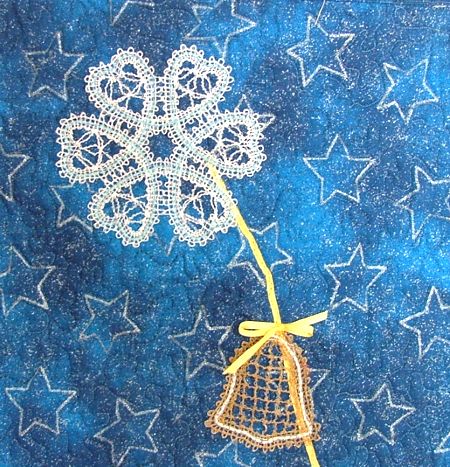
We decided to add free-standing lace ornaments - Snowflakes and Christmas Bells.
First we embroidered all the decorations we wanted and arranged them on the quilt top. When we were satisfied with the arrangement, we started to attach the ornaments one by one. |
| First we couched a piece of narrow ribbon across the quilt. |
|
Then we top-stitched the snowflakes on the ends of the garland.
Then we stitched on the bells, and then small bows on each of the bell. |
|
|
The quilt is ready. Enjoy!
|
|
|
|
|
Happy Stitching!
|
|
Back to Snowman Couple
|
|
Back to Snowman with Gifts
|
|
Back to Projects Page
|


