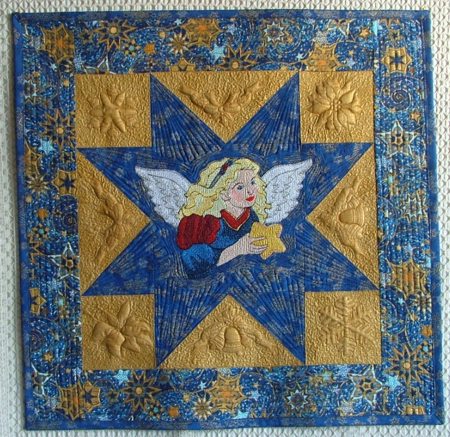
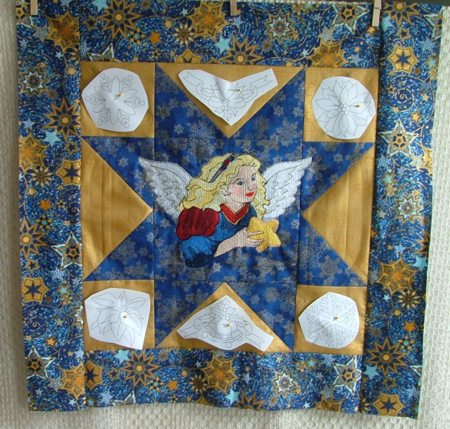
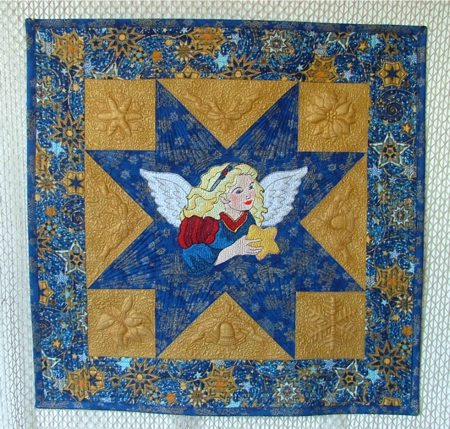
This one block quilt is based on the traditional block called Variable Star.
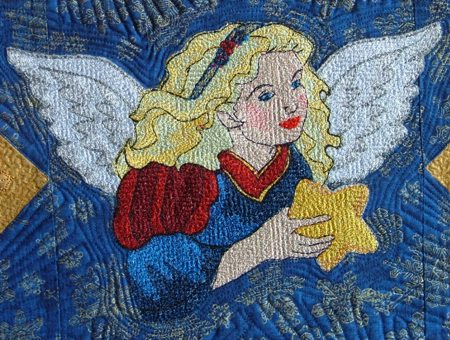
The embroidery design used for the central part is the Christmas Angel . We used the embroidery for a commercial size hoop, however the design for a mega hoop will also look good on this quilt. If you are going to use the large (5" x 7") hoop version, we recommend making the quilt smaller. For the 3D trapunto effect, we used redwork designs from the Christmas Redwork Set II and Christmas Quilting Set. The finished size of the quilt is about 25" x 25".
|
Click to enlarge |
| We chose blue and gold fabrics. You might also consider a combination of gold, green and red. You will need about:
1/2 yard of bright blue fabric,
1/2 yard of golden fabric,
1/2 yard of patterned blue-and-gold fabric.
You will also need batting, fabric for the backing and about a yard of polyester craft felt for trapunto.
|
|
Cutting:
|
Out of bright blue fabric, cut parts for the star and binding:
- a square measuring 9 1/2" x 9 1/2",
- eight squares measuring 5" x 5" and
- 3 strips measuring 2 1/2" and the length of the width of the fabric;
Out of golden fabric, cut parts for the star's background:
- four squares measuring 5" x 5" and
- four rectangles measuring 5" x 9 1/2".
Out of the fabric for borders, cut
- 2 strips measuring 4" x 18" and
- 2 strips measuring 4" x 25 1/2".
|
|
Assembly of the Top:
|
| For the star, you need to sew four "flying geese" strips. It's easy. Take 4 golden rectangles and 8 bright blue squares. For each part you will need 1 rectangle and 2 squares. Position the rectangle on your working table, face up. Position one of the blue squares, face down, on the right of the rectangle. Align the sides.
With a thin graphic pencil, draw a diagonal to connect the upper left corner and the lower right corner.
|

|
Machine stitch along the diagonal.
Cut the excess fabric, leaving 1/4" seam allowance.
Unfold the blue fabric and press. |
|
Repeat for the other side of the strip.
You will need 4 such flying geese parts. |

|
| Take two "flying geese" strips and four gold 5" x 5" squares. Sew a square to each end of the "flying geese". |

|
| Sew two "flying geese" to the upper and lower edges of the 9 1/2" x 9 1/2" blue square. |

|
| Sew the strips with gold squares to the left and right edges of the central part. |
|
Sew the 4" x 18" borders to the upper and lower edges.
Sew the 4" x 25 1/2" borders to the left and right edges. |
|
|
Embroidery:
|
| Stabilize the central part with your favorite cut-away or tear-away iron-on stabilizer. We used polyester craft felt instead of stabilizer. Our quilt is in blue and gold hues, so we decided to change the angels's dress and use blues instead of greens. Because this is a cross-stitch design, substituting colors is easy. To do this, choose a color of the same value - instead of light green take a light blue, instead of darker green, take a darker blue.
Another point to consider are the light colors of the embroidery and the dark background. To avoid the dark fabric showing through, use a topping fabric or stabilizer. Light-weight tear-away stabilizer works well. Remove the excess stabilizer after the first 5 colors.
|
|
| After the embroidery is finished, cut away the excess felt or stabilizer. |
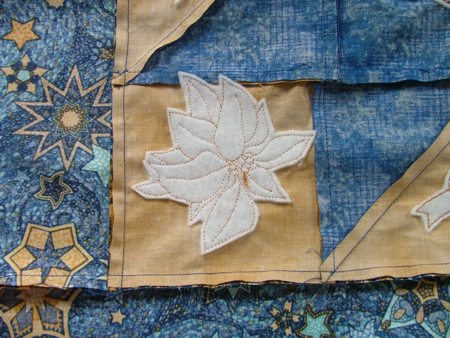
| Print out the templates of the redwork designs and position them on the quilt top. We used two corner designs from the Cristmas Redwork Set II on the triangles between the rays of the star. From the Christmas Quilting Set we used the designs of poinsettias and snowflakes and positioned them on the gold squares. |
|
| Embroider the designs one by one. Each time, use felt as the stabilizer. After the embroidery is finished, cut away the excess stabilizer as close to the stitches as possible. |
|
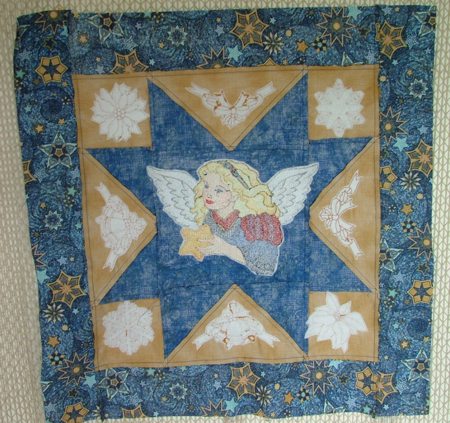
| The back of the quilt top will look like this: |
|
|
Quilting and Finishing:
|
| Now place the backing/lining on a flat surface (table) face down. Cover with batting. Spread your working piece over it. Pin all three layers together with 1" pins. Start quilting. All quilting is done in a free-motion style.We chose matching threads: the star was quilted in blue and the gold background in a dark yellow color.
First quilt around the Angel embroidery to fasten the pattern in place. Then quilt the rays of the star. After this, quilt the triangles between the rays - quilt around the embroidery as close to the stitches as possible, then all over the triangle. Now quilt the squares of the background - again first quilt around the embroidery. The last quilt the borders.
Press the work with heavy steam and square the work -- all corners should be 90 degrees and opposite sides should be of the same length.
|
|
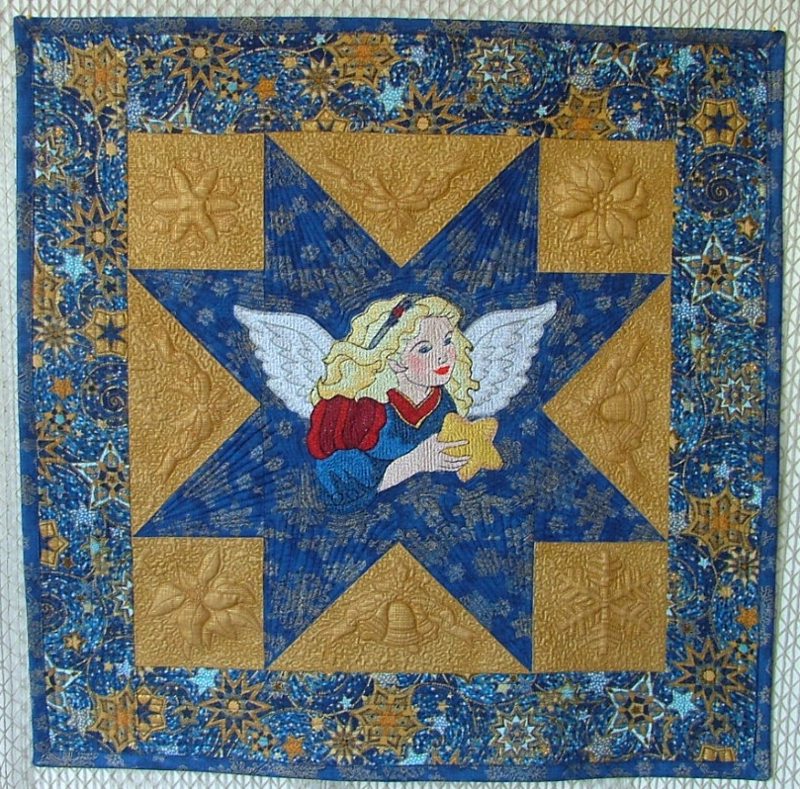
The quilt is ready! Enjoy!
|
|
|
|
|
Happy Stitching!
|
|
Back to Christmas Angel.
|
|
Back to Projects Page
|


