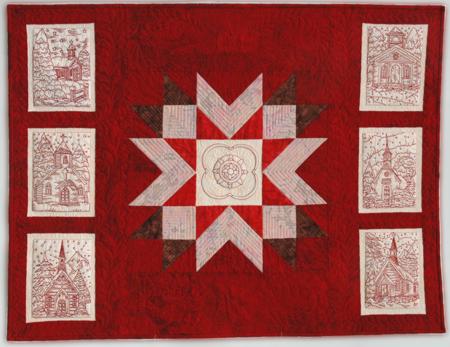
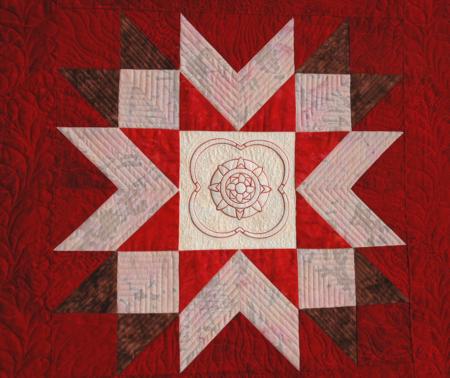
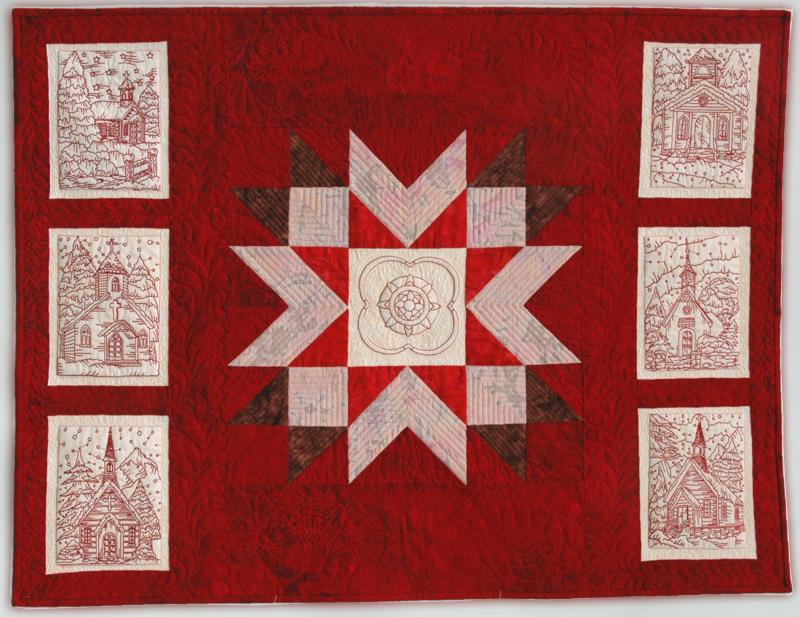
| This gorgeous Christmas-themed quilt is the perfect centerpiece for your Holiday decorations. Best of all, it's pretty quick to put together and can be finished over just a couple of weekends. The designs used for the quilt are from the Redwork Christmas Church Set for a large (5" x 7") hoop. For the central part of the star a design from the Quilting Pattern Set IV is used.
The finished size of the quilt is about 30" x 38"
|
Click to enlarge |
We used 5 batiks - dark red, pale pink, pink, bright red and brownish red. You will need:
- about 1 yard of dark red cotton batik,
- 1/2 yard of pale pink batik,
- a fat quarter of pink batik,
- a strip of 4" x 16" of brownish-red batik and
- a strip of 4" x 16" of bright red batik.
You will also need batting and the fabric for backing.
|
|
Cutting:
|
Out of pale pink fabric cut
- one square measuring 6 1/2" x 6 1/2" and
- six rectangles measuring 6 1/2" x 8 1/2";
out of bright pink fabric cut
- 8 strips measuring 3 1/2" x 6 1/2" and
- four squares measuring 3 1/2" x 3 1/2";
out of bright red fabric cut 8 squares measuring 3 1/2" x 3 1/2";
out of brownish-red fabric cut 4 squares measuring 3 7/8" x 3 7/8";
out of dark red fabric, cut
- 4 squares measuring 3 7/8" x 3 7/8",
- 8 squares measuring 3 1/2" x 3 1/2",
- 2 strips measuring 6" x 18 1/2",
- 2 strips measuring 3 1/2" x 30,
- 2 strips measuring 2 1/2" x 30",
- 8 strips measuring 2" x 6 1/2" and
- 4 strips measuring 2 1/2" and the length of the width of the fabric. Sew them into one long strip for a binding.
|
|
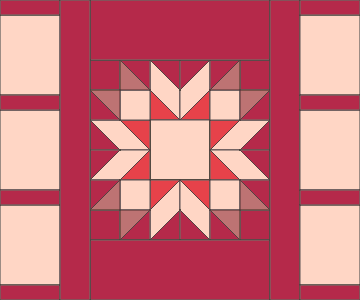
Assembly of the Star, the Central Part of the Quilt:
|
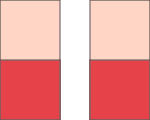
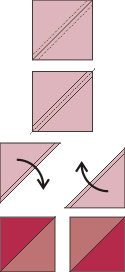
| Take the bright pink strips measuring 3 1/2" x 6 1/2", and bright red and dark red squares measuring 3 1/2" x 3 1/2". Lay the pink strips out in pairs (you will have 4 pairs).
Cover the lower ends with bright red squares, align the edges.
|
|
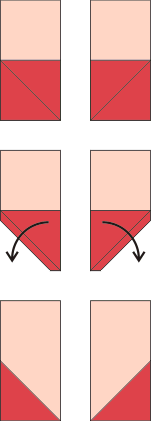
| Take a ruler and a pencil and draw diagonals inside the squares: on the left square, draw a diagonal from the upper left corner to the lower right corner; on the right square, draw a diagonal from the upper right corner to the lower left corner. |

|
Topstitch along the drawn lines.
Cut away the excess fabric, leaving a seam allowance of 1/4".
Unfold the triangles and press. Don't mix the pairs up yet! |
|
| Now repeat, but this time with dark red squares. The final result should look like this: |

|
| Sew the pair together. Seam allowance is 1/4". Unfold and press the seams open. |

|
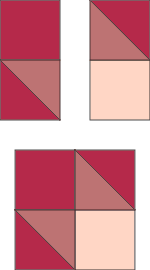
| Take two of the "pair" parts and sew them to the upper and lower edges of the pale pink 6 1/2" x 6 1/2" square. |

|
| Set it aside for the meanwhile. |
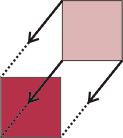
| For the left and right parts of the star we'll need to sew half-triangles first. Take the brownish red and dark red 3 7/8" x 3 7/8" squares. Place them in 4 pairs, face to face. aligning the edges. |
|
With a pencil and a ruler draw a diagonal inside the upper square.
Topstitch with seam allowance 1/4" on both sides of the diagonal.
Cut through the diagonal. Unfold and press. You will have 8 squares measuring 3 1/3" x 3 1/2" with one half dark red and the other half brownish red. |
|
| Using these half triangles and the dark red and pink 3 1/2" x 3 1/2" squares, sew four units: |
|
| Now sew the left and the right sides of the star. |
|
| Sew the left part to the left edge and the right part to the right edge of the central piece. |
|
|
Assembly of the quilt top.
|
| Now sew the 6" x 18 1/2" dark red strips to the upper and lower edges of the star. |

|
| Sew the 3 1/2" x 30" dark red strips to the left and right edges of the star. |

|
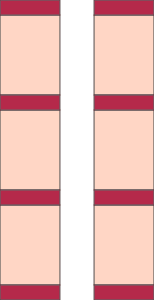
| Take the pale pink 6 1/2" x 8 1/2" rectangles and the dark red 2 x 6 1/2" strips and assemble them into 2 strips: red strip - pink rectangle - red strip - pink rectangle - red strip - pink rectangle - red strip. |
|
| Sew the strips to the left and right edges of the quilt. |
|
| Sew the 2 1/2" x 30" red strips to the left and right edges of the piece. |
|
|
Embroidery:
|
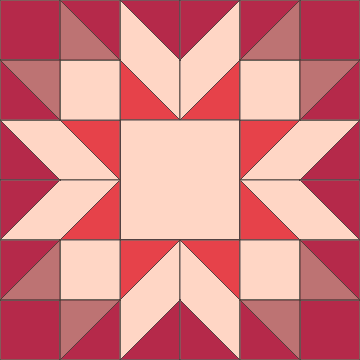
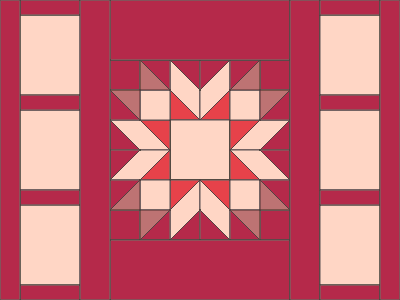
| We wanted to make a trapunto effect in the center of the star. For this we stabilized the central square with polyester batting craft felt and embroidered a design from the Quilting Pattern Set IV. We chose a design with less stitches and wider spaces between the lines of stitches. After the embroidery is finished, we turned the work to the wrong side and cut away the felt around the embroidery and inside the arches:
|
|
| After quilting the central part of the star will look like this: |

|
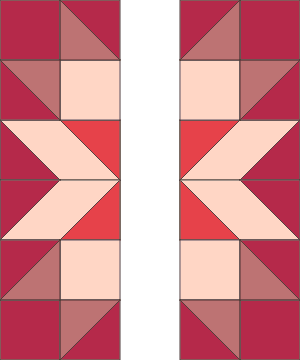
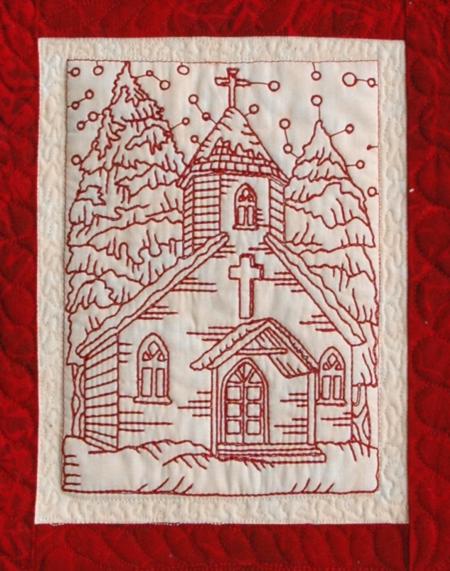
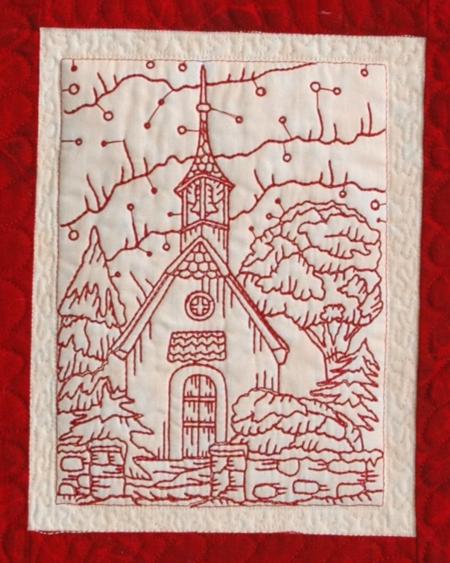
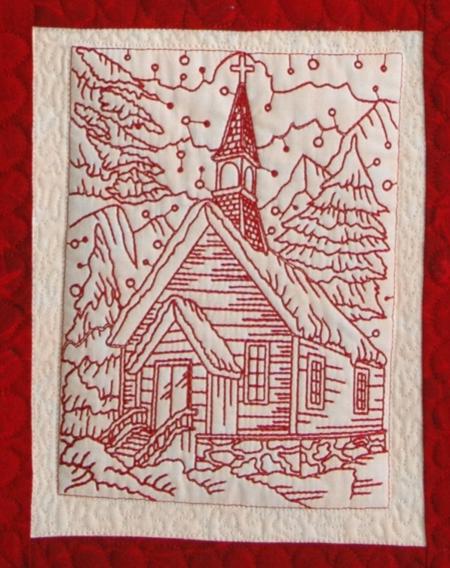
| Then we embroidered the Redwork Christmas Church designs in the pink rectangles around the star. Here you can use your favorite cut-away or tear away stabilizer. |
|
Quilting and Finishing:
|
| Now place the backing/lining on a flat surface (table) face down. Cover with batting. Spread your working piece over it. Pin all three layers together with 1" pins. We quilted around the embroidery and all over the quilt in a free-motion style. Remove the pins while quilting.
Press the work with heavy steam and square the work -- all corners should be 90 degrees and opposite sides should be of the same length.
Finish the raw edges with binding.
|
|
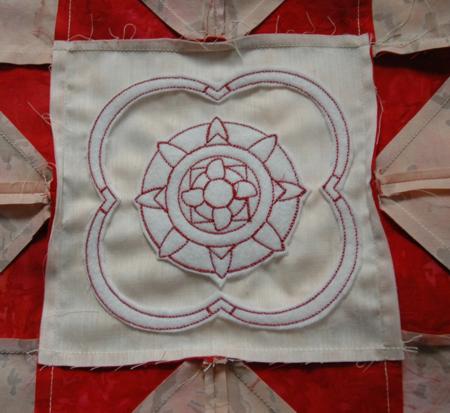
| Here are some close-ups of the embroidery: |

|
|

|

|
|
|
|
The quilt is ready! Enjoy!
|
|
|
|
Happy Stitching! Merry Christmas!
|
|
Back to Redwork Christmas Church Set
|
|
Back to Projects Page
|


