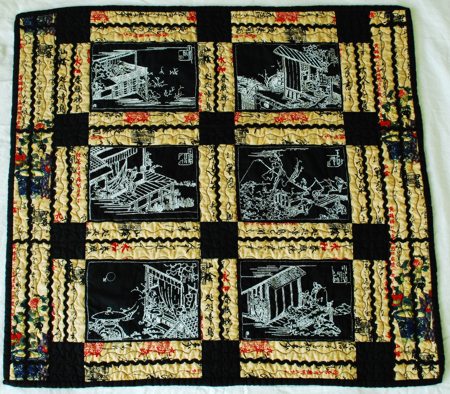
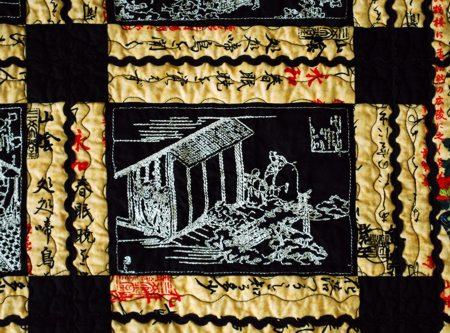
For this oriental wall hanging, we used the redwork designs from the set Life in Japan Traditional Artwork set. The rectangular beige blocks offset the designs very well and give the quilt the look of a traditional Japanese painting.
The finished size of the wall-hanging is about 25" x 27".
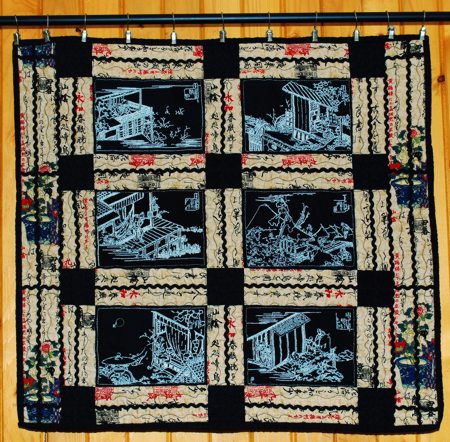
For the project we used 1 yard of black cotton fabric and 1/2 yard of light beige fabric with an oriental-themed pattern. We also used 2 packs of wide rick-rack and fabric for the backing and batting.
Out of black fabric cut,
6 pieces measuring 5 1/2" x 7 1/2"
12 squares measuring 3" x 3"
3 strips 2 1/2" wide and length of the width of the fabric for the binding.
Out of patterned fabric, cut
9 strips measuring 3" x 5 1/2",
8 strips measuring 3" x 7 1/2",
2 strips measuring 3 1/2" x 25 1/2".
Cut rick-rack tape into 7 pieces 25 1/2" long and 4 pieces 27 1/2" long.
Take 3 black squares and 2 patterned strips measuring 3" x 7 1/2". Sew them into a sashing row as shown below. Make 4 such sashing rows.
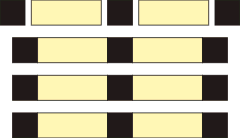
Take 2 black rectangles measuring 5 1/2" x 7 1/2" and 3 patterned strips measuring 3" x 5 1/2". Sew them into a row as shown below. Make 3 such block rows.
Sew the sashing and the block rows together as shown on the diagram below:

Sew the 3 1/2" x 25 1/2" strips to the left and right edges of the top.

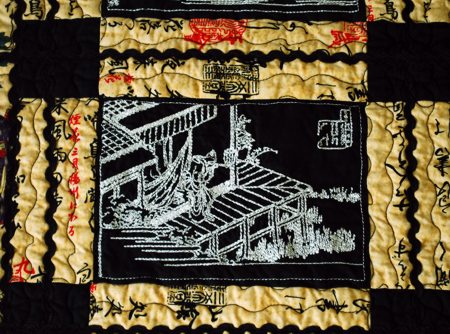
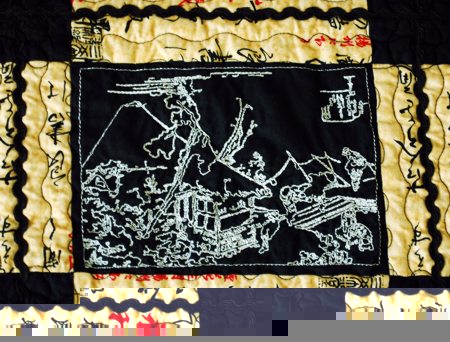
Stabilize the white blocks with light-weight cut-away stabilizer and make the embroidery of the designs from the Life in Japan Traditional Artwork set.
Now place the backing/lining on a flat surface (table) face down. Cover with batting. Spread your working piece over it.
Pin all three layers together with 1" pins. Quilt in the ditch. Remove the pins.
Press the work with heavy steam and square the work -- all corners should be 90 degrees and opposite sides should be of the same length.
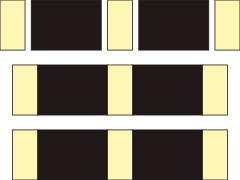
Position two 25 1/2" pieces of rick-rack from top to bottom on the seams between the quilt and its borders. Pin the rick-rack in place. Topstitch in place.
Position the three 25 1/2" pieces of rick-rack from top to bottom to divide the vertical sashing in half. Pin. Topstitch in place.
Position the remaining two 25 1/2" pieces of rick-rack from top to bottom to divide the borders in half. Pin. Topstitch in place.
Position the four 27 1/2" pieces of rick-rack from left to right to divide the sashing rows in half. Pin. Topstitch in place.
In the diagram below, all the positions for the rick-rack strips are highlighted in red.
Finish the raw edges with binding.