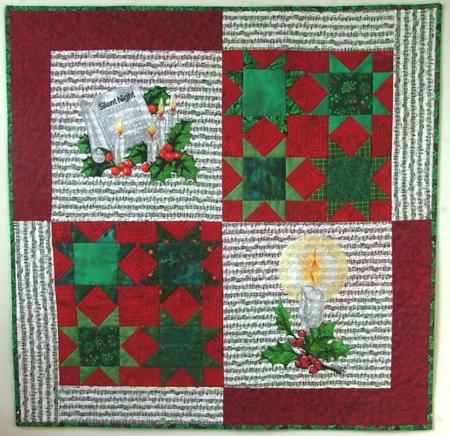
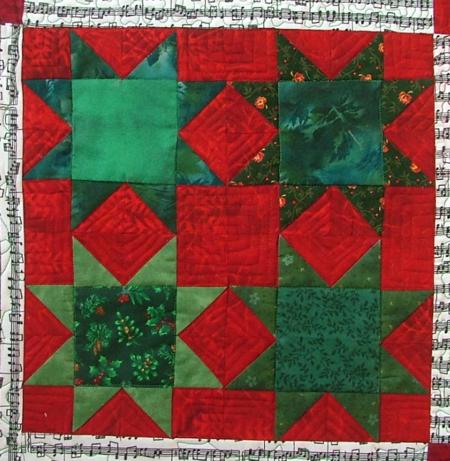
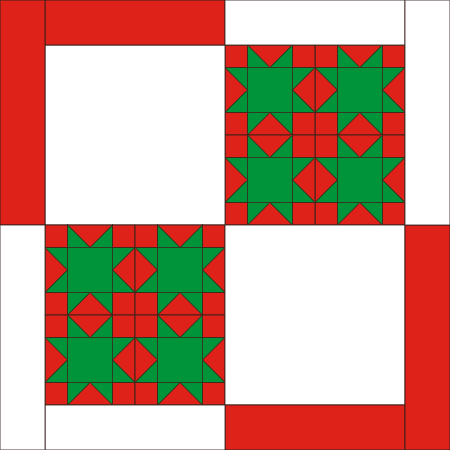
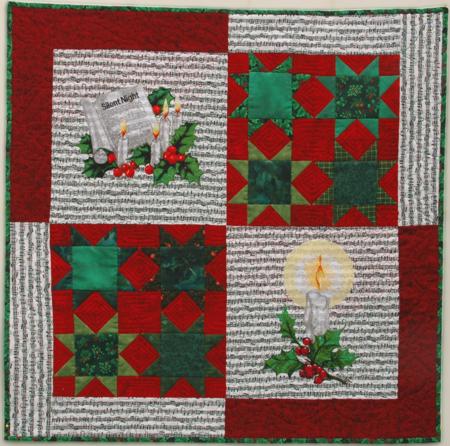
| For the quilt we used the Silent Night and Candle with Holly designs for a commercial size hoop (over 10"). The finished size of the quilt about 30" x 30".
|
Click to enlarge |
You will need:
- about 1/2 yard of light-colored cotton fabric (we used white fabric with a black pattern),
- about 1/2 yard of red fabric and
- scraps of green fabrics.
You will also need batting and the fabric for backing and binding.
|
|
Cutting:
|
Out of the light patterned fabric, cut
- 2 squares measuring 12 1/2" x 12 1/2",
- 2 strips measuring 3 1/2" x 12 1/2",
- 2 strips measuring 3 1/2" x 15 1/2".
Out of red fabric, cut
- 2 strips measuring 3 1/2" x 12 1/2" ,
- 2 strips measuring 3 1/2" x 15 1/2",
- 32 strips measuring 2" x 3 1/2" and
- 32" squares measuring 2" x 2".
Out of scraps of green fabric, cut
- 8 squares measuring 3 1/2" x 3 1/2" and
- 32 squares measuring 2" x 2".
|
|
Assembly of the Stars:
|
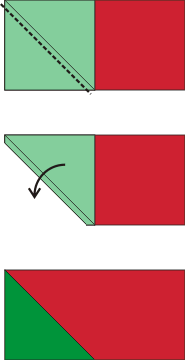
| To make the stars, we'll need to sew "flying geese" strips first. Take the red strips measuring 2" x 3 1/2" and green 2" x 2" squares. Position the red strip on your working table, face up. Position one of the green squares, face down, on the right of the rectangle. Align the sides.
With a thin graphic pencil, draw a diagonal to connect the upper left corner and the lower right corner.
|

|
Machine stitch along the diagonal.
Cut the excess fabric, leaving 1/4" seam allowance.
Unfold the blue fabric and press. |
|
Repeat for the other side of the strip.
You will need 32 such "flying geese" parts. |

|
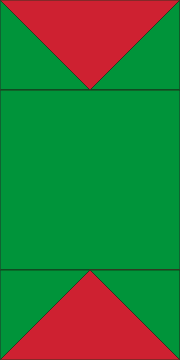
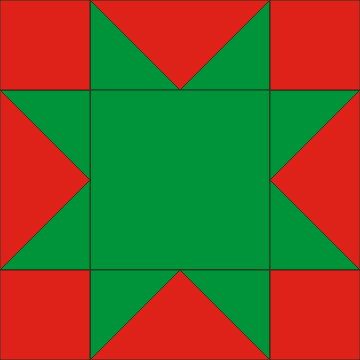
| Take 16 "flying geese" strips and 32 red 2" x 2" squares. Sew a square to each end of the "flying geese". |

|
| Sew the remaining "flying geese" to the upper and lower edges of the 3 1/2" x 3 1/2" green squares. |
|
Sew the strips with red squares to the left and right edges of the central part to form a star.
You will have 8 stars. |
|
|
Assembly of the Quilt Top:
|
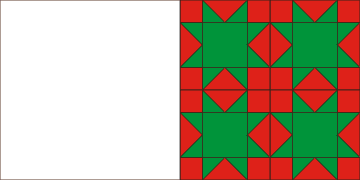
| First sew 2 blocks with 4 stars in each. |
|
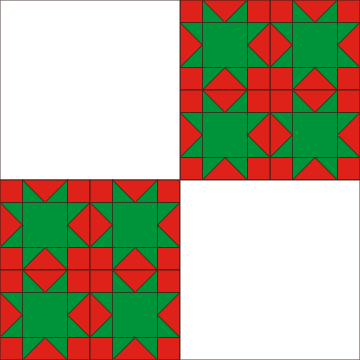
| Sew a star block and the light-colored square together. Repeat for the remaining block and square. |
|
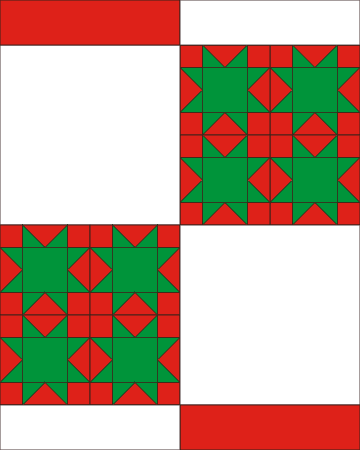
| Sew both rows together: the upper row should start with the light square, the lower row should star with the star block. |
|
| To make the upper and lower borders, take the red and light-colored 3 1/2" x 12 1/2" strips and sew them together. |

|
| Sew them to the upper and lower edges of the quilt so that the red strip corresponds to the light block, and the light strip corresponds to the star block. |
|
| To make the left and right borders, take the red and light-colored 3 1/2" x 15 1/2" strips and sew them together. |

|
| Sew them to the left and right edges of the quilt so that the red strip corresponds to the light block, and the light strip corresponds to the "star" block. |
|
|
Embroidery:
|
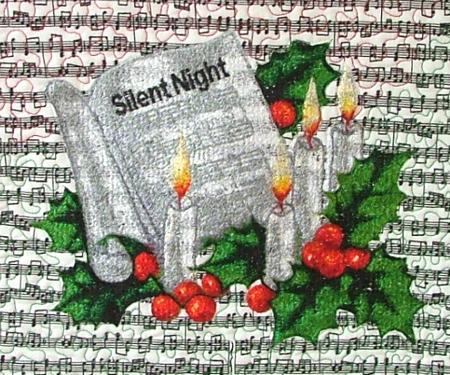
| Stabilize the fabric with your favorite cut-away or tear away stabilizer. We embroidered Silent Night in the upper left corner... |
|
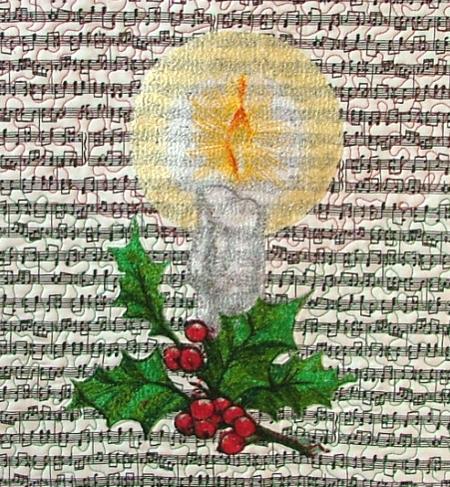
| ...and Candle with Holy in the lower right corner of the quilt. |
|
|
Quilting and Finishing:
|
| Now place the backing/lining on a flat surface (table) face down. Cover with batting. Spread your working piece over it. Pin all three layers together with 1" pins. We quilted around the embroidery and all over the quilt in a free-motion style. Remove the pins while quilting.
Press the work with heavy steam and square the work -- all corners should be 90 degrees and opposite sides should be of the same length.
Finish the raw edges with binding.
|
|
|
Enjoy!
|
|
Happy Stitching!
|
|
Back to Silent Night and Candle with Holy
|
|
Back to Projects Page
|


