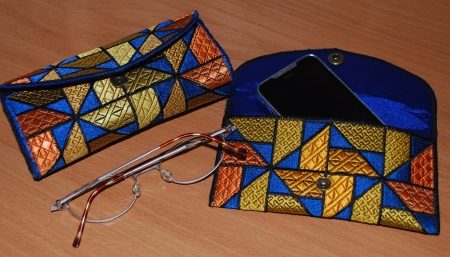
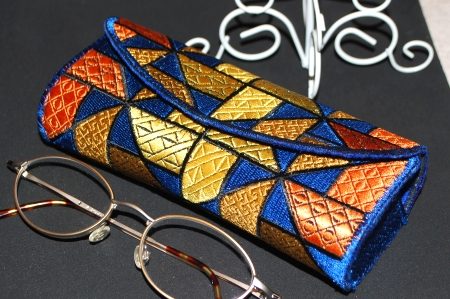
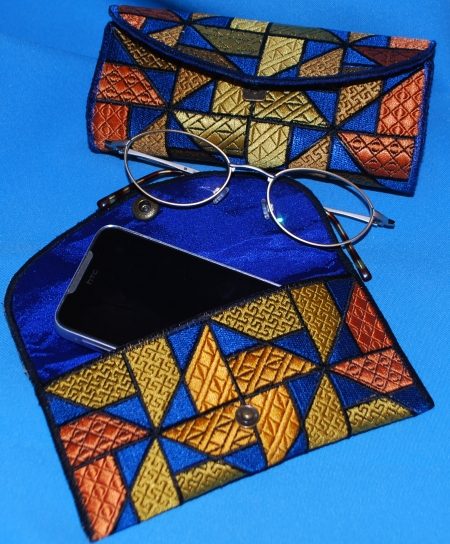
These are instructions on how to make the Glass-Case, Purse or iPhone Case in the Hoop. Though most of the work is done "in-the-hoop", a little bit of final assembly is needed.
Besides embroidery threads (either polyesyer or rayon), you will need a couple of different kinds of stabilizer:
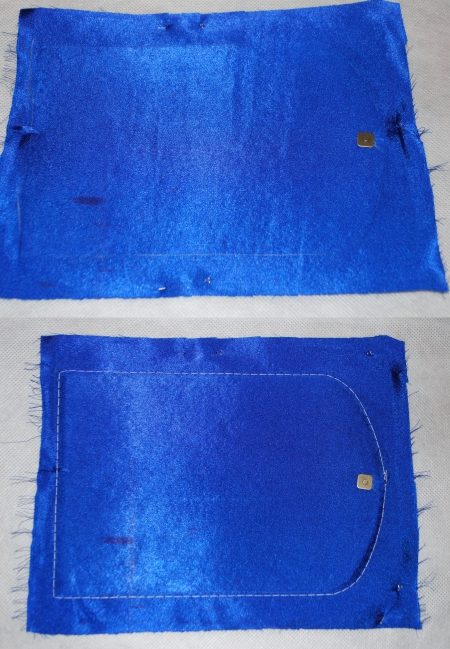
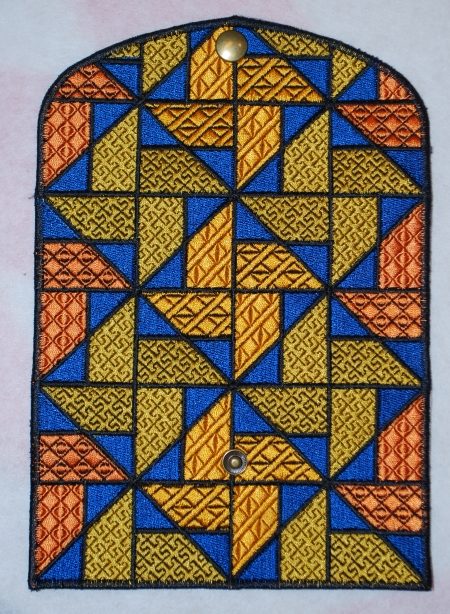
There are 2 files in the set - for the top and the sides of the glass case.
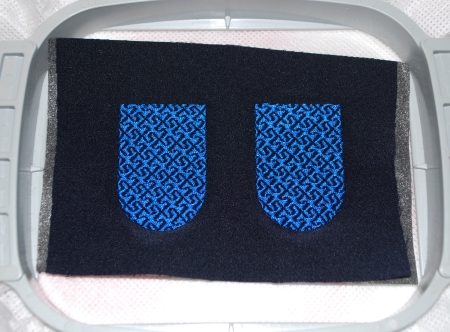
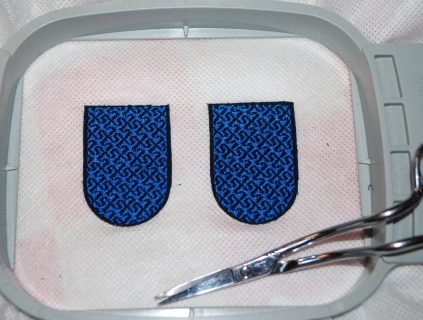
We started with the side panels for the glass case.
Note: You do not need to embroider the sides if you are making the iPhone case or the purse.
Step One: Upload the "side" file into your machine. Cut out a piece of fabric about the size of the hoop and stabilize it with light-weight iron on stabilizer.
Hoop light-weight cut-away or tear-away stabilizer. Insert the hoop in the machine. Cover the hoop with a stabilized piece of fabric.
Start the machine. It will embroider the first color and stop.
Step Two: With a pair of sharp scissors, cut away the excess fabric around the embroidery.
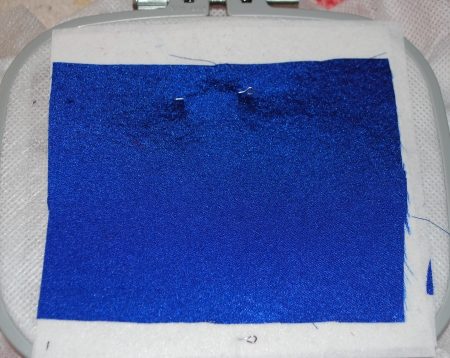
Step Three: Stabilize a piece of fabric for the lining with light-weight iron-on cut-away stabilizer. Turn the hoop back side up and cover it with the piece.
You can either pin the fabric outside the embroidery area, or use tape to keep it in place.
Step Four: Return the hoop to the machine, start it. It will embroider the outline of the side panels and attach the fabric.
With a pair of sharp scissors, cut away the excess lining fabric.
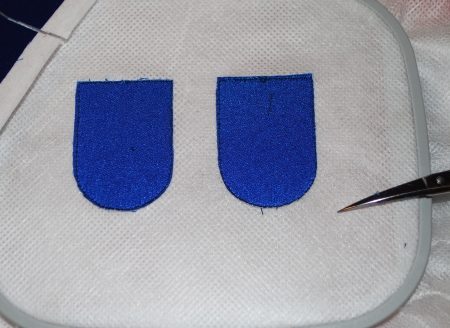
Step Five: Return the hoop to the machine and start the third color of the design. It will finish the raw edges.
Cut away/or tear away the stabilizer. Put the sides aside for a timebeing.
Embroidering the Outside:
Step One: Upload the "outside" file into your machine. Cut out a piece of fabric the size of the hoop and stabilize it with light-weight iron on stabilizer.
Hoop light-weight cut-away or tear-away stabilizer. Insert the hoop in the machine. Cover the hoop with the stabilized piece of fabric.
Embroider the first six colors.
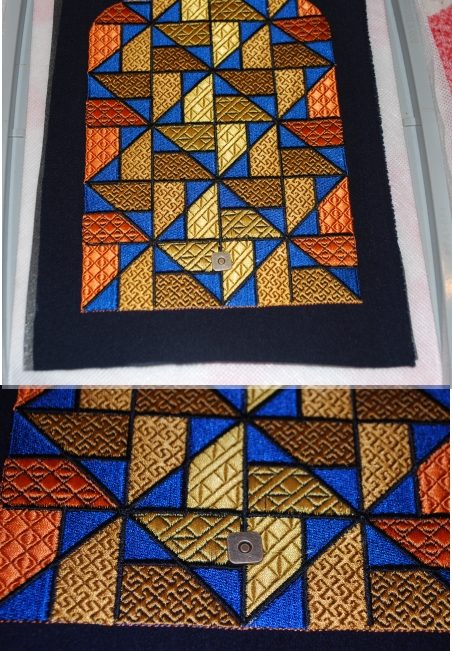
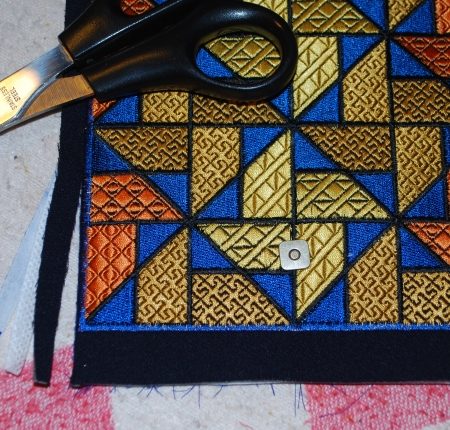
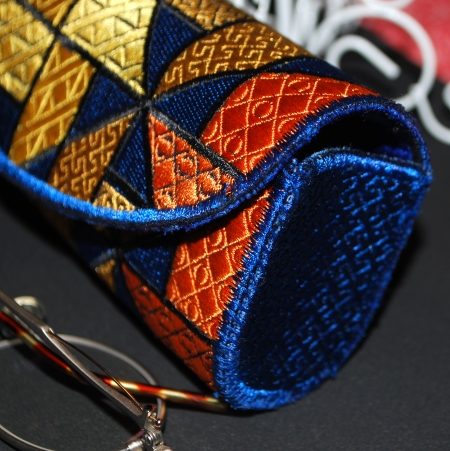
Step Two: Take the hoop from the machine. Without taking the work from the hoop, insert one half of the magnetic clasp. The clasp should be placed the width of one blue triangle from the bottom of the embroidered area, as shown on the photo below.
Step Three: From your computer print-out a screenshot of the the design. Use it as a template and trace the outline on the Inn-Spire Plus interfacing. Cut away 1/8" inside the outline. (The part should be a little bit smaller than the embroidered top).
Cut a piece of lining and stabilize it with light-weight iron-on stabilizer.
Press the interfacing part to the back of the lining.

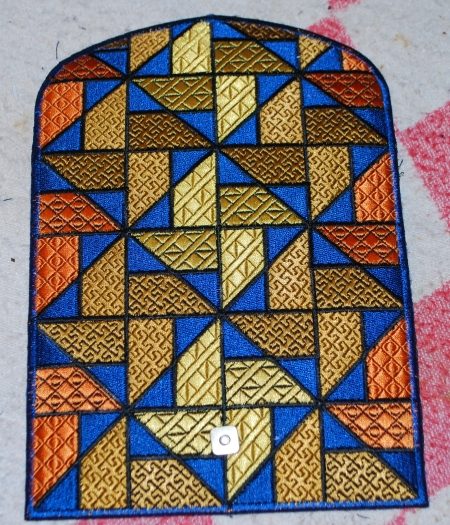
Step Four: Attach the second half of the magnetic clasp to the "lining" as shown on the photo below.

Step Five: It's defnitely a good idea to take a little extra time and care with this next step. Turn the hoop back side up and position the lining over it. With a pin check that the edges of the interfacing shape are inside the embroidered top and do not extend beyond the embroidery.
Either pin the lining or use tape outside the embroidery area to keep it in place.
Start the machine, the next color will fasten the lining with a baste stitch.
Step Six: Cut away the excess lining. Return the hoop to the machine and finish embroidering.
Step Seven: Take the work from the hoop and cut away the excess fabric and stabilizer on the face of the embroidery. Take care not to cut through the stitches.
Step Eight: If you are using Inn-Spire Plus Interfacing, iron the work as per the manufacture's instructions. While still warm, fold the case and close the clasp. Press lightly with your hands to form a flattened tube. The Inn-Spire Plus will hold the shape you give it.
If you use any other stabilizer or felt, fold and close the clasp. The glass-case will get its final shape when you sew in the side panels.
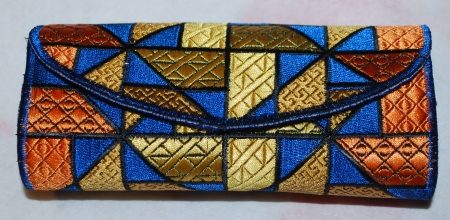
Step Nine: Pin and baste the side panels. Sew them in by hand.
Making the iPhone Case or Purse:
The iPhone case or pruse is much easier to make. You do not need to embroider the side panels, you do not need to insert the closure midway through the embroidery and you do not need Inn-Spire Plus Interfacing for shaping.
Step One is the same as Step One for the glass case. Embroider the first six colors.
Step Two: Stabilize the lining with light-weight cut-away stabilizer. Pin the piece to the back of the hoop outside the embroidery area. Emboider color 7 to baste the lining.
StepThree: With a pair of sharp scissors, very carefully, cut away the excess fabric around the lining and around the embroidery on the face side of the hoop.
Step Four: Return the hoop in the machine and finish embroidery. Cut away the excess stabilizer.
Step Five: Place the working pice on a table, lining up. Fold the the lower part up and the upper part down to cover the lower part and to form a purse. Lightly press.Mark the position of the closure. Unfold.
Either attach Velcro circles or fix a metallic snap for a closure.
Step Six: Fold the lower part up again and using a zig-zag, machine-stitch the sides closed.