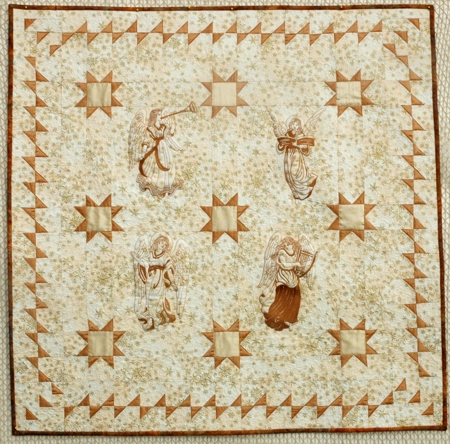
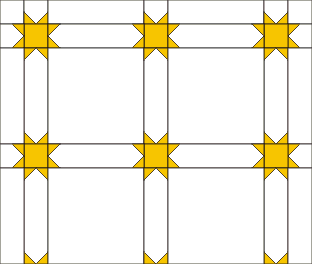
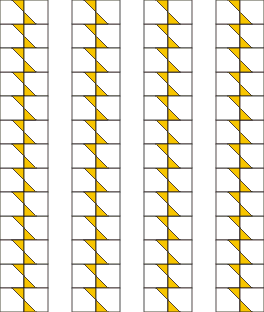
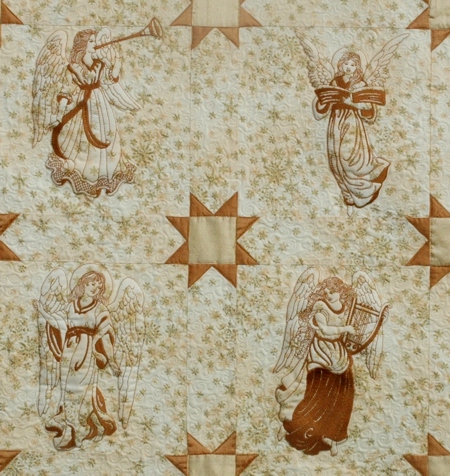
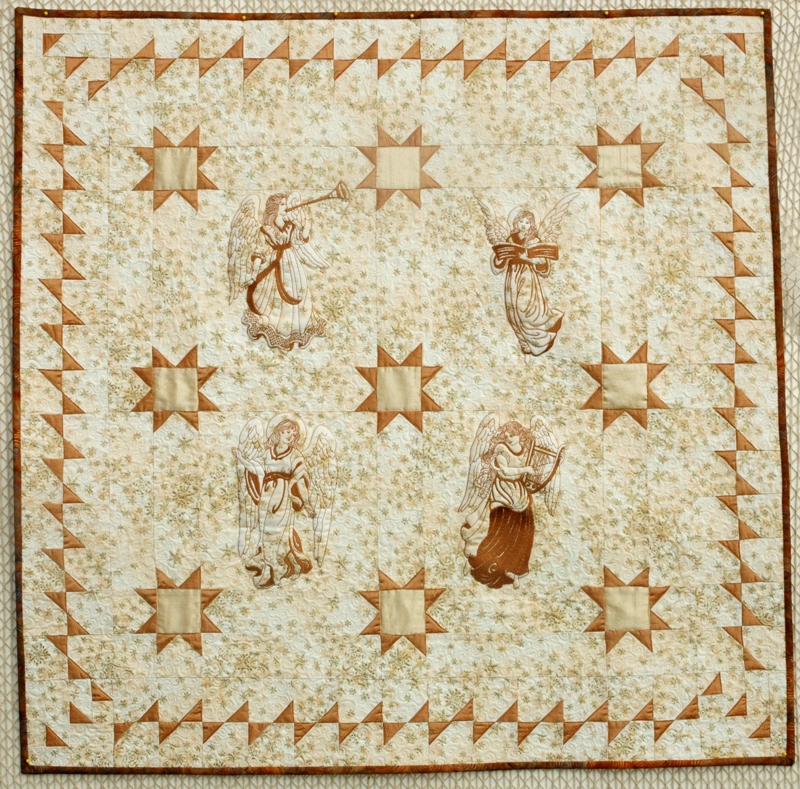
This stylish golden quilt features designs from the Flying Angel Set I and Flying Angel Set II. The embroidery is very easy and fast to make. However, the quilt top will take you time to assemble. You should have plenty of time to do it by Christmas.
The finished size of the quilt is about 33 1/3" x 33 1/2".
Besides embroidery thread, you will need
Cutting:
For the central part of the quilt:
Out of the main fabric, cut
4 squares measuring 8 1/2" x 8 1/2"
20 strips measuring 2 1/2" x 8 1/2"
16 squares measuring 2 1/2" x 2 1/2"
Out of light gold fabric, cut
9 squares measuring 2 1/2" x 2 1/2"
Out of dark gold fabric, cut
72 squares measuring 1 1/2" x 1 1/2"
For the borders:
Out of the main fabric, cut
104 squares measuring 2 1/2" x 2 1/2"
Out of the dark gold fabric, cut
104 squares measuring 1 1/2" x 1 1/2"
For the corner squares of the border:
Out of the main fabric, cut
4 strips measuring 1 1/2" x 4 1/2",
8 strips measuring 1 1/2" x 3 1/2",
8 strips measuring 1 1/2" x 2 1/2",
4 squares measuring 1 1/2" x 1 1/2"
2 squares measuring 1 7/8" x 1 7/8"
Out of the dark gold fabric, cut
8 squares measuring 1 1/2" x 1 1/2"
2 squares measuring 1 7/8" x 1 7/8"
For the binding:
Out of the dark gold fabric, cut 4 strips measuring 2 1/2" and the length of the width of the fabric.
Seam allowance is 1/4". Press every seam after you make it.
Take 12 strips of the main fabric measuring 2 1/2" x 8 1/2" and 48 dark gold squares measuring 1 1/2" x 1 1/2". You will use these to make strips with gold corners.
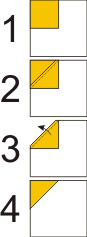
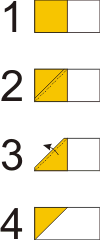
Position a 1 1/2" gold square on one corner of a 2 1/2" x 8 1/2" strip. Draw a diagonal and stitch on the line. Trim seam allowance to 1/4", unfold and press. Repeat for all the corners of the strips. Make 12 strips in this way.
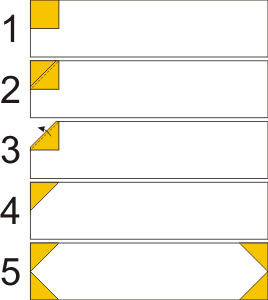
You will also need 12 squares with star rays. To sew this unit, take 12 light 2 1/2" x 2 1/2" squares and 24 gold 1 1/2" x 1 1/2" squares.
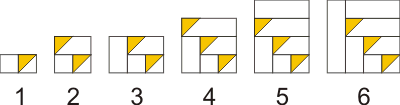
Position a 1 1/2" square on one corner of a 2 1/2" x 2 1/2" ssquare. Draw a diagonal and stitch on the line. Trim seam allowance to 1/4", unfold and press. Repeat for the neigbouring corner of the square. Make 12 squares in this way.
Assembly of the Block Rows:
Sew two block rows as shown on the picture below: light 2 1/2" x 8 1/2" strip - light strip with gold corners - light 8 1/2" x 8 1/2" square - strip with gold corners - light 8 1/2" x 8 1/2" square - strip with gold corners - light strip.
Assembly of the Sashing:
The first and the fifth rows of the sashing are assembled as follows: light 2 1/2" square - square with gold corners - light 2 1/2" x 8 1/2" strip - square with gold corners - light 2 1/2" x 8 1/2" - square with gold corners - light 2 1/2" x 2 1/2" square.
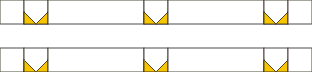
The second, third and fourth rows of the sashing are assembled as follows: square with gold corners - light gold 2 1/2" x 2 1/2" square - strip with gold corners - light gold square - strip with gold corners - light gold square - square with gold corners.
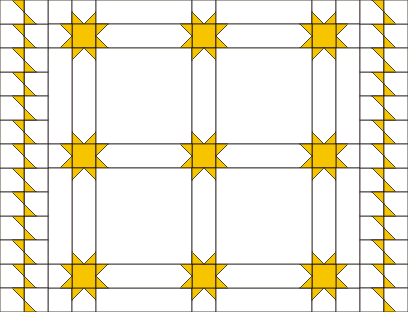
Assembly of the Top without Borders:
Sew together the first and the second sashing rows as shown:

Sew the first block row to the lower edge of the sashing.
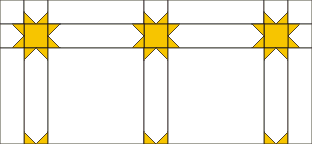
Sew the third sashing row to the lower edge of the block row.
Sew the second block row to the lower edge of the working piece.
Sew the fourth sashing row to the lower edge of the working piece.
Sew the fifth sashing row to the lower edge of the working piece.
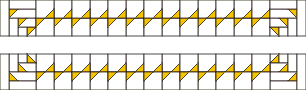
Sewing the Units of the Border:
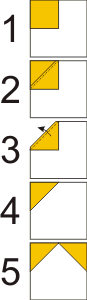
Position a 1 1/2" dark gold square on one corner of a light 2 1/2" x 2 1/2" square. Draw a diagonal and stitch on the line. Trim seam allowance to 1/4", unfold and press. Make 104 squares in this way.
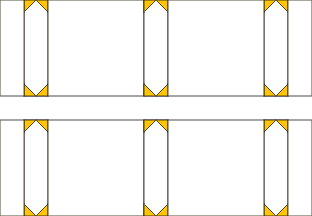
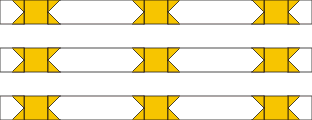
Sew the new squares in 52 pairs as shown:

Sew the new units into 4 strips, 13 pairs per strip.
Sewing the Corner Blocks:
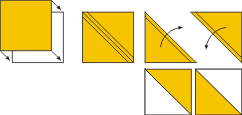
Position the light and gold 1 7/8" squares face to face. Draw a diagonal line. Stitch 1/4" on each side of the diagonal.
Cut along the diagonal. Open and press. You'll get 4 half-triangle squares, each measuring 1 1/2" x 1 1/2".
Take a light 1 1/2" x 2 1/2" strip and a gold square. Position the square on the left end of the strip. Draw a diagonal and sew along the line.Trim seam allowance to 1/4", unfold and press. Make 4 strips in this way.
In the same way make 4 strips measuring 1 1/2" x 3 1/2".

Assemble the corner block according the diagram below:
Sew the corner blocks to the ends of two of the border strips. Make sure the gold triangles point outwards.
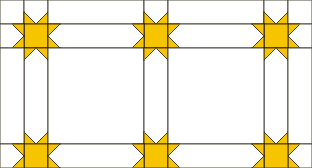
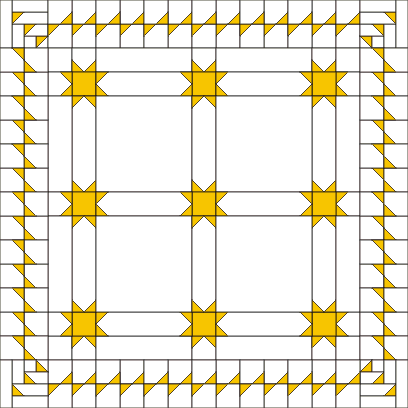
Attaching the Borders:
Sew the borders without corner blocks to the left and right side of the quilt top.
Sew the borders with the corner blocks to the upper and lower edges of the quilt top.
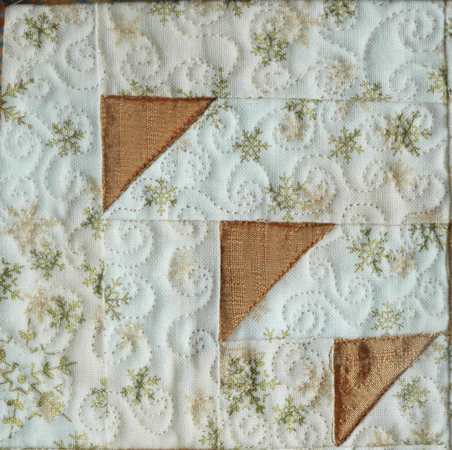
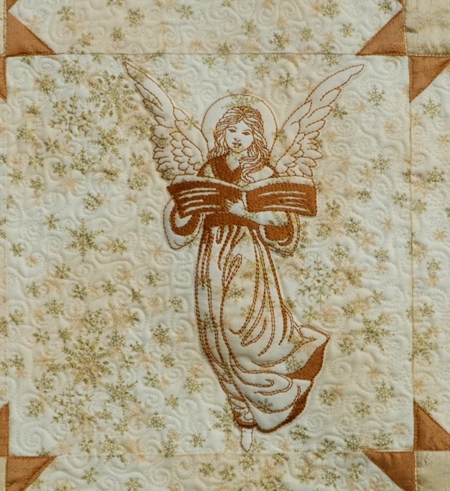
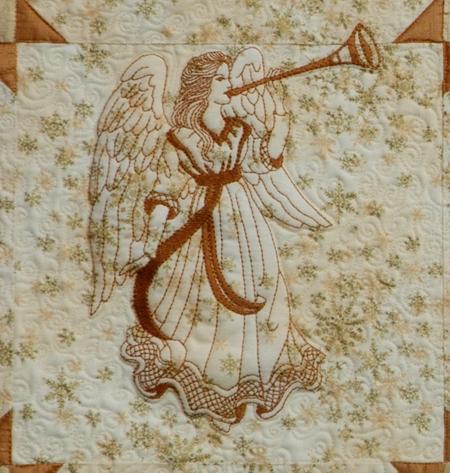
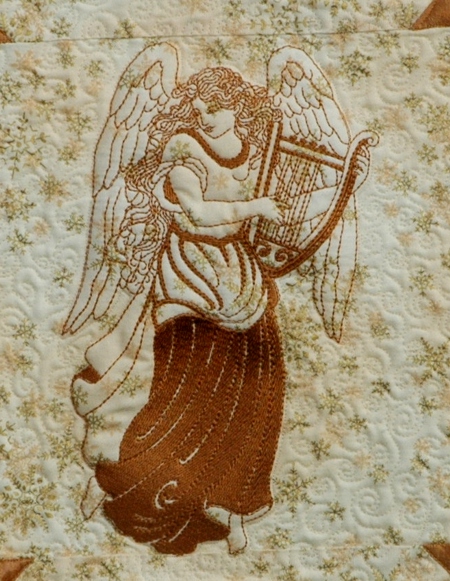
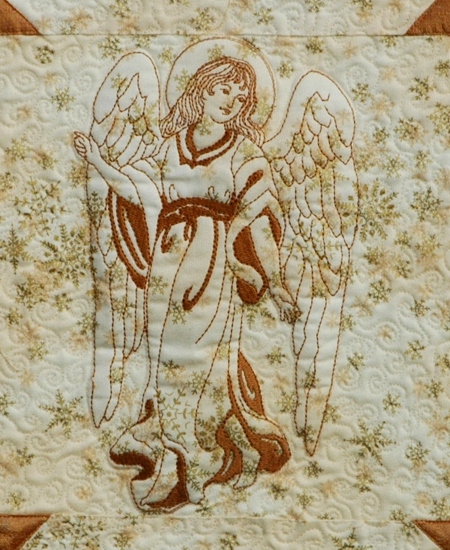
Embroidery:
Now the quilt is ready for embroidery. Choose the angels you like best. Stabilize the squares of the quilt with polyester craft felt (or cut-away stibilizer). Select embroidery thread to match the dark gold fabric. Embroider the angels in each square.
When the embroidery is done, cut away the felt around the embroidery close to the stitches.
Quilting and Finishing:
Now place the backing on a flat surface (table) face down. Cover with batting. Spread your working piece over it.
Pin all three layers together with 1" pins and start quilting. We quilted along the lines of the embroidery, and all over the quilt in a free-motion style.
After the quilting is finished, press the work with heavy steam and square the work -- all corners should be 90 degrees and opposite sides should be of the same length.
Finish the raw edges with the binding.
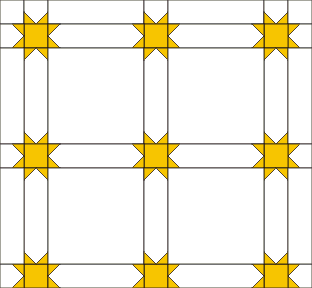
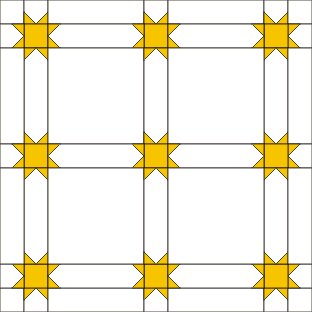
Here are more close-ups:
Back to Flying Angel Set I snd Flying Angel Set II


