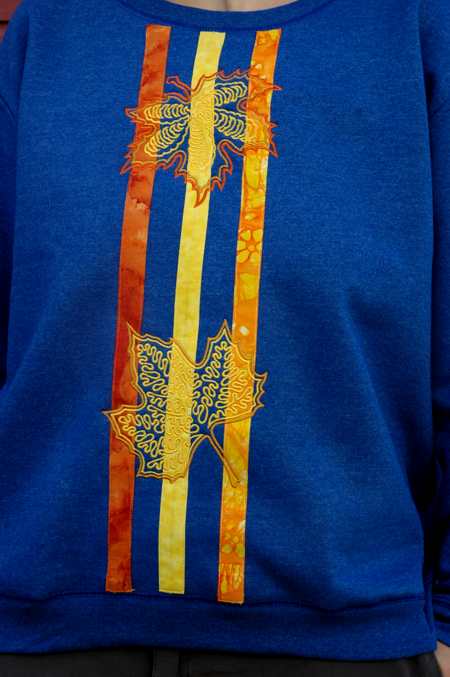
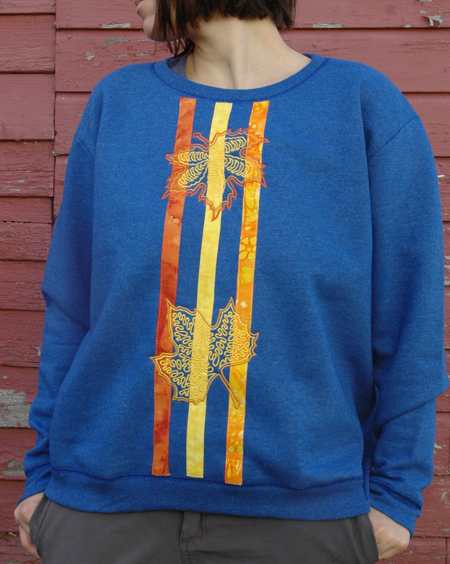
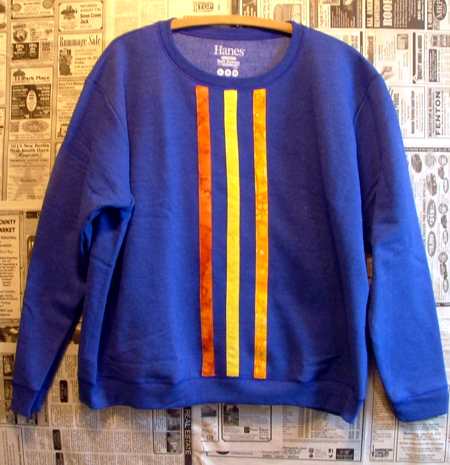
This very simple and quick make-over can change any regular sweater into a unique garment. We used designs from the Autumn Leaf Set.
Besides embroidery thread (either polyester or rayon), you will need
Step 1: Measure the length of the sweatshirt's front - from collar band to bottom band. Select fabrics. Out of each fabric cut a strip measuring 1 1/2" wide and the length of the sweatshirt's front plus 1". In our case it 's 18" + 1" = 19"
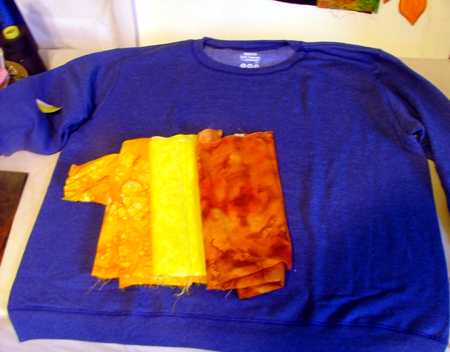
Step 2: Fold the strips in half lengthwise and lightly press to mark the central line.
Fold the first long raw edge to the central line and press, fold the other long raw edge to the central line and press.
Fold the short raw edges 1/2" inside and press. The result is a long, thin strip with finished edges. Check the length, it must be the same as the sweatshirt's front length. In our case, 18".
In the same way, make 2 more strips.
Step 3: With the help of a straight-edge and marker, draw 3 parallel lines on the shirt's front to mark the position where the strips will be.
Apply the fusible web over the central line. Follow the instructions of the manufacturer to adhere the first fabric strip over the web. Then press with an iron.
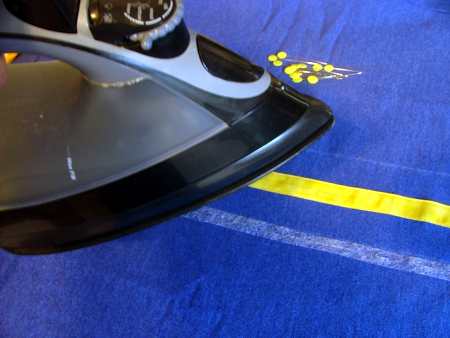
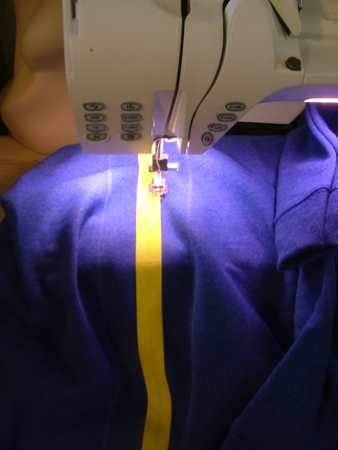
Step 4: Even though the fusible web is supposed to be permanent (and it probably is), we prefered to topstitch the fabric tape with matching threads, very close to the edges. This adds a decorative touchand ensures the strips won't come off.
Step 5: In the same way, attach all the strips to the sweatshirt. Now it's ready for embroidery.
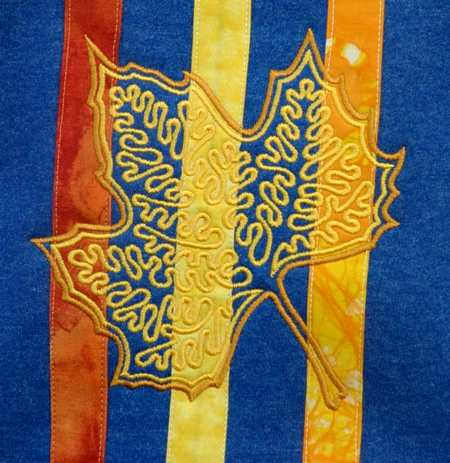
Step 6: Using paper print-outs of the designs as templates, mark the position of the embroidery on the sweatshirt. Stabilize the back with light-weght cut away stabilizer, hoop it and embroider the designs one by one.
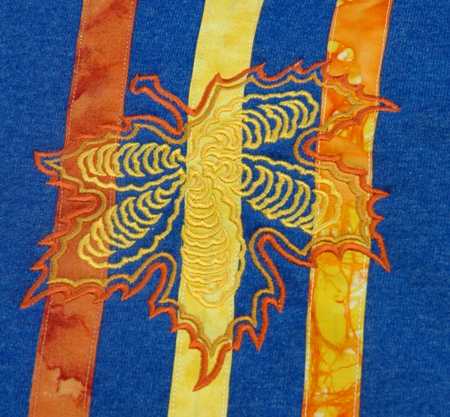
Select embroidery threads to your liking. We chose colors to match the strips, so the designs slightly blend in. You might prefer to choose different colors.
Step 7: Cut away the excess stabilizer close to the stitches. Press the sweatshit. That's it, it's ready to wear.