Mobile Menu IconMenu
Advanced Embroidery Designs -- Online Center for Machine Embroidery Designs
Easter Sale! 50% OFF EVERYTHING! 3 Days Only! Shop Now!

"Just Roses" Quilted Table Runner with Applique Embroidery

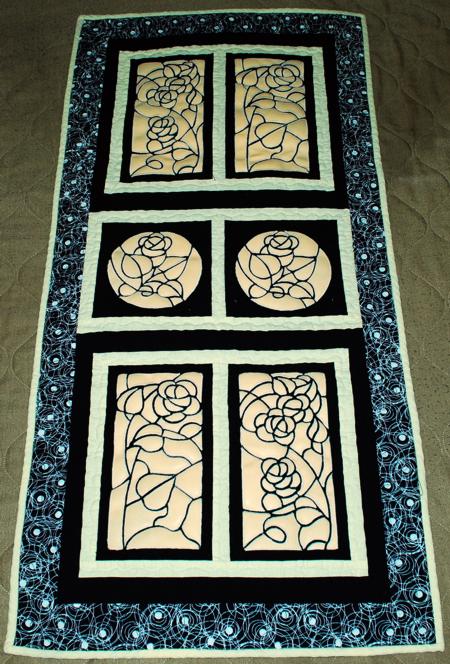
Simple to sew and simultaneously charming and elegant, this table runner usesthe designs from the Stained Glass One-Color Applique Rose Panel Set.
We used the designs for the mega hoop (6" x 11").

The finished size of the table runner is about 24" x 53".

"Just Roses" Quilted Table Runner with Applique Embroidery image 1

Besides embroidery thread (either polyester or rayon), you will need

  • light-weight cut-away stabilizer,
  • about 1/2 yard of black fabric for embroidery;
  • applique fabric stabilized with light-weight iron-on stabilizer;
  • about 1/2 yard of black-and-white cotton fabric for the borders;
  • about 1/2 yard of white cotton fabric for the sashing and bonding;
  • batting and fabric for the backing;
  • quilting threads;
  • quilter's ruler and rotary cutter (if you don't use rotary cutter, you'll need a graphic and chalk pencil and sharp scissors).

Emboridery

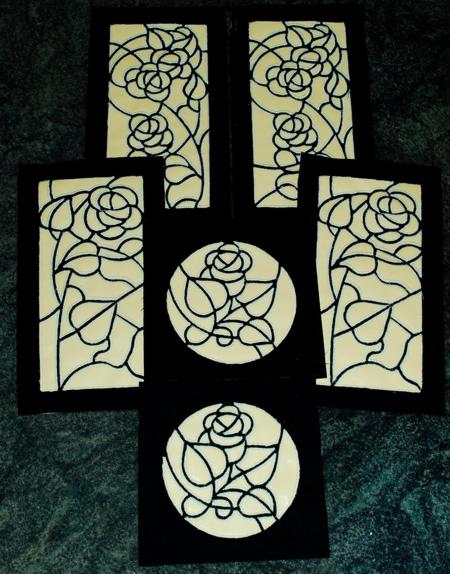
Embroider the Rose Panel designs as described in the instructions. You will need 2 stitch-outs of each panel. Use light-weight cut-away stabilizer for the base fabric.

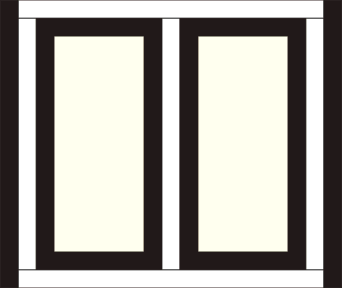
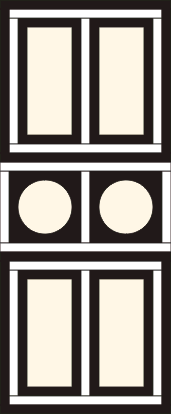
After the embroidery is finished, using a ruler and a rotary cutter, trim the stitch-outs leaving 1" around the embroidery. You will get 2 blocks with round designs measuring about 8 1/2" x 8 1/2" and 4 blocks with rectangular designs measuring 7 1/2" x 14".

Cut away the excess stabilizer on the back of the embroidery. Do not remove the stabilizer under the embroidery.

"Just Roses" Quilted Table Runner with Applique Embroidery image 2

Cutting:

Out of white fabric, cut

  • 3 strips measuring 1 1/2" x 8 1/2",
  • 2 strips measuring 1 1/2" x 19 1/2",
  • 6 strips measuring 1 1/2" x 14" and
  • 4 strips measuring 1 1/2" x 17 1/2".
Cut the rest of the white fabric into binding strips (2 1/2" wide and and the length of the width of the fabric), you will need ... for the binding.

Out of black fabric, cut
  • 4 strips measuring 1 1/2" x 16" and
  • 4 strips measuring 2" x 19 1/2".

Out of printed black-and-white fabric, cut:
  • 2 strips measuring 2 1/2" x 19 1/2" for the borders on the short sides.
  • For the borders on the long sides you will need 2 strips measuring 2 1/2" x 53 1/2". This may be longer than your piece of fabric, so it may be easier to assemble them out of shorter strips.

Assembly of the Top:

Sew a 1 1/2" x 8 1/2" white strip between 2 round stitch-outs.
Sew the remaining two 1 1/2" x 8 1/2" white strips to the left and right edges of the round stitch-outs. Press the seams.

Just Roses Quilt Diagram

Sew the 1 1/2" x 19 1/2" white strips to the upper and lower edges of the working piece. Press the seams. This will be the central part of the table runner.

Just Roses Quilt Diagram

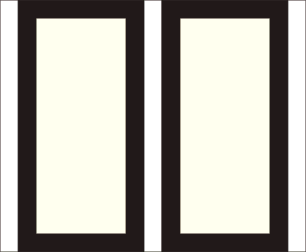
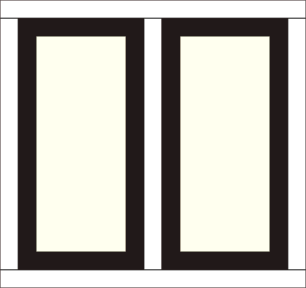
To assemble the end blocks, arrange the rectangular stitch-outs in 2 rows, placing different panels in each row.

Sew 1 1/2" x 14" white strips between 2 stitch-outs.

Sew the remaining 1 1/2" x 14" white strips to the left and right edges of the stitch-outs. Press the seams.

Just Roses Quilt Diagram

Sew the 1 1/2" x 17 1/2" white strips to the upper and lower edges of the working pieces. Press the seams.

Just Roses Quilt Diagram

Sew the 1 1/2" x 16" black strips to the left and right edges of the working pieces.
Press the seams.

Just Roses Quilt Diagram

Sew the 2" x 19 1/2" black strips to the upper and lower edges of the working pieces. Press the seams.

Just Roses Quilt Diagram

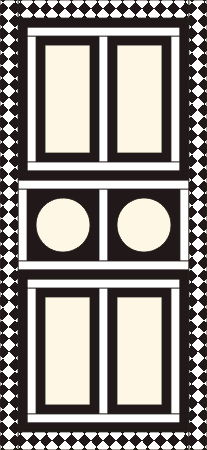
Sew the three parts of the quilt together.

Just Roses Quilt Diagram

Attach the patterned borders, starting with the short sides, then the long sides. Press the seams.

Just Roses Quilt Diagram

Quilting and Finishing:

Now place the backing on a flat surface (table) face down. Cover with batting. Spread your working piece over it.

Pin all three layers together with 1" pins and start quilting. We quilted in a free motion style all over the table runner.

After the quilting is finished, press the work with heavy steam and square the work -- all corners should be 90 degrees and opposite sides should be of the same length.

Finish the raw edges with the binding.

"Just Roses" Quilted Table Runner with Applique Embroidery image 3

Your table runner is ready. Enjoy!

Happy Stitching!

Back to Stained Glass One-Color Applique Rose Panel Set

Back to the Project Page

Mailing List
Enter your e-mail for news, discounts and exclusive special offers.


Find us on Twitter

Special Offers
Bonus design on all orders over $50
Daffodils and Eggs Set

Shop Now!

Announcement
Best Project Contest
The results are in!
Featured Project
Check out our latest project Birds and Blooms Quilted Tablerunner
Tutorials
Never heard of photo stitch? - Check out our What is Photo Stitch? page
Most Popular Designs
|| Home || Shop || Free Designs || New Designs ||
|| Projects || Tutorials || Links || About Us || Contact Us ||
|| Store Policy || Licensing || Accessibility ||

Social Media:

Copyright © Advanced Embroidery Designs. All Rights Reserved.